

Productivity at the workplace is paramount and there’s no better way to do it than sharing resources. It’s always good practice to save documents, files, and whatever resources co-workers need on a Mapped Network drive which is usually a shared folder/directory or storage drive on a PC. This way, anyone with the clearance can access these resources without leaving the comfort of their workstation.
This setup isn’t only useful in a working environment. You can do the same thing with a NAS (Network Attached Drive) or even a Raspberry Pi hooked up to a hard drive to make your data i.e movies, music, pictures, documents e.t.c. readily available to whoever can access your mapped network drive. A mapped network drive appears on your computer just like any other drive (e.g. C: drive). Here, let’s take you through the process.
How to Map a Network Drive in Windows 10
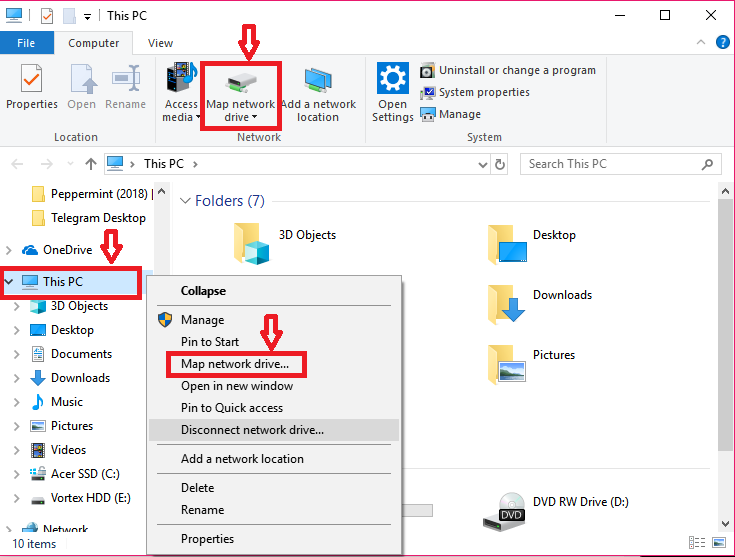
Open File Explorer
Right click on This PC and select Map network drive…
OR On the Computer tab, click the Map network drive icon

Select the Drive letter (the default is Z:). It’s advisable to choose something high up there that won’t interfere with any removable storage.
In the Folder box, click on the Browse button to navigate to the shared network folder that you want to map as a network drive, and click OK.
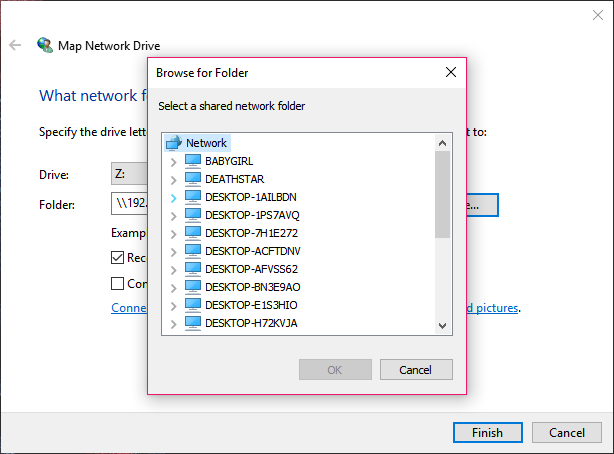

OR You can type the path to the shared network folder (Example: \\server\share
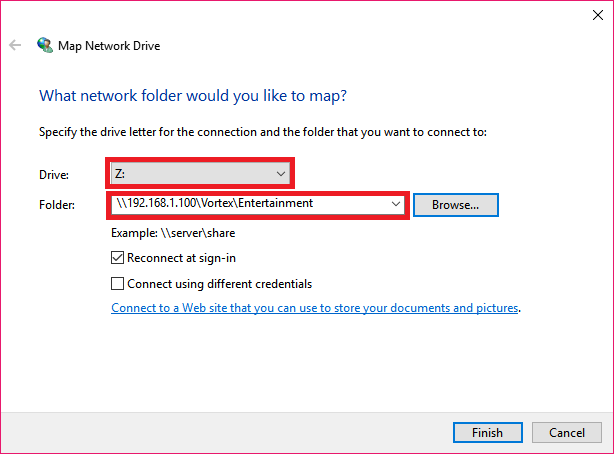
By default the Reconnect at sign-in box is ticked. This ensures the mapped drive is always available to you. Untick this box if you don’t want this.
Related: Build your own Network-Attached Storage (NAS) device using a Raspberry Pi
Tick the Connect using different credentials box in case you need another account credentials to access the shared network folder. You might be prompted to enter the shared network login details. What credentials mean here is the username and password of the PC you are trying to connect to.
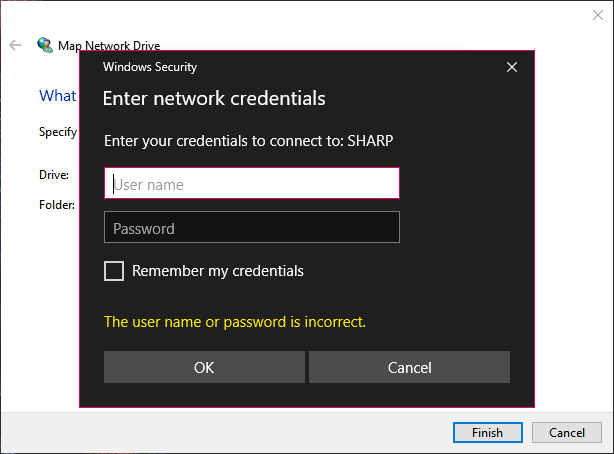
Click Finish once you are done.
Once you are done with that, your mapped drive will appear in My PC like any other drive. Clicking on it will show you the contents of the shared network folder. If you feel that you don’t need the mapped drive any longer, right-click on it and select “Disconnect.”
Featured Image: messina-consulting.com