Just like how BBM meant the world to BlackBerry users some year ago, it’s almost comparable to valuable iMessage is to iPhone users and even Apple Inc. as a company. iMessage was introduced alongside iOS 5 eight years ago in 2011? Now, the messaging service is arguably one of the most valuable product in the iOS ecosystem, and also the reason why many cannot dump their iPhones for the devices running the more popular Android OS.
Although there are other instant messaging platforms (WhatsApp, Telegram, and Hangouts, for example) that facilitates interaction between devices of different OS, you’d be surprised that many Android users wished they could have (and use) iMessage on their phone. Well, since envying something as good as iMessage isn’t entirely a bad thing, AirMessage is bringing that fantasy to reality.
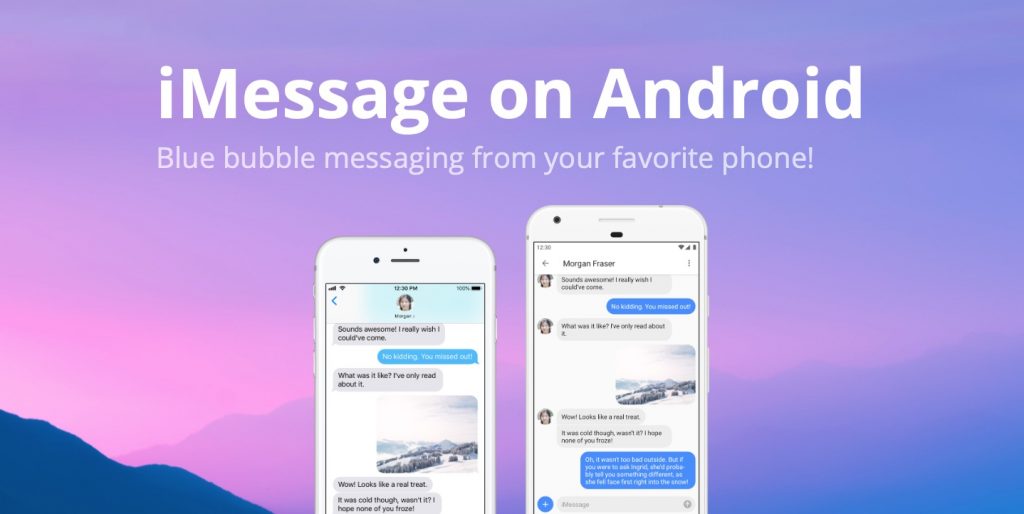
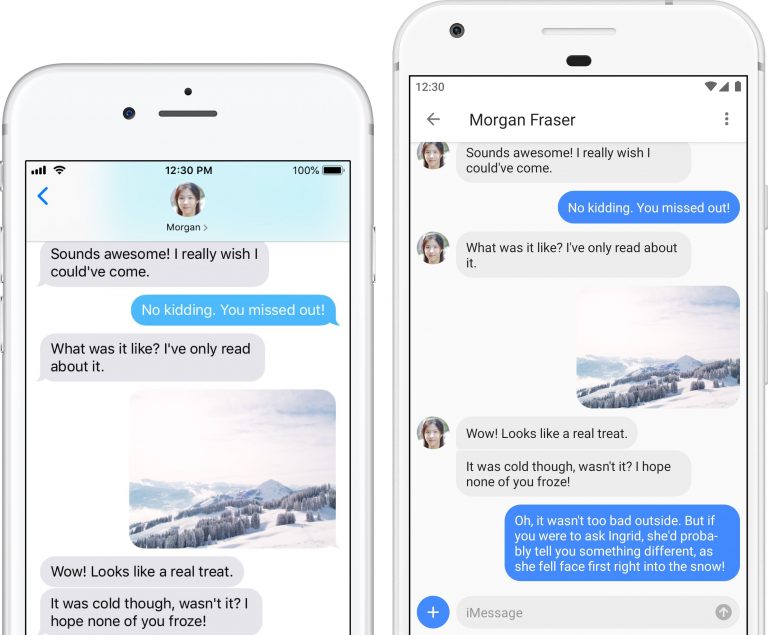
Developed by Tagavari, AirMessage is a two-part solution which allows Blue bubble messaging on Android devices. And while it truly allows you use iMessage in your Android phone, it isn’t exactly as straightforward as installing iMessage on your device, sign-up and start sending an receiving messages in blue and grey bubbles. There’s more to it…but it works.
As mentioned earlier, AirMessage is a “two-part solution.” What this means is it involves (1) a desktop client (server) for MacOS and (2) a mobile app (for phone or tablet). So, to actively text your buddy on iMessage from your Android phone or tablet via the AirMessage app, you need an ‘always-on’ Mac computer to function as an intermediary, a server.
Have a look at the requirements:
- Smartphone/tablet running Android 6.0 Marshmallow or higher
- A computer running OS X 10.10 Yosemite or higher.
If you have these two in place, you can then proceed to individually setup AirMessage on your Mac computer as well your Android device to behind syncing iMessage texts from your Mac to your Android phone.
AirMessage Mac Server Installation
Installing the AirMessage server on your Mac is very important as it is sort of a linking bridge that connects your Android’s AirMessage App to Apple’s iMessage service. To get this done;
1. Download AirMessage’s server to your Mac computer. You can follow this LINK to download AirMessage server for MacOS.
2. Place the server in the “Applications” folder of your device
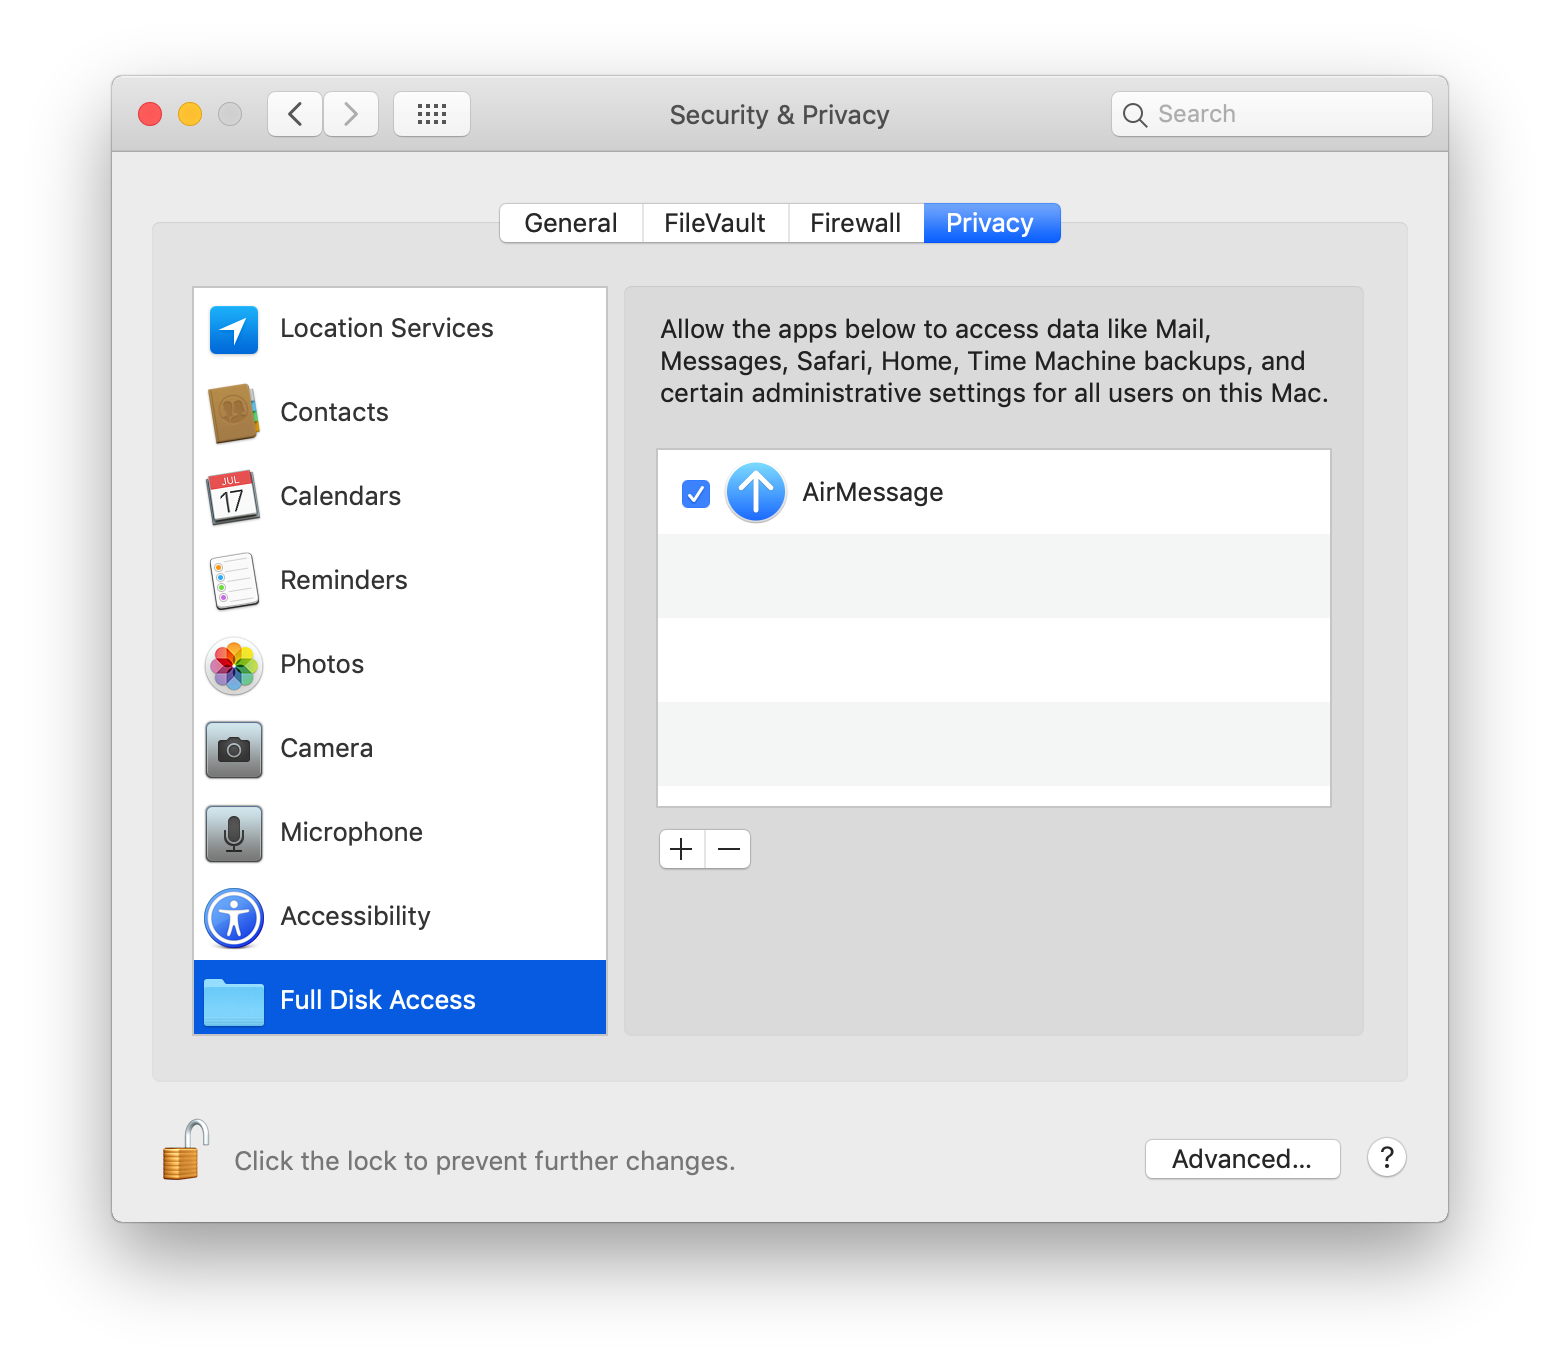
3. To grant AirMessage full disk access and to also ensure it doesn’t read any other data asides from your Messages, navigate to:
System Preferences >> Security & Privacy >> Privacy >> Full Disk Access
4. Check the “AirMessage” option
5. Next step is to launch and configure the server.
6. When you open the server on your computer, navigate to “Preferences”
7. Click on “Edit Password” to change the default password to a ‘strong password’ you can easily remember.
NOTE: You’ll need this password to subsequently log in to the AirMessage Android app.
8. Save the change by closing the window.
It is recommended that you leave the server running all the time so that messages can be sent and received instantly and round-the-clock. Also, it is recommended that you keep your computer as updated as possible so as to have access to AirMessage’s latest feature.
For example, only computers running macOS 10.12 Sierra or higher will receive tapback messages.
Connection Configuration
To be able to use AirMessage on your phone wherever you are, you have to configure your (home) connection to allow your phone connect to your computer irrespective of your location — whether you’re in the house or out on a trip. This process is known as Port forwarding and it varies according to router type and model.
For detailed step-by-step instructions on how to configure Port forwarding on your connection so you can use AirMessage irrespective of your proximity to your AirMessage server, check out the official installation guide and tutorial concocted by AirMessage.
Setting up AirMessage on your Android Phone
This is the last step and it is just as important as all other steps listed above. To begin sending and receiving iMessage texts on your Android,
1. Download and install the AirMessage app from the Google Play Store.
2. Launch the app after successful installation
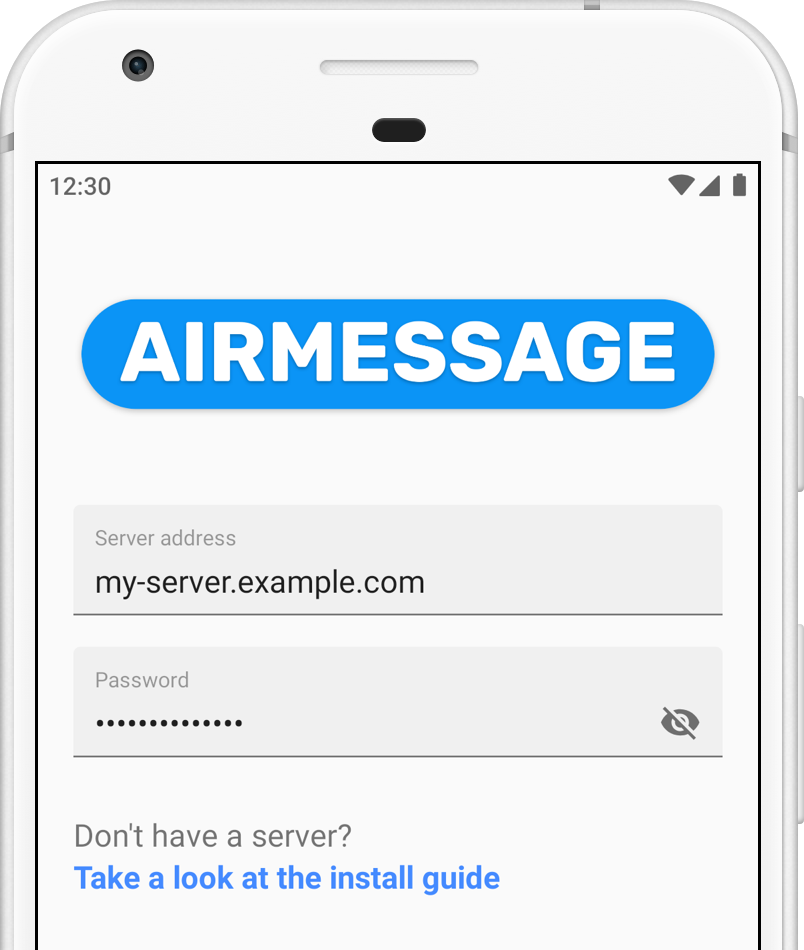
3. Enter the AirMessage server address and password you created earlier on your computer into the appropriate boxes.
4. If the information provided are correct, your phone connects to the server and messages begin to sync from your computer to your phone. You can also begin to send & receive messages from your friend’s using iPhones or AirMessage on Android phones too.
Again, it’s a long process but it works. Once you complete the setup, that’s it. You don’t have to repeat the process. It’s a one-time thing. But is it worth the work, time and energy? You be the judge of that. I, however, think it is worth it. I mean, since the likelihood of Apple releasing an official iMessage app for Android is almost non-existent, AirMessage is a great alternative.
It’s got its shortcomings (you need a Mac computer, for instance) but it gives you what you need: iMessage on Android.
Image credits: https://airmessage.org/