Virtual meetings are becoming more popular by the day. And from the look of things, they are set to become the new normal in the world. Zoom has been a great tool in executing virtual meetings. Did you know that you can actually schedule Zoom meetings via a Chrome extension? Here is how to do it.
How to Install the Google Chrome extension
1. Go to the Chrome web store and open the Zoom extension.
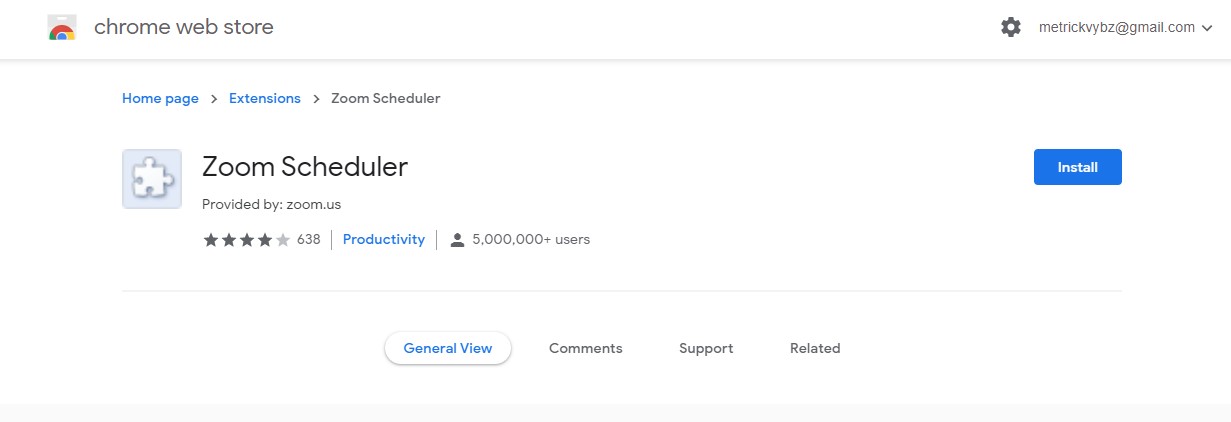
2. Click “Add to Chrome” on the top-right corner of the page. The extension will then be added to your Chrome address bar. Once you click the Zoom button, the Chrome extension will open.
To Schedule a Meeting
1. Open Google Chrome and visit the Zoom website to sign into your Zoom account.
You should then open the newly installed Zoom Scheduler Chrome extension. You can do this by double-tapping the extension shortcut at the top right of your screen.
2. Tap on Schedule a meeting.
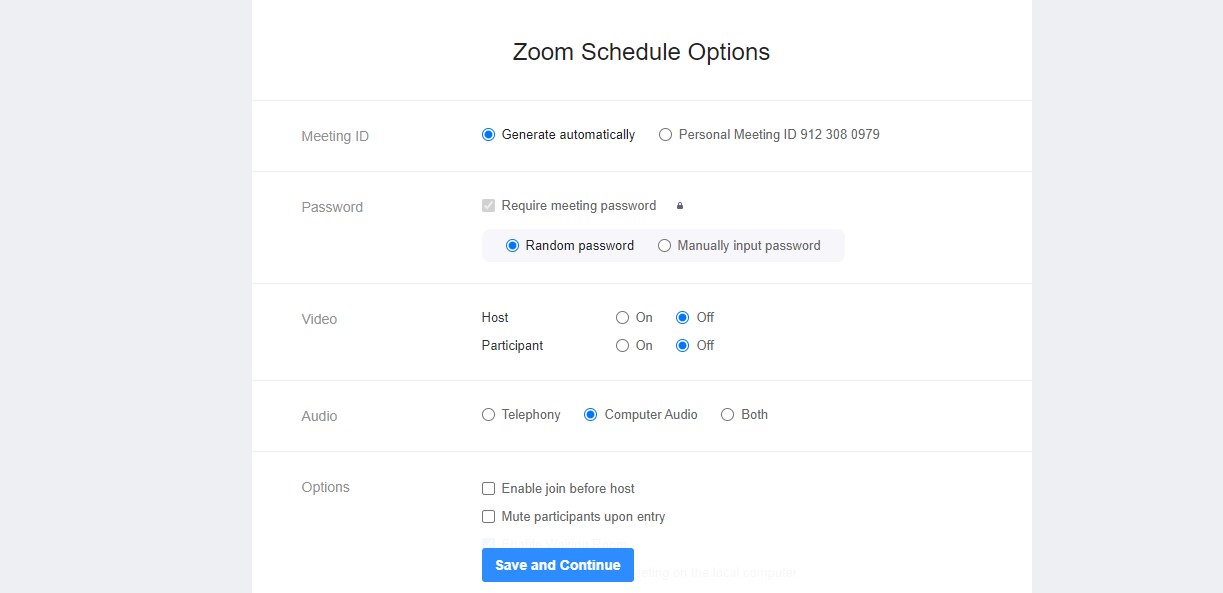
3. You will be directed to a page having the Zoom scheduling options. Populate the meeting details in the description and click on ‘Save and Continue’.
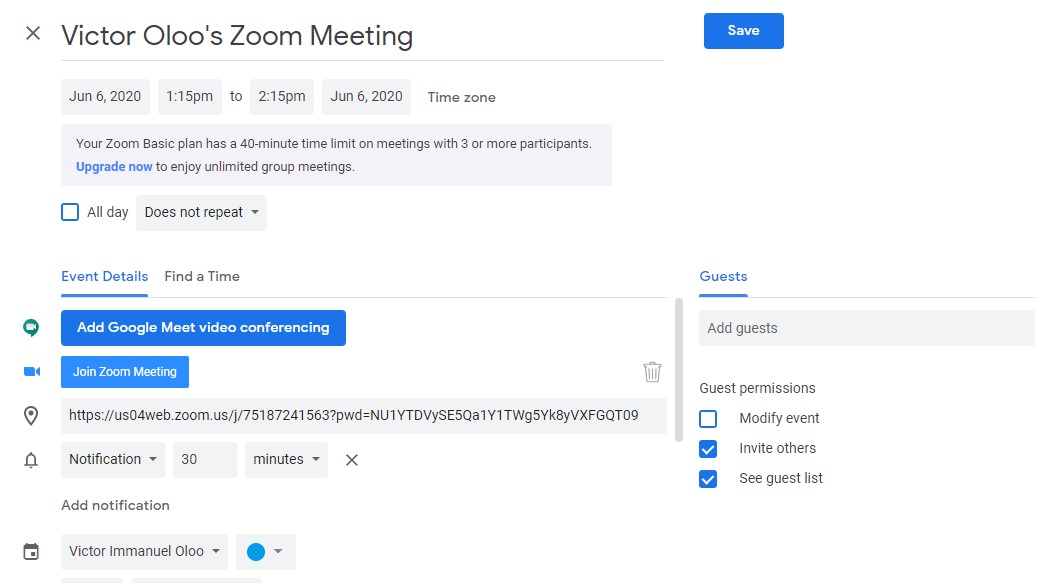
4. You will be redirected to your Google Calendar where you will be asked to create an event. Fill in details like time and date and click Save.
Once the meeting has been saved, you can share a link to participants and they will be reminded of the meeting when the time has reached.
Related Article: How to Host a Zoom Meeting: a Step-by-Step Guide
Scheduling Options on the Chrome Zoom Extension
- Host Video: Here, you will select whether you would like the host video on or off when joining the meeting.
- Participant Video: Here, you select whether you would like the participants’ videos on or off when joining the meeting.
- Audio: Here, you will select whether to allow users to call in via Telephone only, Computer Audio only, Telephone and Computer Audio, or 3rd Party Audio among others.
- Require Meeting Password: If selected, you will be required to input your meeting password here. Any meeting participants will be required to input this password before joining the scheduled meeting.
- Enable join before host: With this option, you can allow participants to join the meeting before you join.
- Mute Participants Upon Entry: This will mute all meeting participants as they join the meeting.
- Use Personal Meeting ID: If selected, you will be required to use your Personal Meeting ID. If not selected, a unique meeting ID will be generated for the meeting.
- Add a watermark that identifies the viewing participant: This adds a watermark on shared content during the meeting.
- Record the meeting automatically: Select this if you want the meeting to be automatically recorded. It can be recorded either locally or to the cloud.
- Alternative Hosts: This allows another Zoom user who is licensed, on your account to start the meeting in your absence.
You don’t have to go through last minute panics because you are trying to set up a Zoom meeting. Use the Zoom Chrome Scheduler extension to schedule your meetings ahead of time.