


We all know PowerPoint as the place to go when you need to make Slides for a Presentation. But what if I told you that you can do more than that? Since PowerPoint 2013 (updated version) MS Office users have been able to record your screen (both video and audio) at no extra charge.
Pound for pound, the Microsoft Office Suite is arguably the most impressive productivity software, head and shoulders above the rest. For most users, its all-star ensemble of utility programs has become synonymous with what it means to have a PC.
Being Microsoft Office fans ourselves, we have talked about a number of productivity hacks here and there. This time around, we return to talk about yet another: how to record your Windows 10 screen using Microsoft PowerPoint.
Step 1: Go to Insert Tab and select Screen Recording


Once you open your PowerPoint, select a slide where you want your screen recording to go. Go to ‘Insert” tab and select “Screen Recording” at the end of the tab ribbon as shown in the image above.
Step 2: Select Area to Record

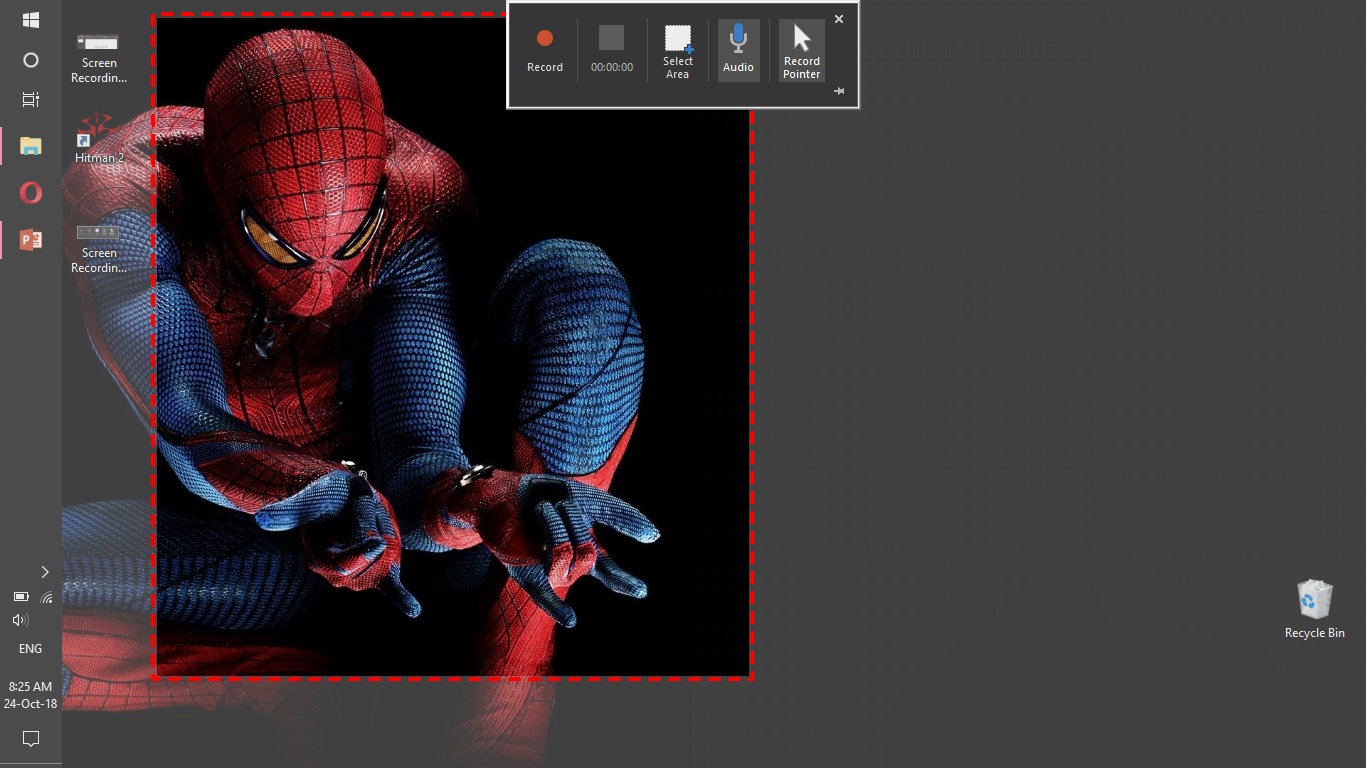
Once you click on “Screen Recording”, a Control Dock will appear at the top of your screen. You are then prompted to select an area to record. Click “Select Area” and click and drag the area you wish to record. Alternatively, press Windows key + Shift + F to select the entire screen for recording.
By default, PowerPoint will record the Audio and mouse pointer unless you uncheck these options on the Control Dock.
Related:
- How to remove an image background using Microsoft Word
- How to remove a Signature background using Microsoft Word in 3 Quick Steps
Step 3: Record

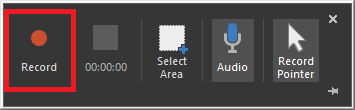
Hit Record to get the ball rolling. The shortcut for this is Windows key+Shift+R which doubles as the shortcut for Pause and Record to resume recording. Once you start recording, the Control Dock will recede into the screen and disappear. To bring it back, move the cursor to the top middle of the screen to pull it back out.
Step 4: Save your Media

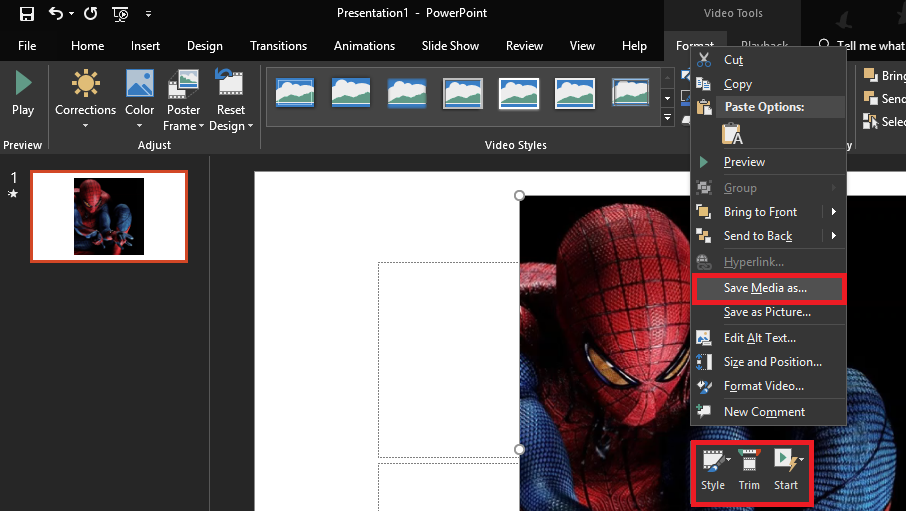
After you stop the recording, PowerPoint will automatically embed it into the slide. If that was your intention all along, well and good. Otherwise, you will need to save it somewhere on your desktop. Microsoft PowerPoint provides a few editing tools such as Style, Trim, and Start [at some point]. To save the file separately, Right Click said file and Save Media As. Rename it as appropriate and save it at a location of your choosing.
Congratulations, you just recorded your screen with Microsoft PowerPoint. More Power to you!
Have fun!