

Setting up 2-Step verification (also known as 2-Factor authentication) for your Google Account should be a no-brainer. This is a feature that helps keep your account really secure by double checking if it’s really you trying to log in, when there’s any attempt to do so.
Considering the large number of platforms you’re most likely using under the Google umbrella, a 2-step verification is a good way to prevent hackers/fraudsters from gaining access in to your account easily.
This post takes you through the process of setting up 2-step verification for your Google Account. You should follow through.
READ MORE: How to sign in to a 2FA-enabled Google account when you lose your phone.
Set Up 2-Step Verification on Google
- First, open your Google Account. You can do that HERE.
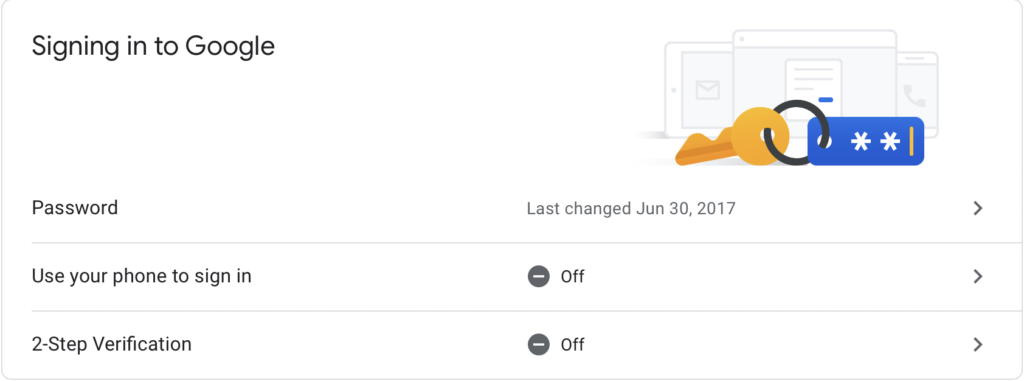
- Next, click on the Security tab from the navigation area you see on the left part of the page.
- Scroll down and click on 2-Step Verification under the “Signing in to Google” section.

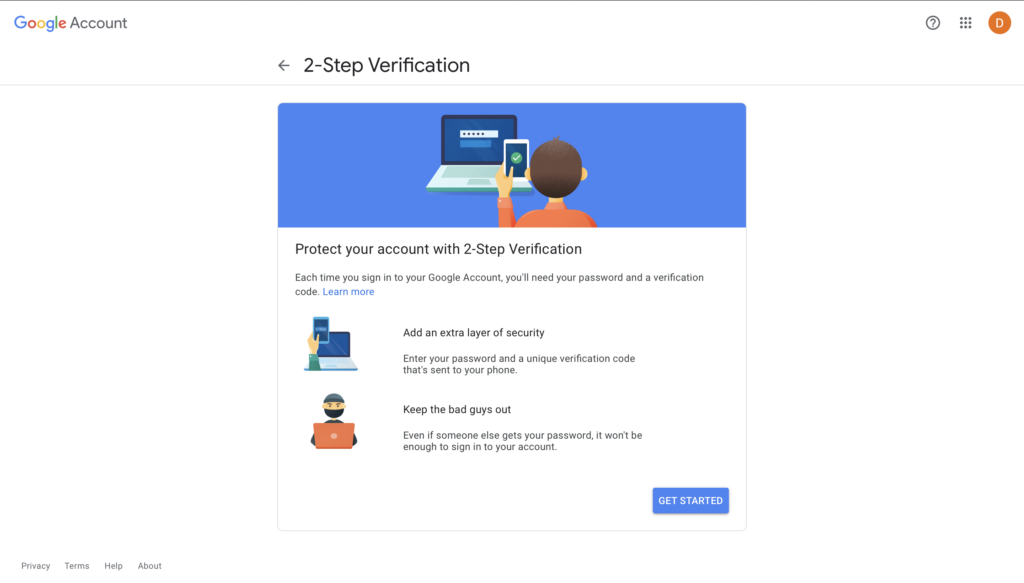
- Select Get Started.

- Re-enter your Google account password to confirm it’s you trying to log in.
- Select Continue to use your mobile device as a 2nd step Verification or click Show More Options for other modes.
- Other modes include via a security key or text message/voice call.
- Choose another option as backup and click Next.
- Turn On 2-Step verification.


And once this process is done, you’ll need to complete a second step to verify it’s you when you sign in.
However, you shouldn’t have to face this step every time you log in to your Google account. Especially if you use a particular device to log in frequently. If you don’t want to provide a second verification step each time you sign in on your computer or phone, check the box next to “Don’t ask again on this computer.
READ MORE: Correctly Configure Two-Factor Authentication before you’re locked out of your own account.
In the same vein, you can also remove devices from your trusted list. This lets google know to do a double check when someone’s trying to log in from that device. Open your Google Account > Security > 2-Step Verification > Select Revoke All under “Devices you trust”.
That’s about all you need to know around setting up 2FA for your Google account. Please feel free to ask questions or clarifications in the comments section below.