


The influx of notifications on your computer can be very distracting. Especially when you’re trying to channel focus to a particular task. It helps that you are able to silence those notifications, at least until you can attend to them. This is what the Do Not Disturb feature helps you do on your Mac.
To be clear, when you use the Do Not Disturb feature on your Mac, it does not stop notifications from coming in. What it does is silence these notifications so you won’t even know they’re there unless you check the particular apps they’re in.
Do Not Disturb can be turned on/off manually and also customized to come on or go off at specified periods. This is useful if, for example, you have a period you set aside not to be disturbed.
In this post, we’ll show you how to set up/activate Do Not Disturb on your Mac and how to customize and schedule it.
READ MORE: How to Take Full Web Page Screenshots on iPhone and Mac.
How to Activate Do Not Disturb On Mac
Follow the steps below to activate the Do Not Disturb feature on a Mac computer.
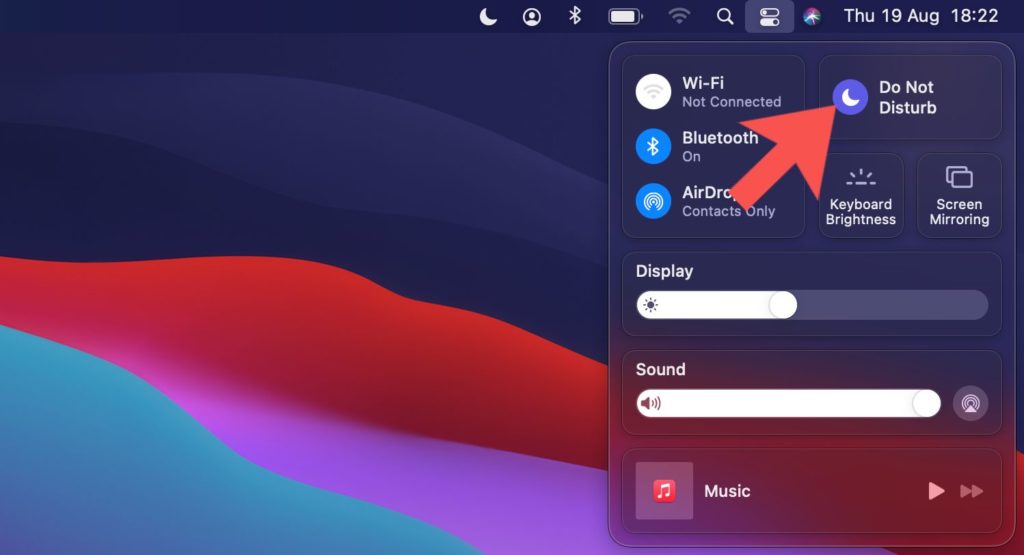
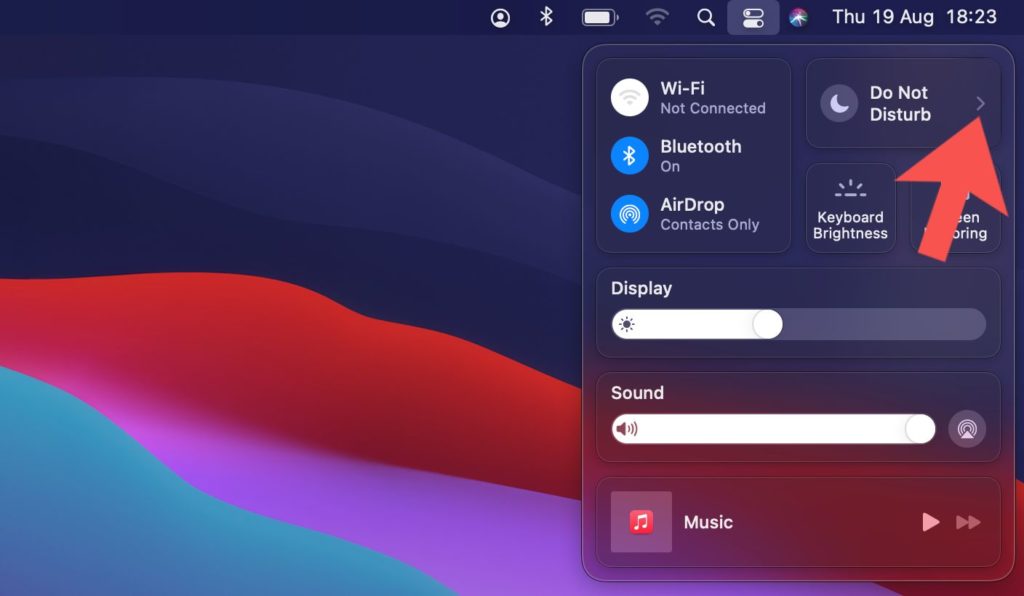
- Click on the Control Center icon located at the top right corner of your Mac.


- Click on the Do Not Disturb icon – a half moon icon – and it turns it on immediately.

How to Schedule & Customize Do Not Disturb On Mac
Follow the steps below to schedule and customize the Do Not Disturb feature on your MacBook.
From System Preferences
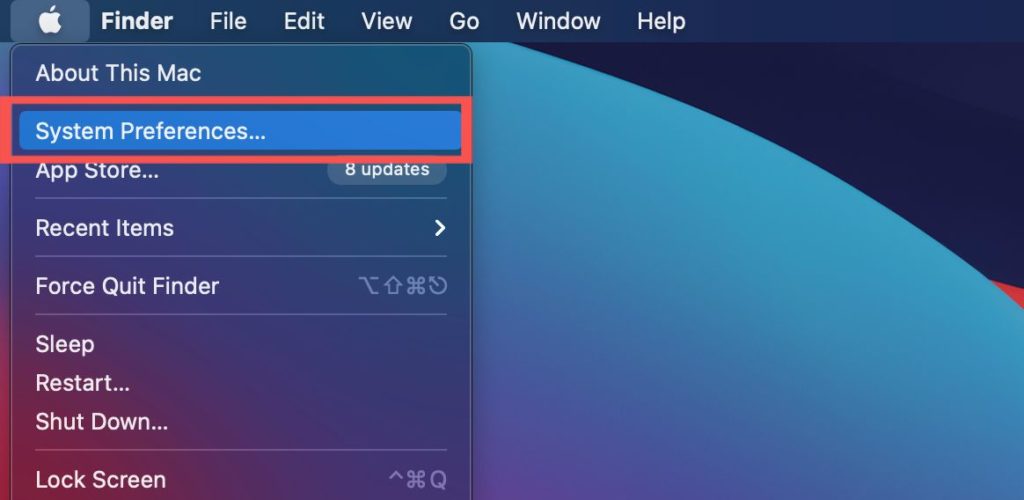
- Click the Apple icon at the left corner of your Mac and select System Preferences.

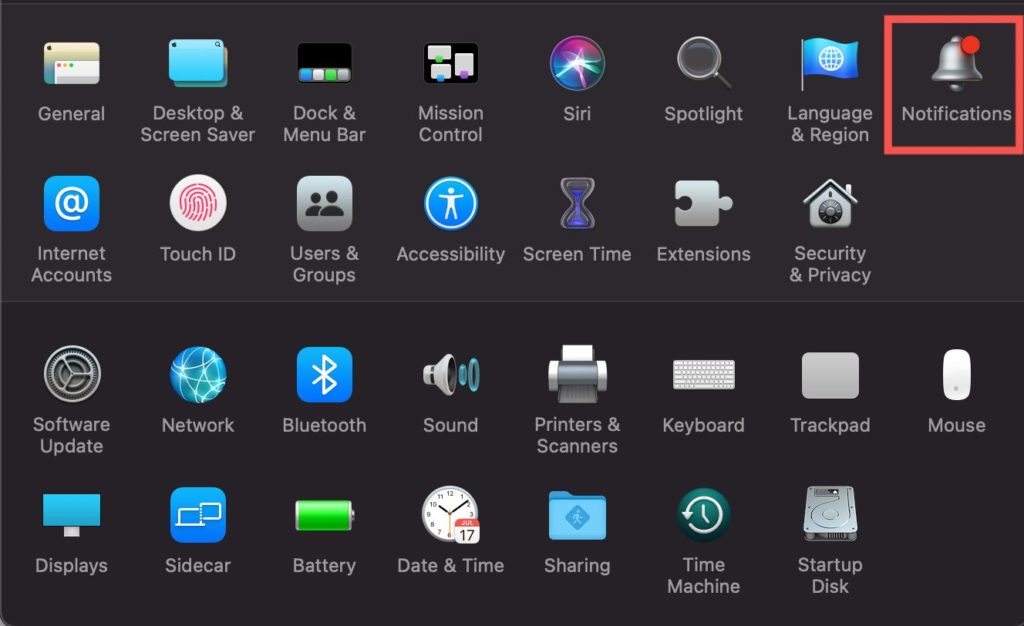
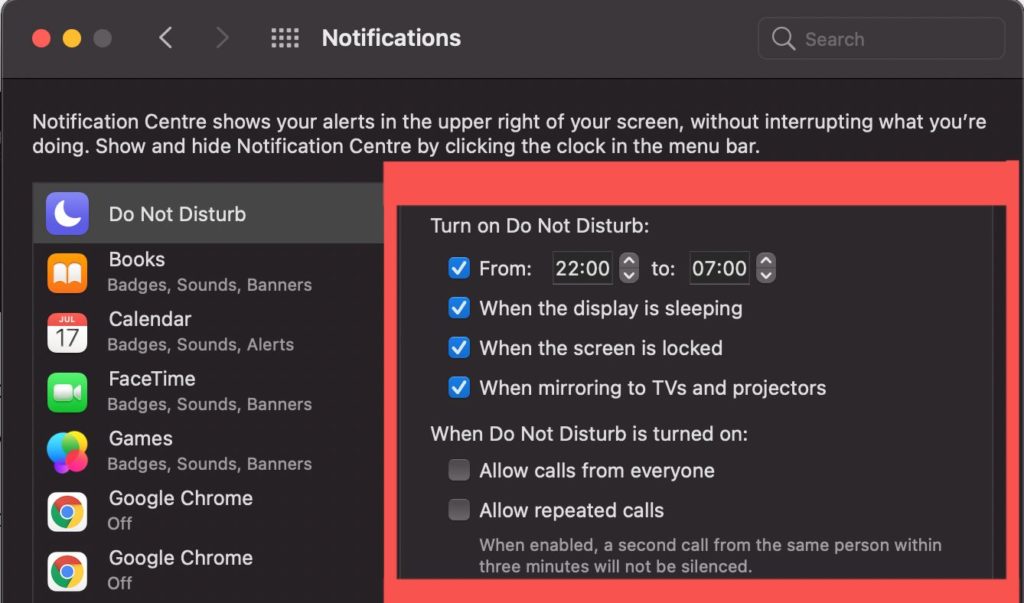
- Select Notifications.

- Select Do Not Disturb located at the top of the sidebar.

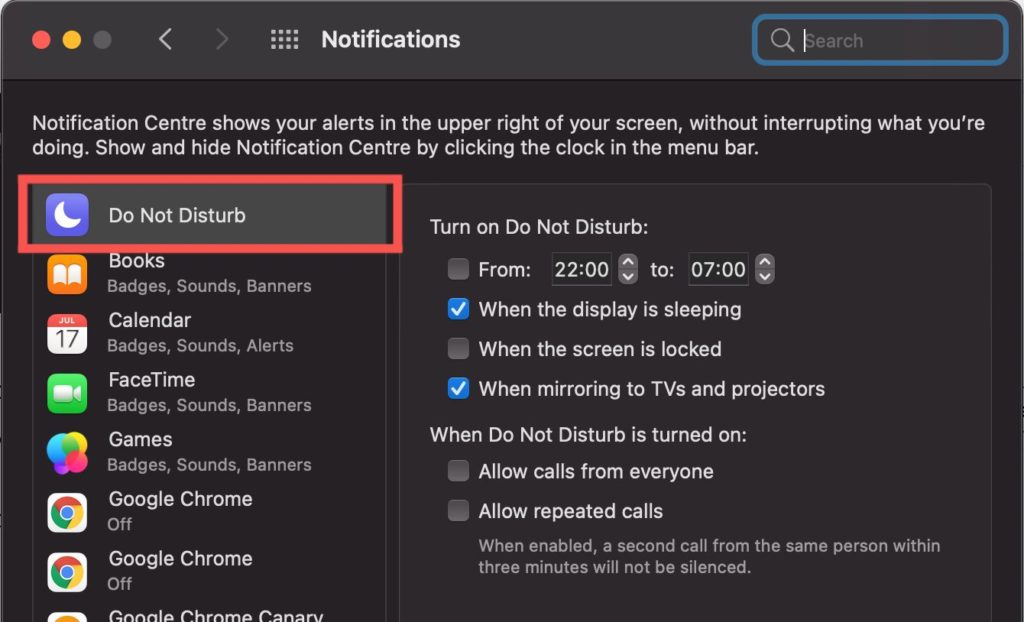
- Check every option you want to apply to the Do Not Disturb feature on your Mac at that point. Some of these options include Allow calls from everyone when Do Not Disturb is turned on, Allow repeated calls, e.t.c

From Menu Bar
- Click the Control Center icon located at the top right corner of your Mac.
- Hover around the Do Not Disturb option and clcik on the “>” arrow instead of the DND icon.

- Select your preferred option between For 1 hour, Until this evening, until tomorrow, Always on.

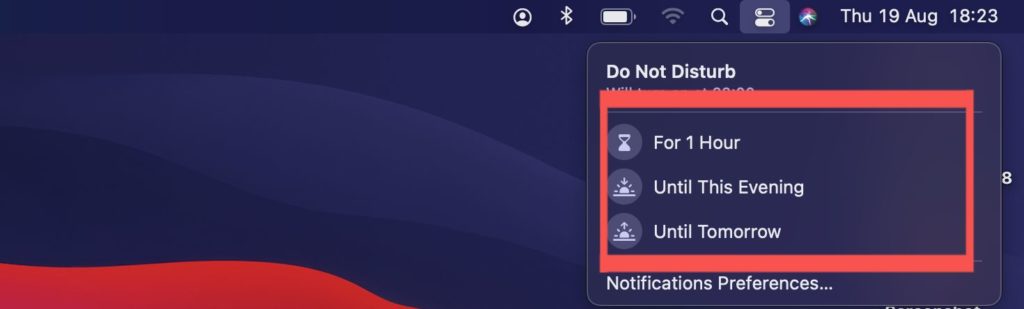
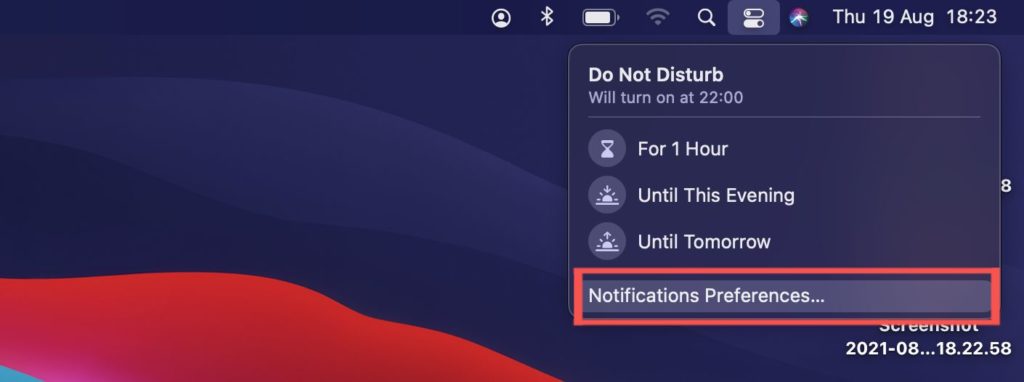
- If you don’t like any of those options, select Notification Preferences and it takes you to the page from System Preferences so it can be properly customized.

And that’s about what you need to know using Do Not Disturb on your MacBook. If you have any more questions regarding this feature, please let us know in the comments section below and we’ll definitely send in a response.