


In 2018, Apple acquired the music recognition app, Shazam, in a $400 Million deal. While the app still works as a standalone, it has also been integrated into Apple’s major products – iPhone, MacBook. For this purpose, we will focus on the ways to use Shazam on your MacBook.
Integrating the Shazam app into iPhone and Mac opens it up to a new crop of users who might have not used it before. While you don’t have to download the Shazam app to integrate to iPhone, you have to do that for your MacBook.
In this post, we’ll show you how to use Shazam on your MacBook. And the first step is to get the app. Follow through on all the steps.
READ MORE: How to Use Shazam From Your iPhone’s Control Center.
Download Shazam On Your MacBook
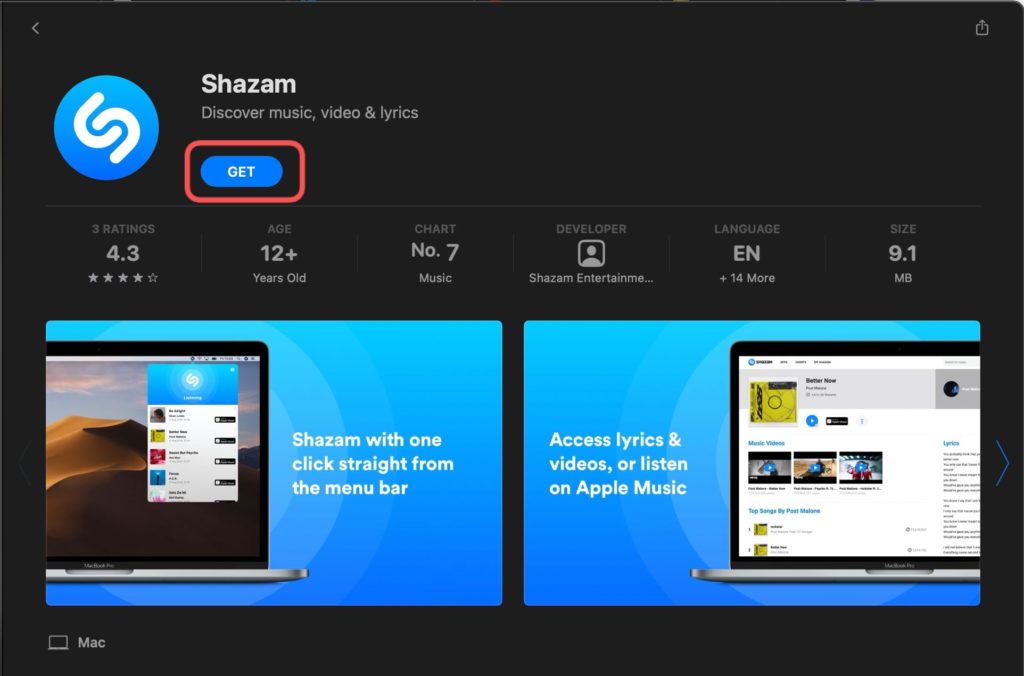
Follow the steps below to download and install the Shazam app to your Mac from the app store.
- Open your macOS app store.
- Search for Shazam app and click on the first result.
- Click on Get and Install the app.

Use Shazam On Your MacBook
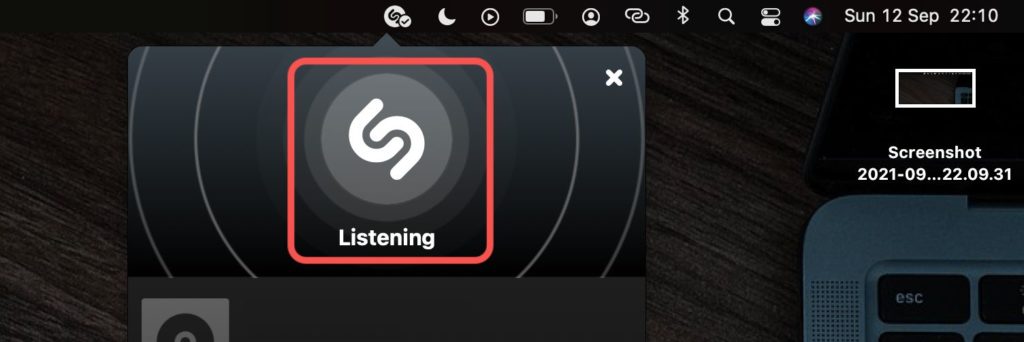
When you download the Shazam app to your MacBook and launch it, an icon appears in the menu bar. Follow the steps below to use Shazam on your MacBook.
- Click on the Shazam icon in the menu bar while a song is playing.

- Follow the instruction and click on the modal where it says Click to Shazam.


- Wait while the app listens to the song playing – it shows Listening here.

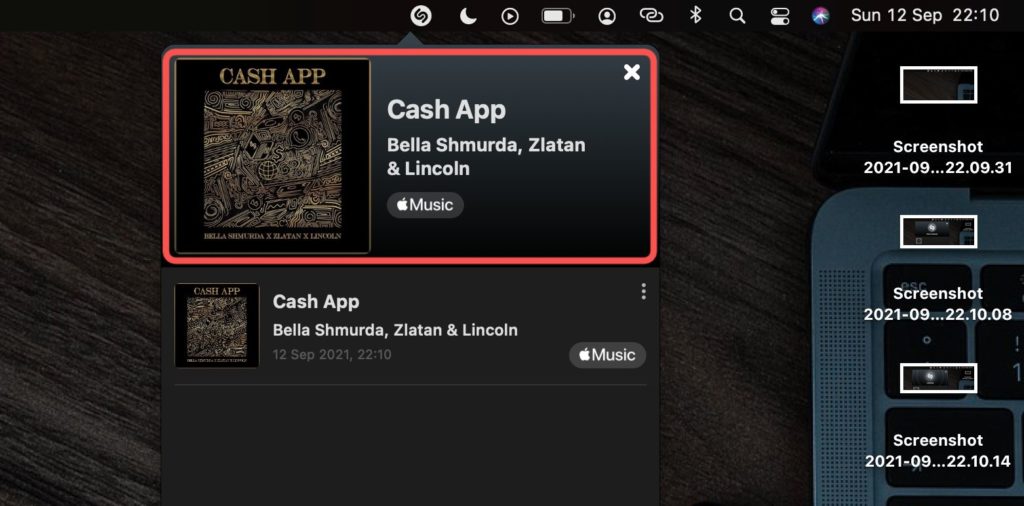
- Once listening is done, it shows you what song is playing.

Customize Shazam On Your MacBook
You can choose to customize Shazam settings on your Mac. Follow the steps below to do this.
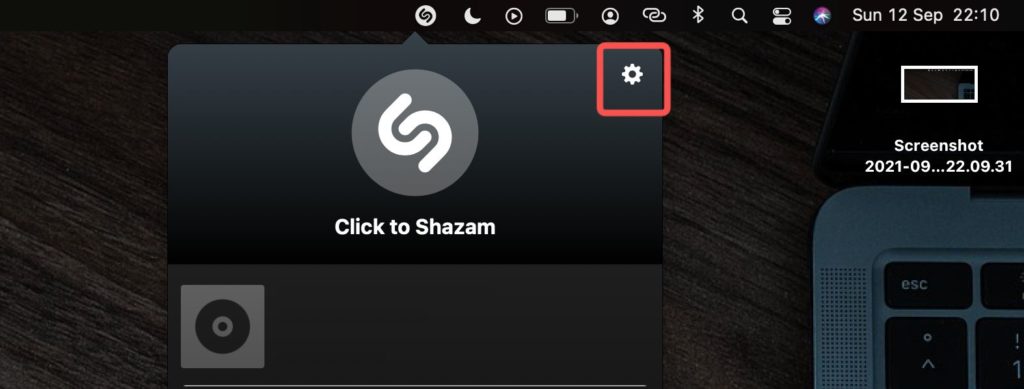
- Click on the Shazam icon in the menu bar.
- Click on the Setting icon.
- Select Preferences.

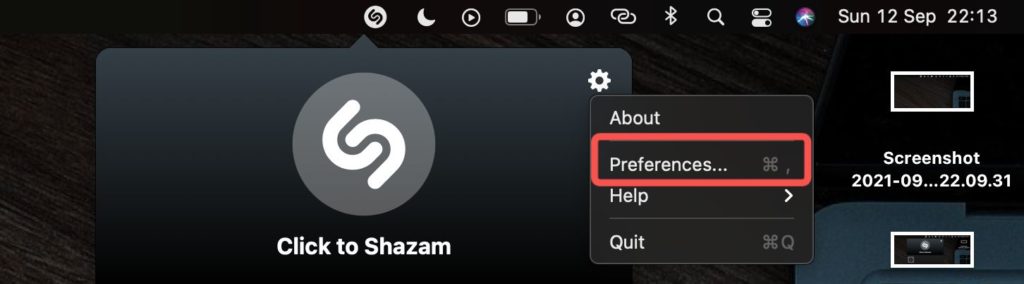
- Check and uncheck your preferences among the listed ones. You can decide to open Shazam automatically when you log in to your Mac, allow Shazam to start listening once you click the Menu Bar icon, or change the keyboard shortcut for Shazam.


That’s about all you’d need to use Shazam on your Mac. Please drop comments below on how smooth (or not) this process has been. If you have questions too, we’re happy to respond to them in the comments section.


About Daniel
Daniel Moses Oluwadanie is a tech writer based in Nigeria with extensive experience in mobile apps, social media, and fintech. At Dignited.com, he specializes in writing practical how-tos, smartphone reviews, and consumer tech news—helping readers make sense of the digital tools they use every day. With a finger on the pulse of Nigeria’s tech scene, Daniel delivers insights that are both timely and relatable.