


By default, the Netflix app on your PC stores all your downloaded movies in the same drive that the app is installed in. In most cases, that means all your downloaded programs will be stored in the main drive (C:). It is, however, possible to change Netflix’s storage location to an external drive. That is if you do not want to crowd the main drive with Netflix downloads or when you start running out of internal storage.
Below is a step-by-step guide on how to change the Netflix download location on your PC.
Generally, to download a one-hour Netflix video in Standard-Definition, you will need approximately 1 GB of storage space. For the same duration, a High-Definition video will require 3 GB of storage. The storage requirement for Ultra-HD Format videos goes up to 7GB. The method below will move your Netflix App and all your existing downloads to a new location of your choosing.
Also Read: Who’s using your Netflix account? Here’s how to find out
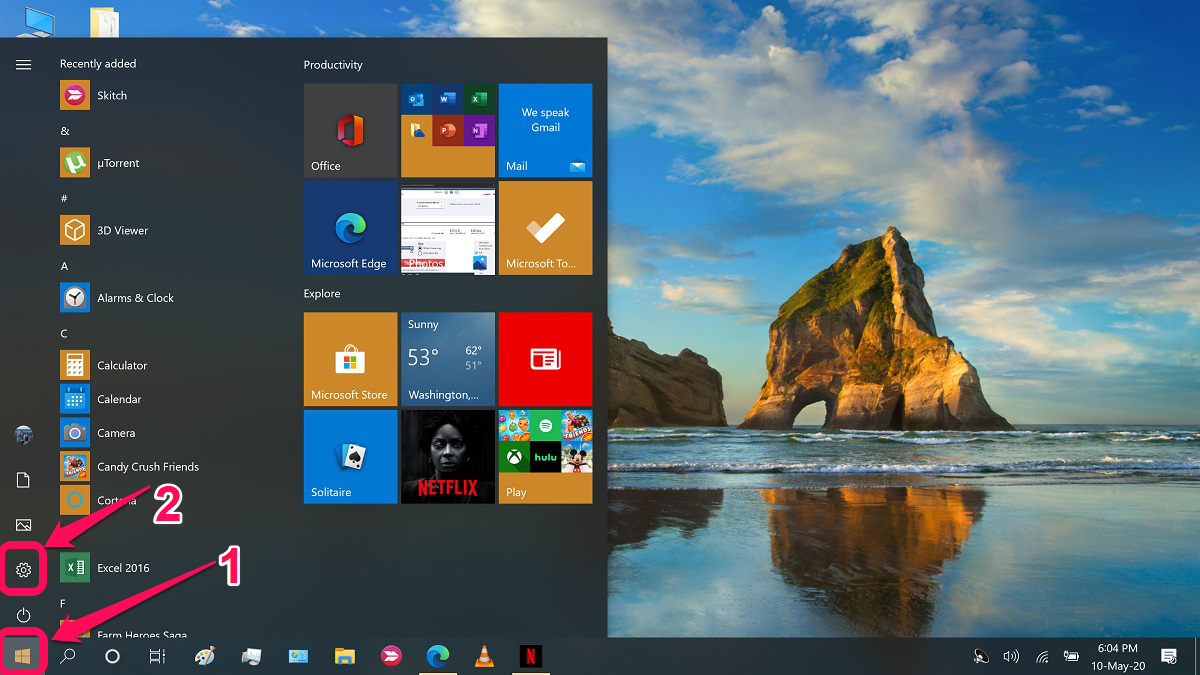
Step 1 & 2
First press the Windows Key and then click on the Settings icon to open Windows settings.

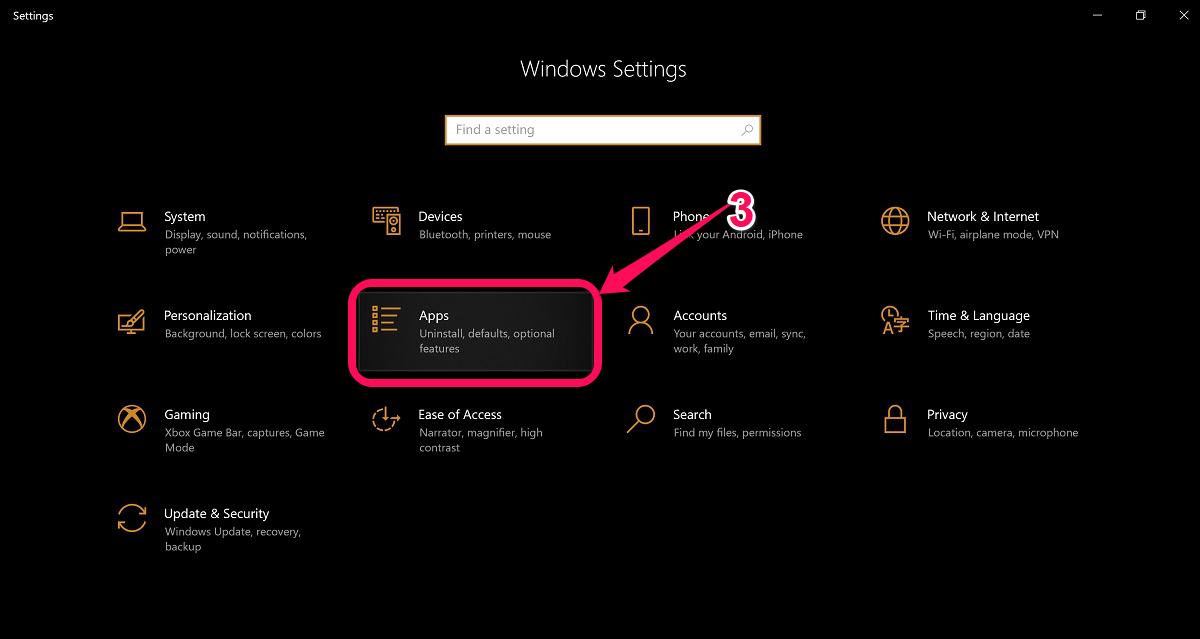
Step 3
On the Windows settings page, click on the Apps link to show a list of all apps and features you have installed.

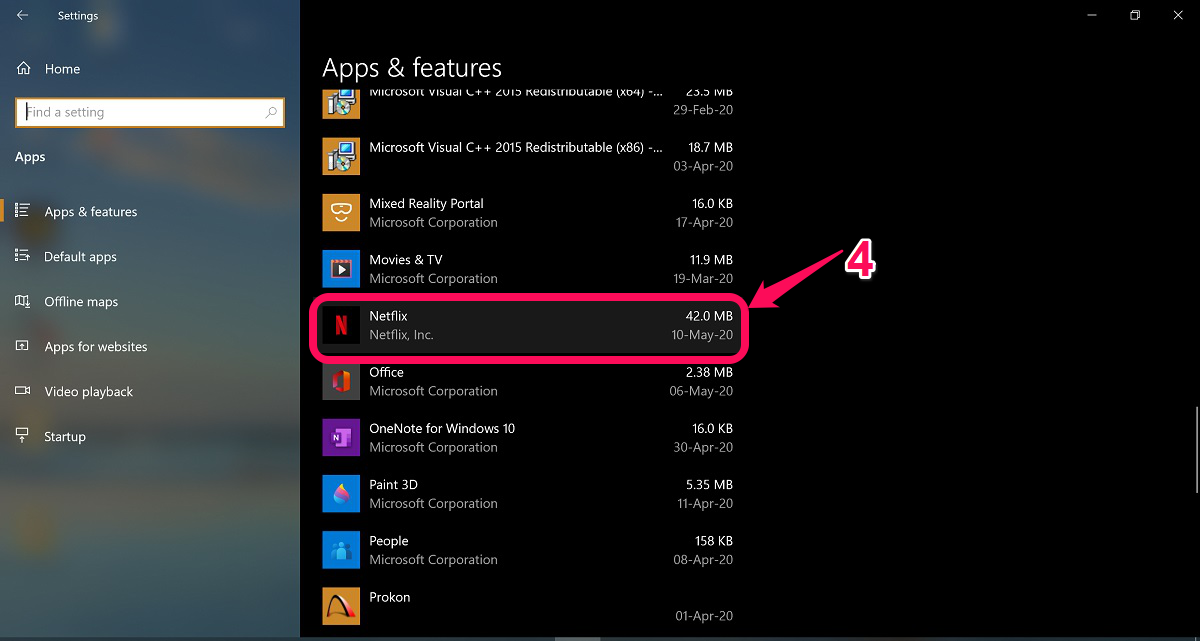
Step 4
Scroll down the list of alphabetically arranged apps to where the Netflix app is and click on it.

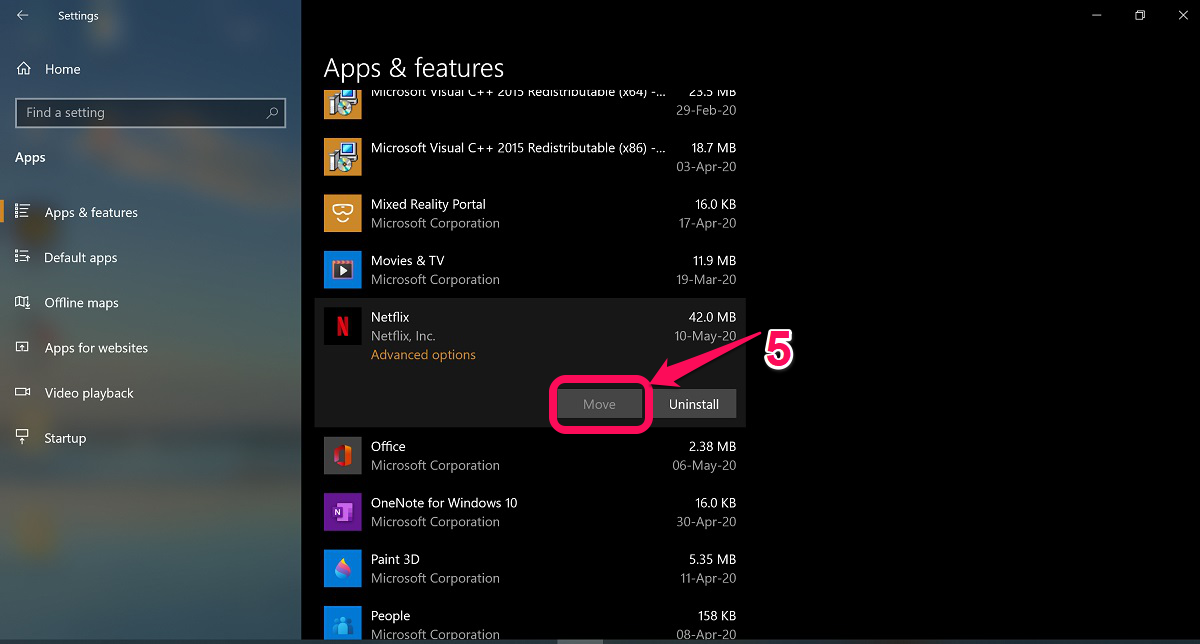
Step 5
The Netflix app section will expand as shown below. If your Move button is greyed out, proceed to Step 6 to rectify that. However, if your Move button is not greyed out, you may jump to Step 13.

Also Read: Netflix’s New Parental Control Options: How to Use Them
Step 6
To activate the Move button, open Windows Settings as demonstrated by Step 1 & 2. This time click on the System link.

Step 7
On the page that opens, look for Storage on the left pane and click on it.

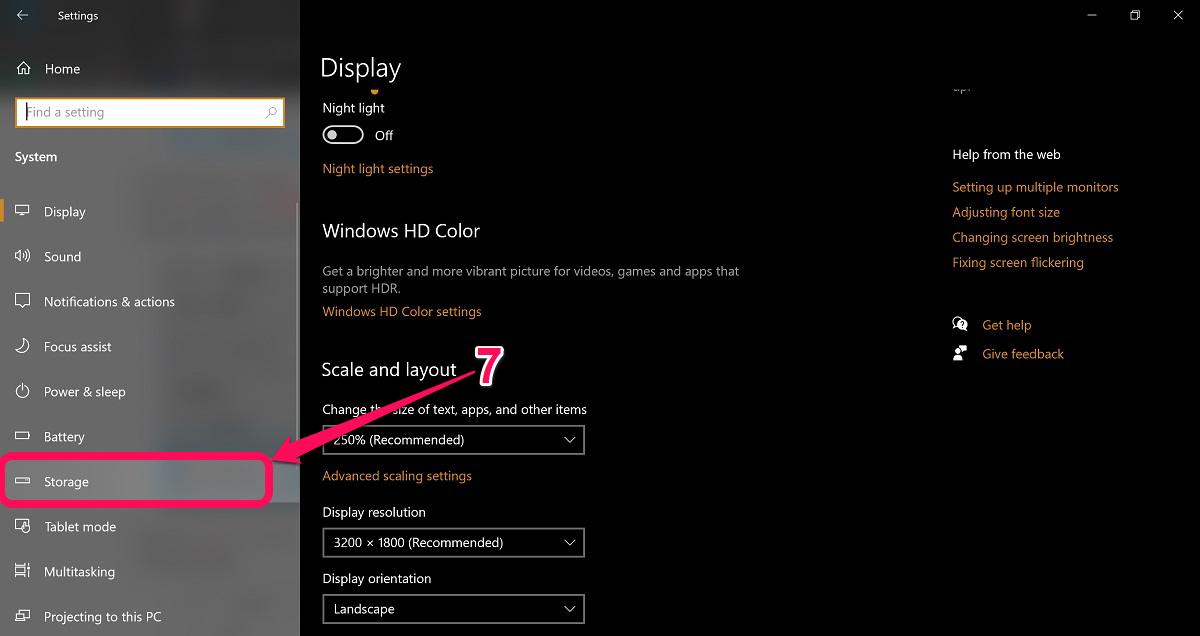
Step 8
Next click the “Change where new content is saved” link.

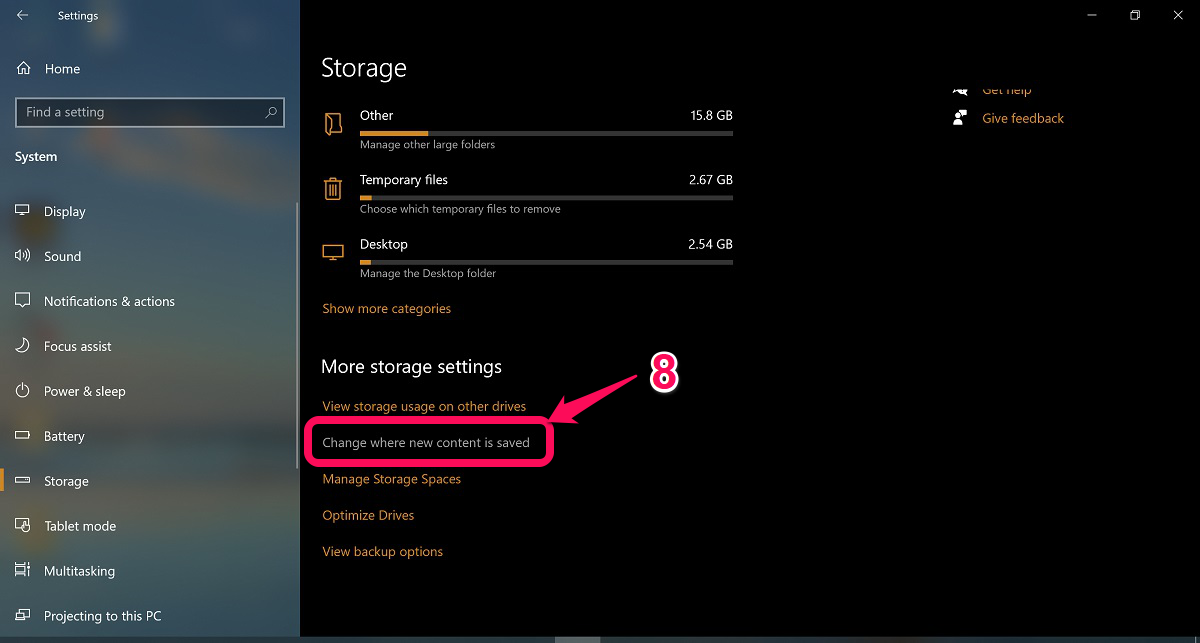
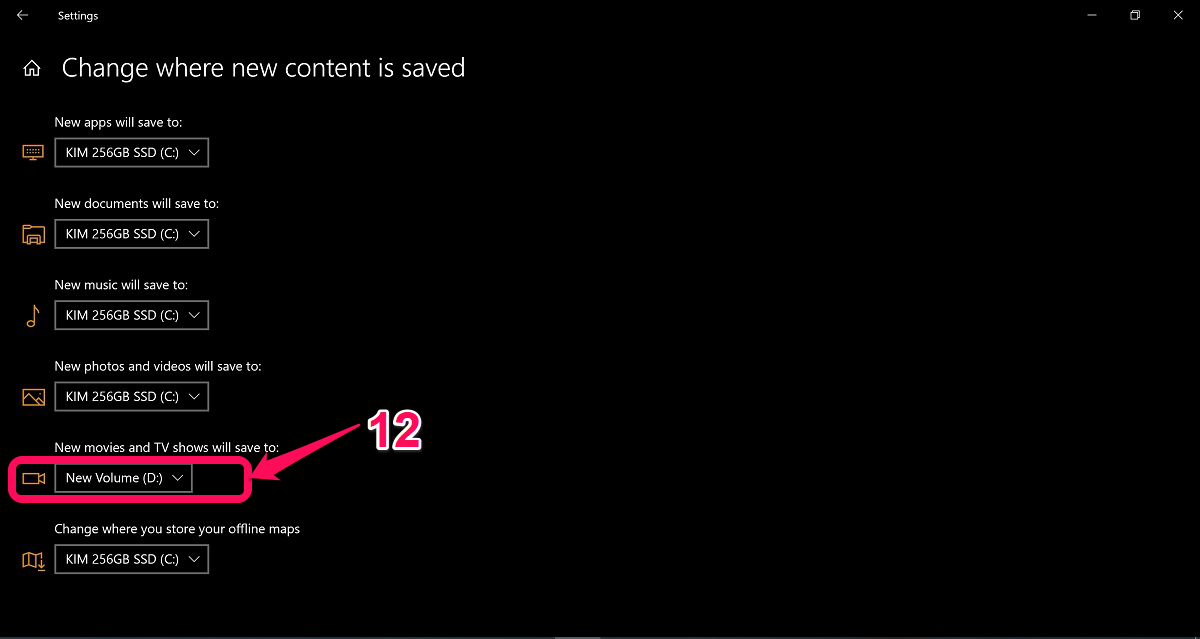
Step 9
Now scroll down to the “New movies and TV shows will save to” section and click the Down-Arrow to open a drop-down list of available storage devices.

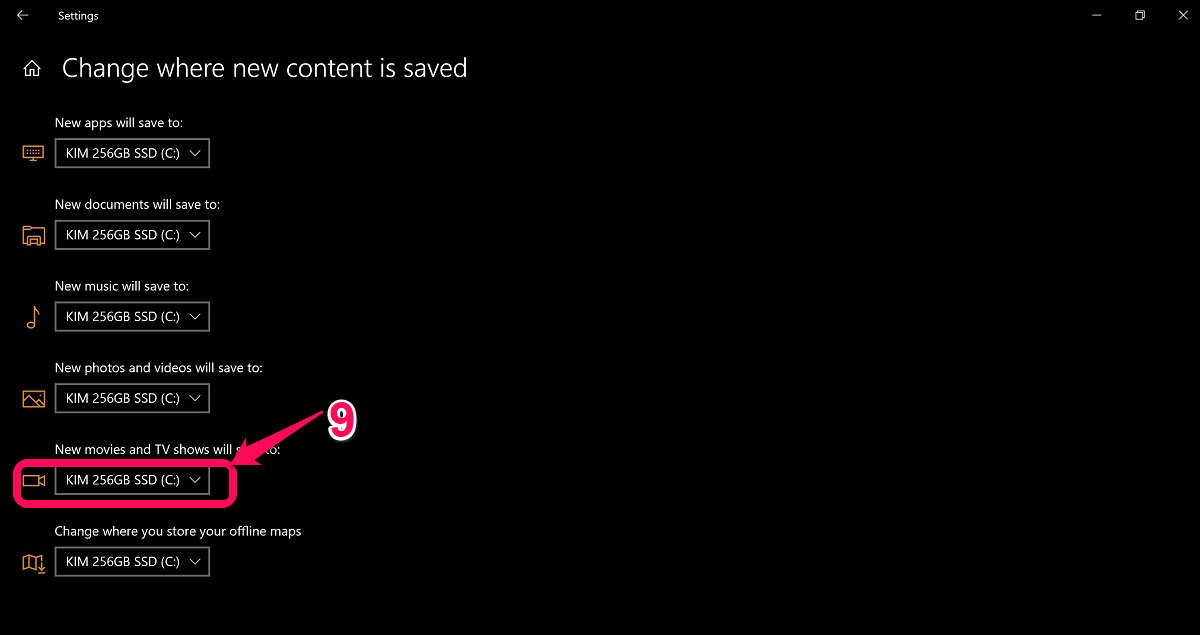
Step 10
Next, choose the storage device you want to change the Netflix download location on your PC to.

Also Read: Top 5 Netflix Chrome Extensions to Enhance Your Viewing Experience
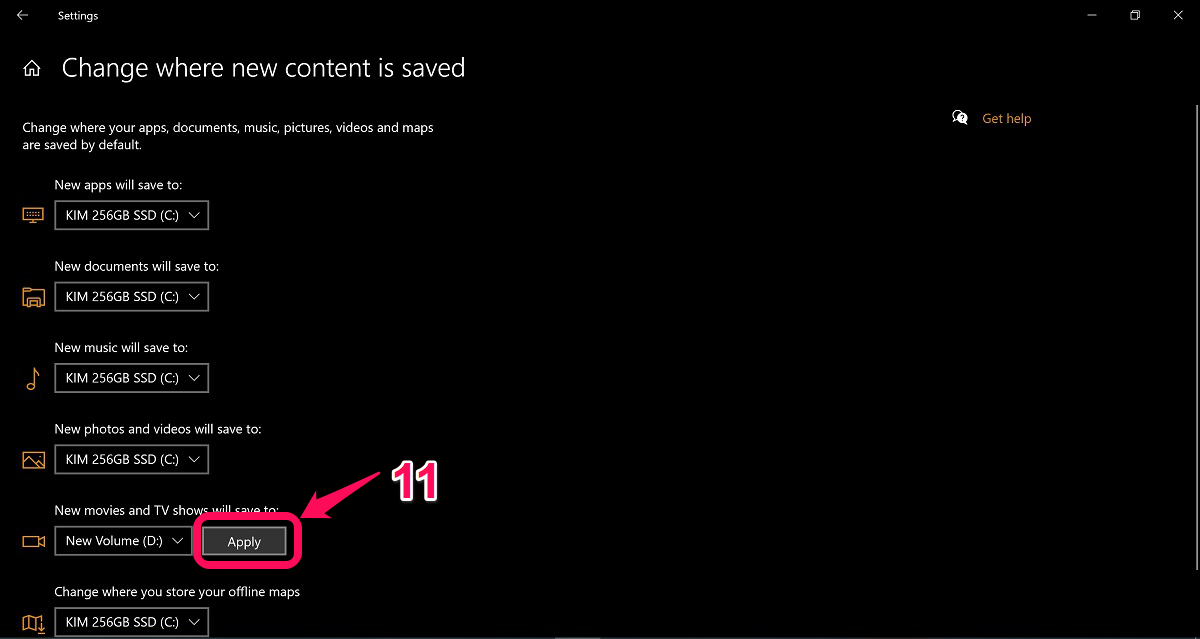
Step 11
After choosing your preferred storage location, click Apply for the changes to take effect.
Step 12
Confirm that your preferred storage location is active under the “New movies and TV shows will save to” section and close the Window.
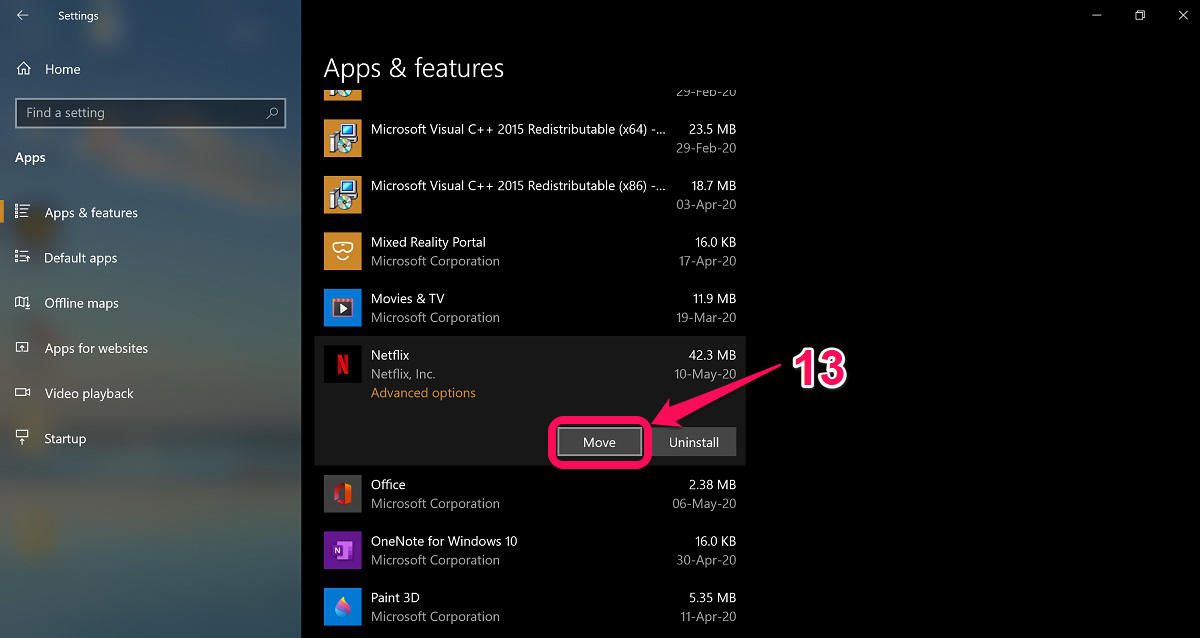
Step 13
Redo Steps 1 to 5, your Move button should now be active. The next step is to click that Move button that is now active.

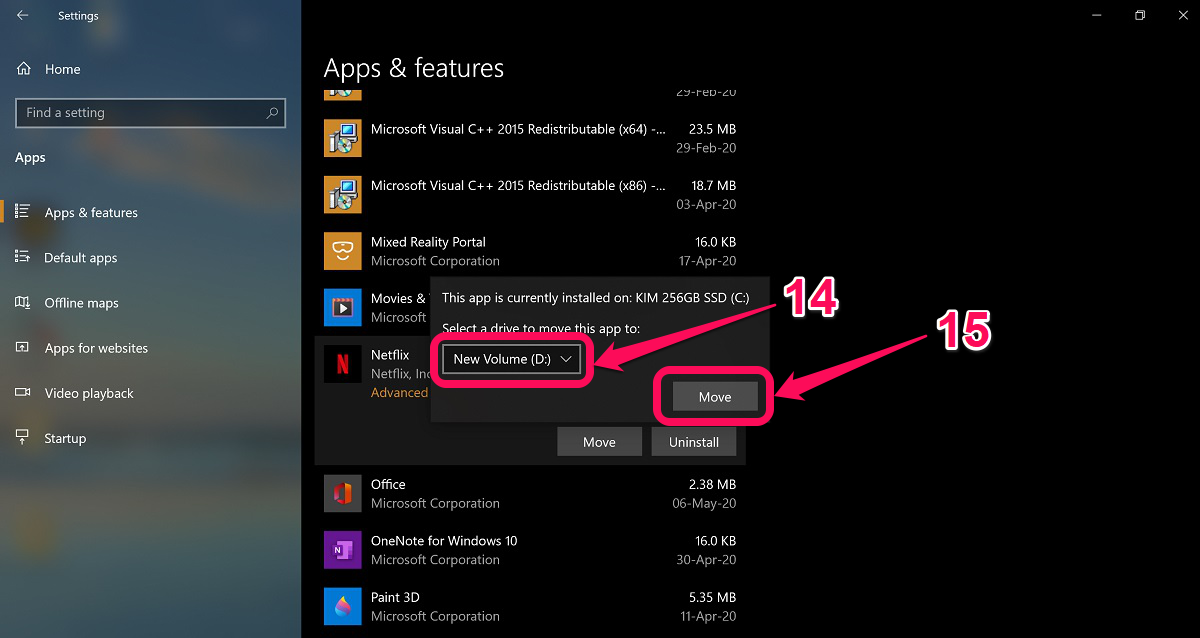
Step 14 & 15
You will be prompted to select a drive to move the Netflix App to. Choose accordingly and click Move.
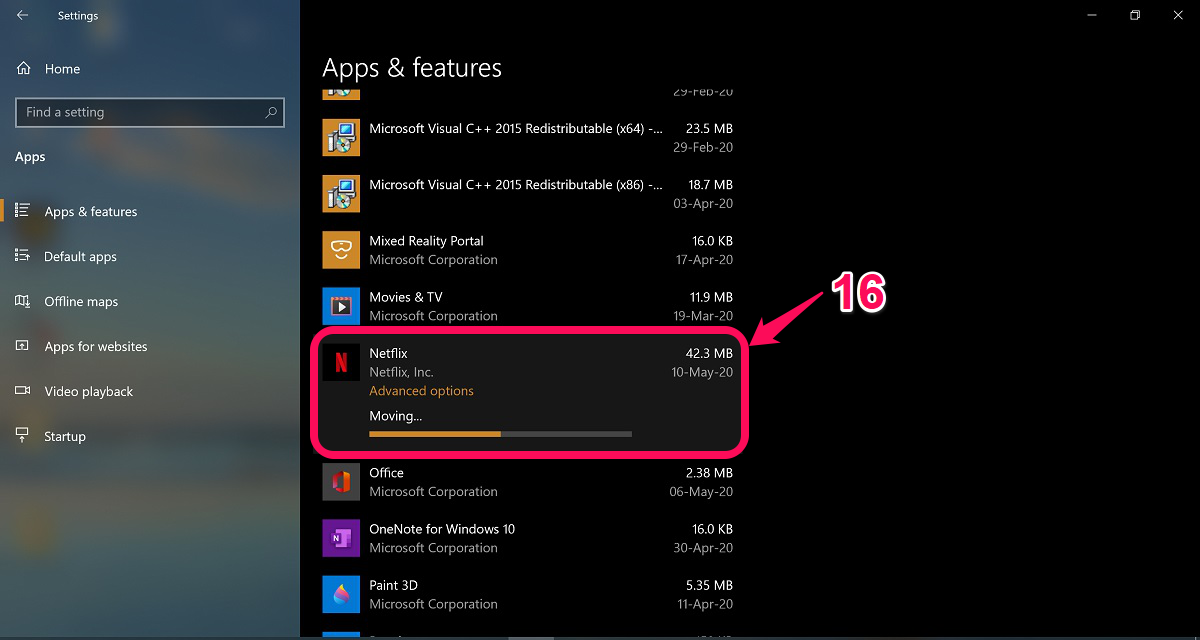
Step 16
Then the Netflix app will be moved and so will your Netflix downloads location.

Note: If you change the Netflix download location on your PC to an external drive, you will need to have it plugged in whenever you want to stream or watch downloaded content. If you do not do that, Netflix will display a “Can’t open” error.
Kindly make use of the comments section below to let us know what other guides you would like us to do.
Also Read: How to Lock Your Netflix Profile with a PIN