If you need to find out your laptop serial number in Windows, there are several ways to do it. The serial number is a unique identifier that can help you with warranty issues, technical support, or other purposes.
Here are some of the methods you can use to get your laptop serial number in Windows.
Use the Command Prompt
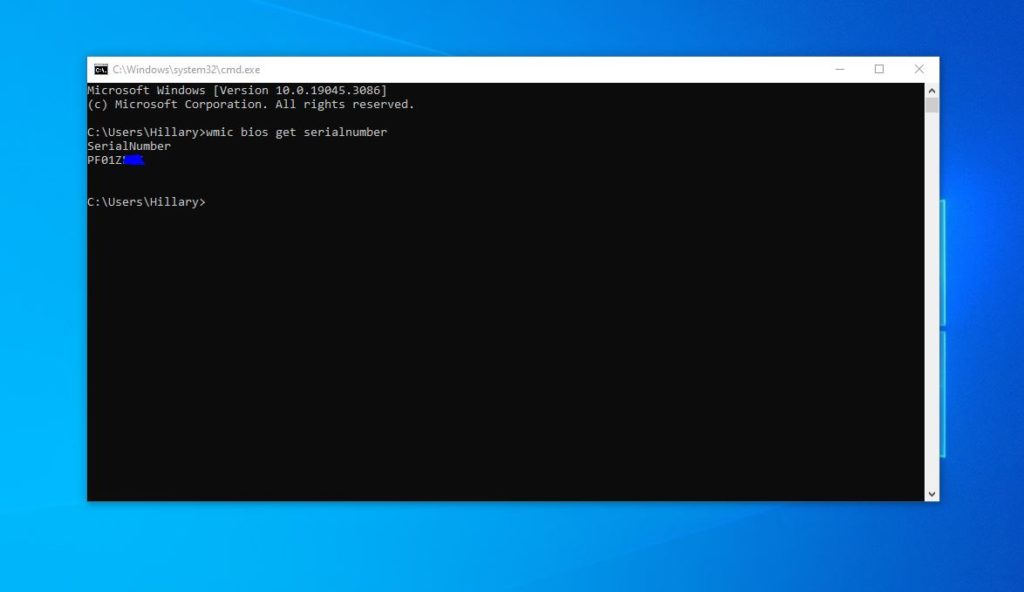
One of the easiest ways to get your laptop serial number is to use the Command Prompt. To do this, follow these steps:
- Press Windows + R to open the Run dialog box.
- Type cmd and press Enter to launch the Command Prompt.
- In the Command Prompt window, type this followed by Enter.
wmic bios get serialnumber
- You will see your laptop serial number displayed on the screen.
Use the System Information
Another way to get your laptop serial number is to use the System Information tool. To do this, follow these steps:
- Press Windows + R to open the Run dialog box.
- Type msinfo32 and press Enter to launch the System Information tool.
- In the System Information window, look for the System Summary section on the left pane.
- On the right pane, look for the BIOS Version/Date item and click on it.
- You will see your laptop serial number displayed on the bottom of the window.
Use the Sticker on your Laptop
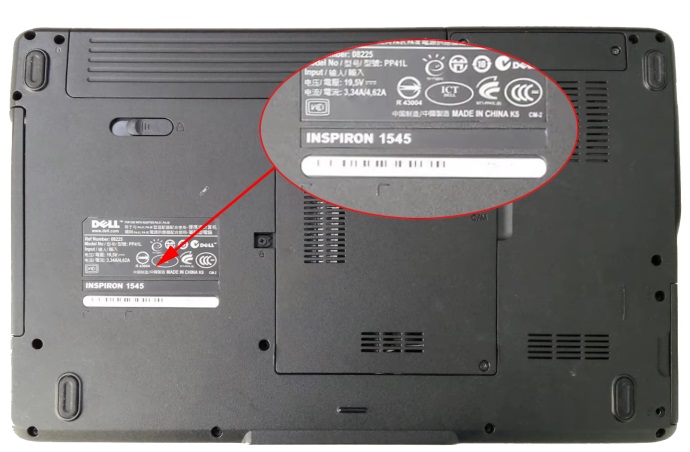
The last method to get your laptop serial number is to use the sticker on your laptop. Most laptops have a sticker on the bottom or on the back that shows the serial number and other information. To do this, follow these steps:
- Turn off your laptop and unplug it from any power source.
- Locate the sticker on your laptop and look for the serial number. It may be labeled as S/N, SN, Serial No., or something similar.

- Write down or take a picture of your laptop serial number for future reference.
These are some of the ways you can get your laptop serial number in Windows. We hope this blog post was helpful and informative. If you have any questions or feedback, please leave a comment below.
Discover more from Dignited
Subscribe to get the latest posts sent to your email.


