Many people don’t feel comfortable ditching Windows altogether and taking the plunge into Linux as their primary operating system. Having a safety net in such matters is wise and makes the transition easy. Dual booting Windows and a copy of Linux has been a staple for many years.
As expected, the dual booting involves jumping through a few monir hoops but for the most part, it is easy to get these two systems to run on your PC. However, I have been running on a certain issue in my setup.
Every time I switch from Linux to Windows or vice versa, my system clock is off by 3 hours. This means I have to set my clock every time I reboot to a different operating system.
Related:
- How to dual boot Ubuntu and Windows 10 without Partitioning
- Getting Started With Windows Subsystem for Linux
If you are experiencing issues with the clock in a dual-boot setup with Ubuntu and Windows, it is likely due to the difference in time standards used by the two operating systems. Windows uses local time by default, while Ubuntu uses Coordinated Universal Time (UTC). This can cause the clock to display different times in each system.
How to Fix Windows-Linux Dual boot Clock mismatch
To fix this issue, there are two methods you can try. Essentially, this involves asking one of your operating systems to use the clock system that the other uses.
Step 1 will show you how to tell Linux (Ubuntu, Linux Mint, Pop OS) to use local time that Windows uses so these two are on the same page.
- Set RTC to local time zone in Ubuntu: This method involves setting the Real Time Clock (RTC) to use local time zone in Linux.
- To do this, open a terminal window by searching for it in your app list, pressing Win+T or Win+Shift+T.
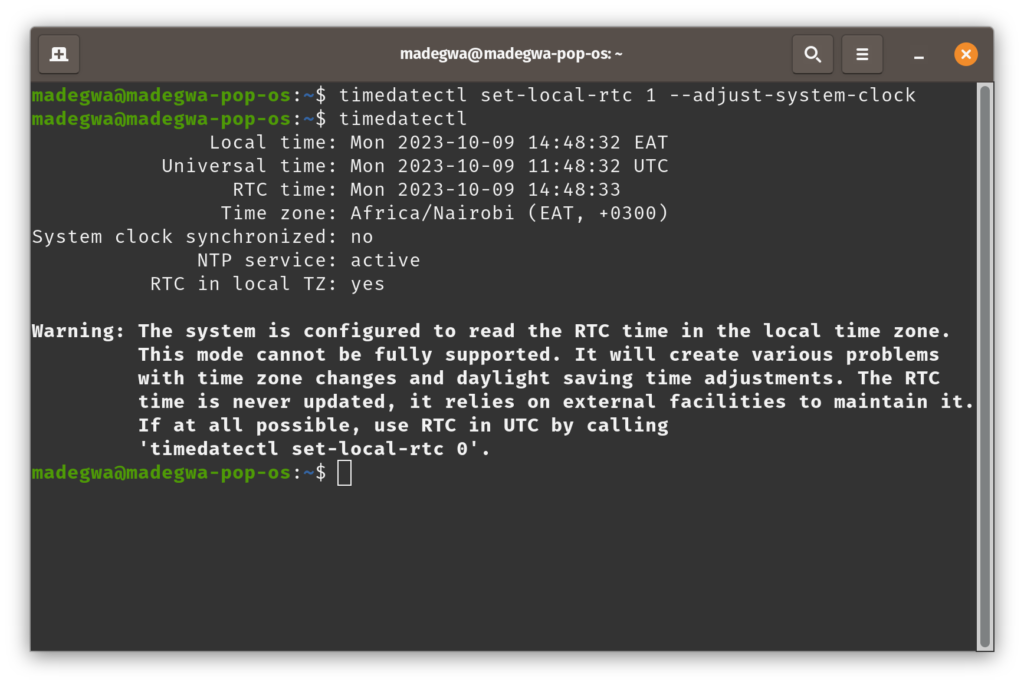
- Run the following command:
timedatectl set-local-rtc 1 --adjust-system-clockby copy-pasting and the Enter. This is not a sudo command so it doesn’t need your password.

- You can check the status of your system clock by running
timedatectl. - If “RTC in local TZ: yes” is displayed, then the local standard is in use.
That’s it! Next time you reboot to Windows, you should have the same time and date as your Linux install. But then maybe you are more into Windows and you’d like to enable UTC time on Windows. Below is how to do it.

- If you’re running Windows 11, you can enable the UTC / GMT time standard via the following steps:
- Click on the ‘Search’ icon on taskbar.
- Search for and right-click on ‘Command Prompt’ and select ‘Run as administrator’.
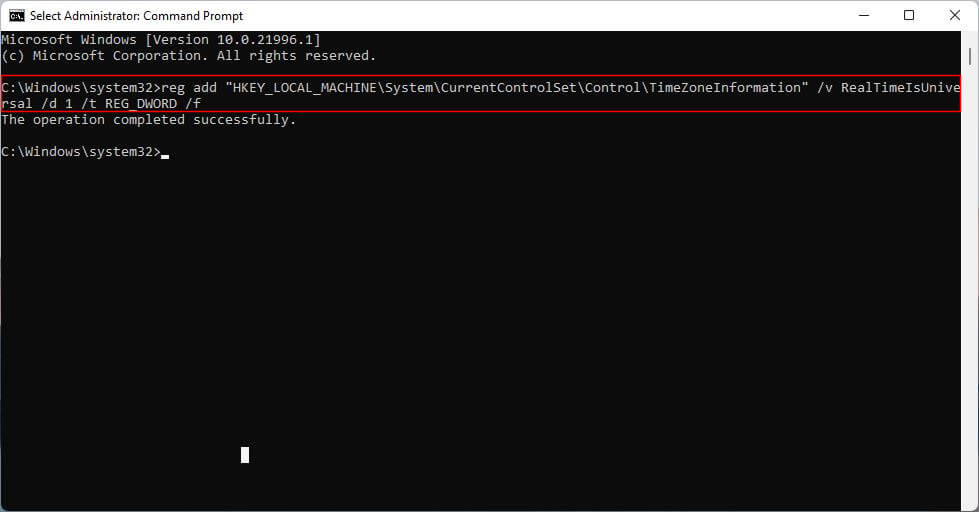
- When the command prompt opens, copy and paste the command below and hit run:
reg add "HKEY_LOCAL_MACHINE\System\CurrentControlSet\Control\TimeZoneInformation" /v RealTimeIsUniversal /d 1 /t REG_DWORD /f
- The command creates a registry key to tell Windows to use the universal time standard.
- Refresh the display time to apply the change.
These simple steps should fix one of the biggest headscratchers I had had to deal with for years so you don’t have to. Also, you only need to apply one of these fixes and the issue will go away.
Discover more from Dignited
Subscribe to get the latest posts sent to your email.


