Update: Windows 10 now comes with inbuild Wireless Mobile hotspot feature.
Contrary to popular belief, setting up a wireless network hotspot in Windows isn’t rocket science. Far from it. A tech zombie can have their laptop hotspot up and running in under a minute. Now why would you want a wireless hotspot anyway?
Same reason why you setup one on your smartphone — to share internet on your PC or share files with your other family and friends devices without having to buy an expensive Wi-Fi router.
Now all you need is a Windows desktop computer or laptop equipped with Wi-Fi capabilities. Now these steps require interactions with the command-line — the notorious black screen — which might be a little intimidating for novices. However, we offer a simpler solution at the end.
Here’s what to do:
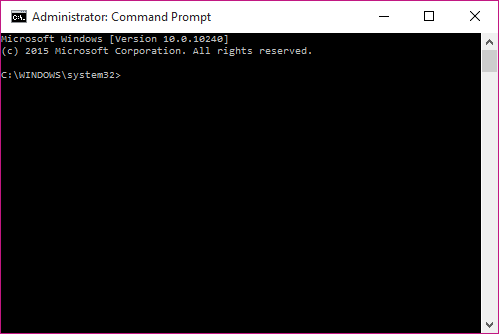
Step 1: Press Windows Button + X and select Command Prompt (Admin)
A black window with a blinking cursor will pop up. This allows you to interface with your computer from the command line.

Step 2: Copy and Paste the following three lines into your Command Prompt
netsh wlan set hostednetwork mode=allow ssid=Dignited key=tutorial
netsh wlan start hostednetwork
netsh wlan show hostednetwork

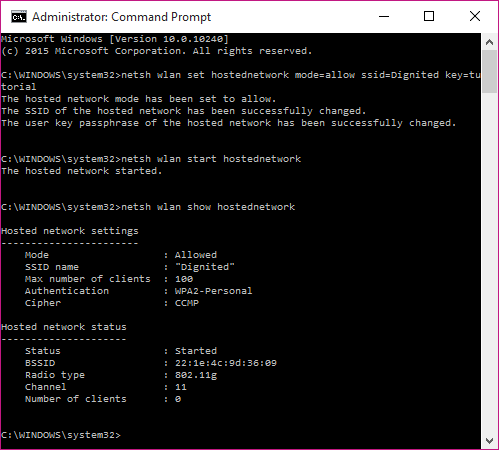
Your windows should look like this.
*SSID (Service Set Identifier) is a fancy way to say Name of your network. Choose whatever name works for you.
**KEY is a geek-speak for password.
***WLAN is shortform for Wide Local Area Network.
Step 3: Type the following into your command prompt:
ncpa.cpl

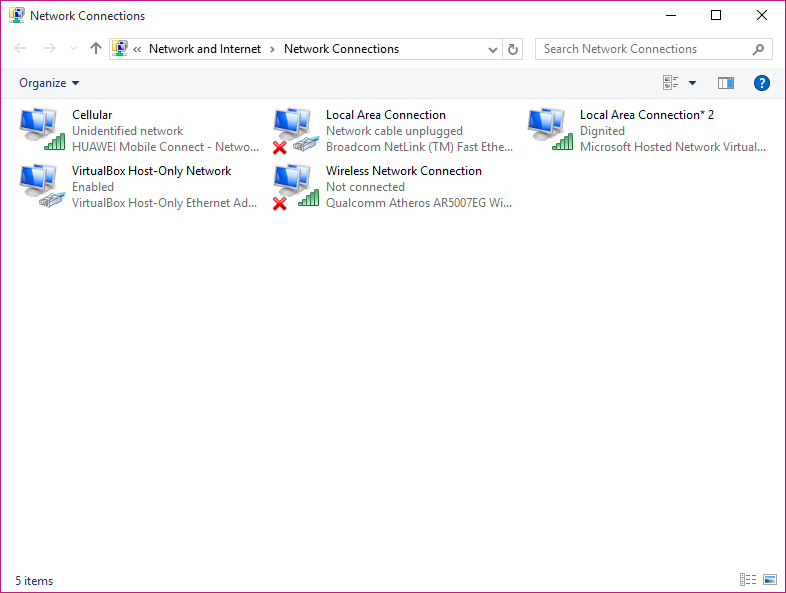
This opens the Network and Sharing Center window
Right Click on Cellular (USB modem internet or whatever you are using) and select Properties
In Properties choose Sharing
Click “Allow other network users to connect through this computer’s Internet connection”
Select the Local Area Connection you created (Dignited in our case)
Step 4:Close Network and Sharing Center
Close Command Prompt. Done!
There you have it! A quick easy way to turn your PC into a Wi-Fi hotspot at the affordable price of free shillings. One should note that Windows Hotspot capabilities are rather last decade. The internet connection on the hotspot was unstable on our machine which was a bummer.
Some tech circles recommend Wifi Hotspot software such as Connectify and Virtual Router. Feel free to look them up.
Feature image: Pcfaster.com
Discover more from Dignited
Subscribe to get the latest posts sent to your email.


