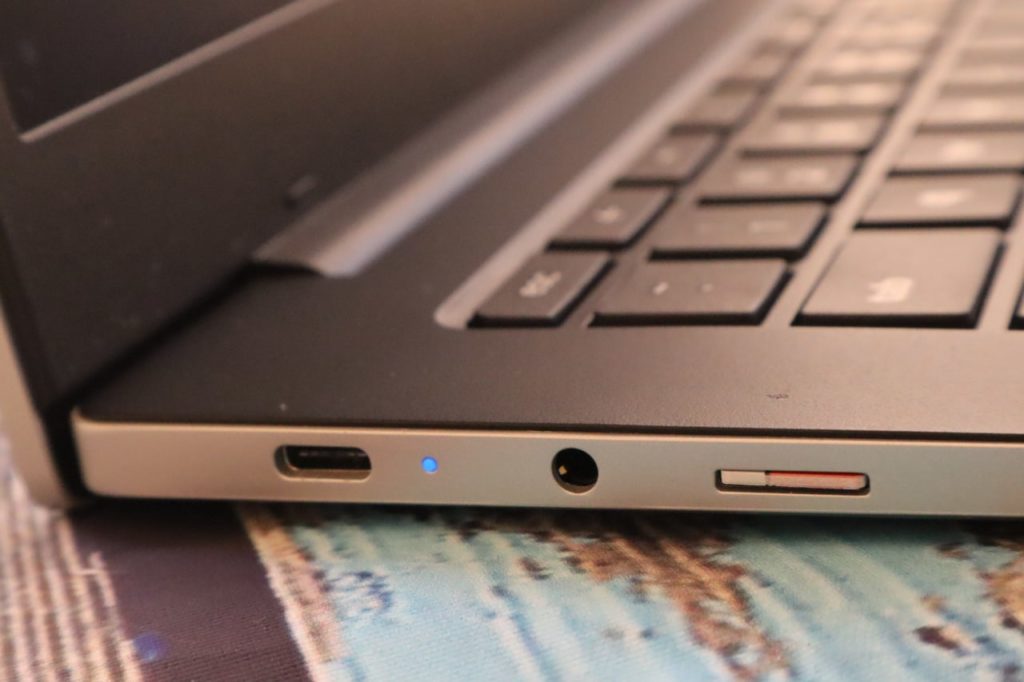
Chromebooks are pretty much limited in storage. The most come with about 64GB of internal storage, of which at least 13 GB is taken by the operating system. So you have very little to store your local movies and music. The assumption Google is making here is that you are using Google Drive cloud storage with at least a 100GB subscription plan. However, that’s not the case for most people.
Now you can expand on your storage either by installing a microSD card upto 2TB or just connect to a Network Attached Storage(NAS) drive such as Synology or QNAP or Windows/Linux/Mac shared network folder via local wired network or WiFi. My setup is a Samsung Galaxy Chromebook Go which is my daily driver and a secondary old Asus Vivo book running Linux Mint. I managed to set up network shared folders on my old Linux mint laptop through the Samba software. You can easily mount your network shared folder on your Chromebook and use it as if it was running on your Chromebook.
Here’s how.
The first thing you have to establish is the IP address of your Network storage device — whether that’s a NAS drive or computer. Note it down somewhere. You should ensure that both your Network storage device and Chromebook are connected to the same network — that is you can reach your Chromebook from your PC or NAS drive and vice versa. You can easily establish this by trying to ping other devices. For instance, my Chromebook local IP address is 192.168.100.45 while that of my old Linux Mint laptop is 192.168.100.3. You can tell that they are on the same subnet.
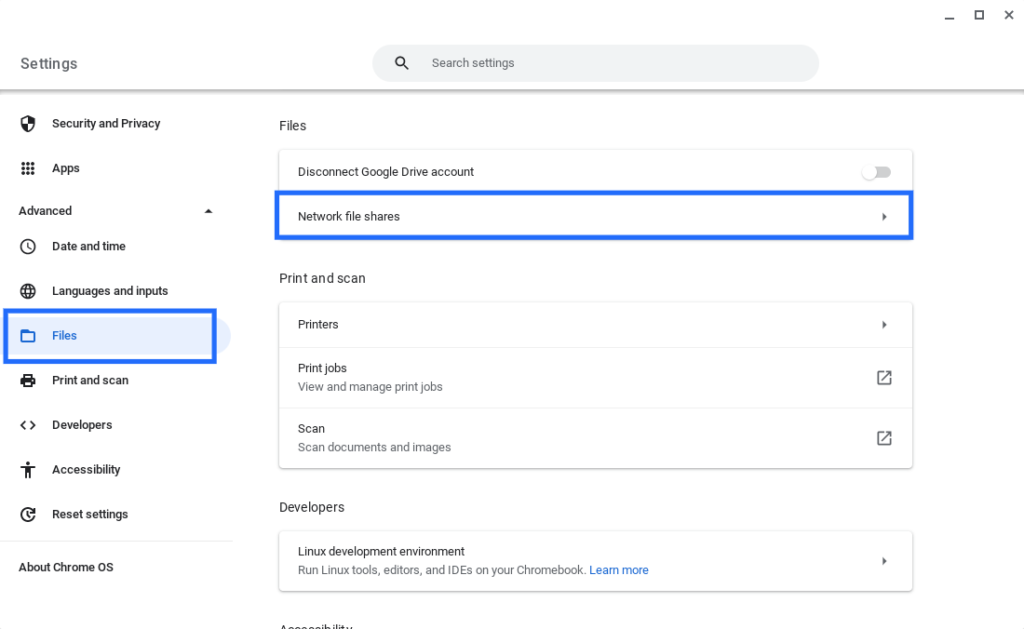
With that done, you can now try to mount your shared network folder on your Chromebook. To do that, open Settings > Files > Network file shares > Add file share.
Under File share URL, enter the network full path to your network shared folder in either Windows or Linux Formats. The Windows format looks like \\HOST\SHARED-FOLDER-NAME while Linux follows an SMB URL like smb://HOST/SHARED-FOLDER-NAME. You can also use an IP address instead of a hostname. In my case I entered smb://192.168.100.3/vids. Now 192.168.100.3 is the IP address of my Linux Machine, vids is the name of the shared folder I created using the Samba server. Chrome OS will try to scan the network for any shared folders, and if found, you’ll see the candidates in the dropdown. This will eliminate the need for you to enter the shared folder full path manually as demonstrated.
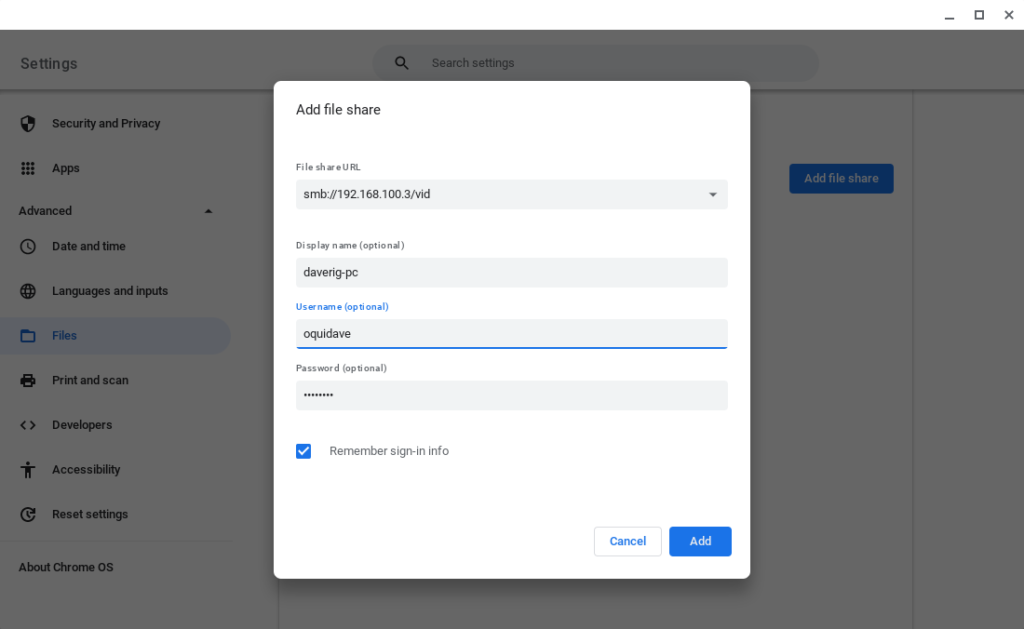
If the network shared folder is anonymous, you don’t need to enter the username/password. This is why these fields are marked as optional. However, if it’s authenticated, then you’ll need to enter NAS Drive or computer’s credentials which usually are the same as those you use to login to your computer. This all depends on how the network shared folder was set up.
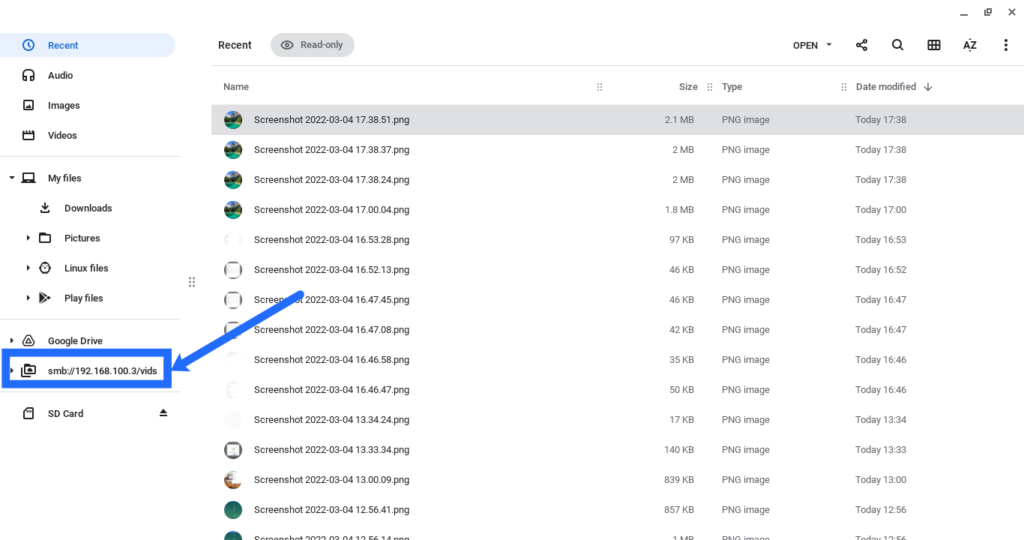
When the network shared folder is mounted on your Chromebook, open the Files App. You can now easily access shared files and folders from the side panel. You can copy and move files and folders between your local storage and the mounted network shared folder easily. Simply drag and drop or right click, select copy and then go and paste the content wherever you wish.
We’ve made a video tutorial that shows how to access Windows network shared folders, mac shared folders from your Chromebook. We also show how to connect to a NAS drive from your Chromebook. See below.
Alright, that’s how you can easily access a NAS drive, Windows network shared folder or Linux Samba share on your Chromebook. If you have any questions, let me know in the comments below.
Discover more from Dignited
Subscribe to get the latest posts sent to your email.


