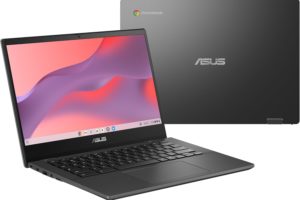
Chromebooks are a great alternative to regular PCs. They are very affordable, portable, and can do almost everything you’d need a laptop to do. Their lightweight and portability mean they are significantly smaller than regular PCs, which means smaller screens. Screen magnification is a powerful tool that can help you see and read text on your Chromebook in greater detail.
It enlarges the screen and allows you to zoom in on details that might otherwise seem illegible or hard to see properly. I will walk you through how to use screen magnification on your Chromebook. It’s easy, and it can make your screen a lot easier to see.
Adjusting browser zoom
To magnify the contents on your browser;
- Open your browser and navigate to the website you would like to view.
- Hold ctrl plus the + key. Keep pressing that until you get a magnification of your liking.
To zoom out, hold ctrl plus the – key and keep pressing until you get the magnification you need. If your browser is set to anything other than the default magnification, a magnifying glass will appear on the Address bar. Click on this button plus the onscreen +/- buttons to adjust the zoom level.

To reset back to default, press the onscreen reset button or simply press ctrl + 0.
Make everything on the Chromebook bigger
When adjusting the browser magnification, the changes made apply to the browser only. If you want to make everything on your Chromebook screen larger, all you need to do is add the shift key to the mix.
Press ctrl plus shift plus + to magnify everything on the Chromebook. To zoom out, press ctrl plus shift plus –. Press ctrl plus shift plus 0 to reset.
Related Article: How To Easily Customize the Shelf on a Chromebook
Full-screen magnifier
What happens if the size of the browser is still not large enough even after magnifying? You can use Chromebook’s full-screen magnifier. This can be accessed either through the accessibility settings or by pressing the keyboard shortcut ctrl + search + m.
- Head over to the Chromebook settings and then search for Accessibility in the search bar.
- Click on “Manage Accessibility Features,” then go to the display section. From here, you can explore and turn on different magnification features.
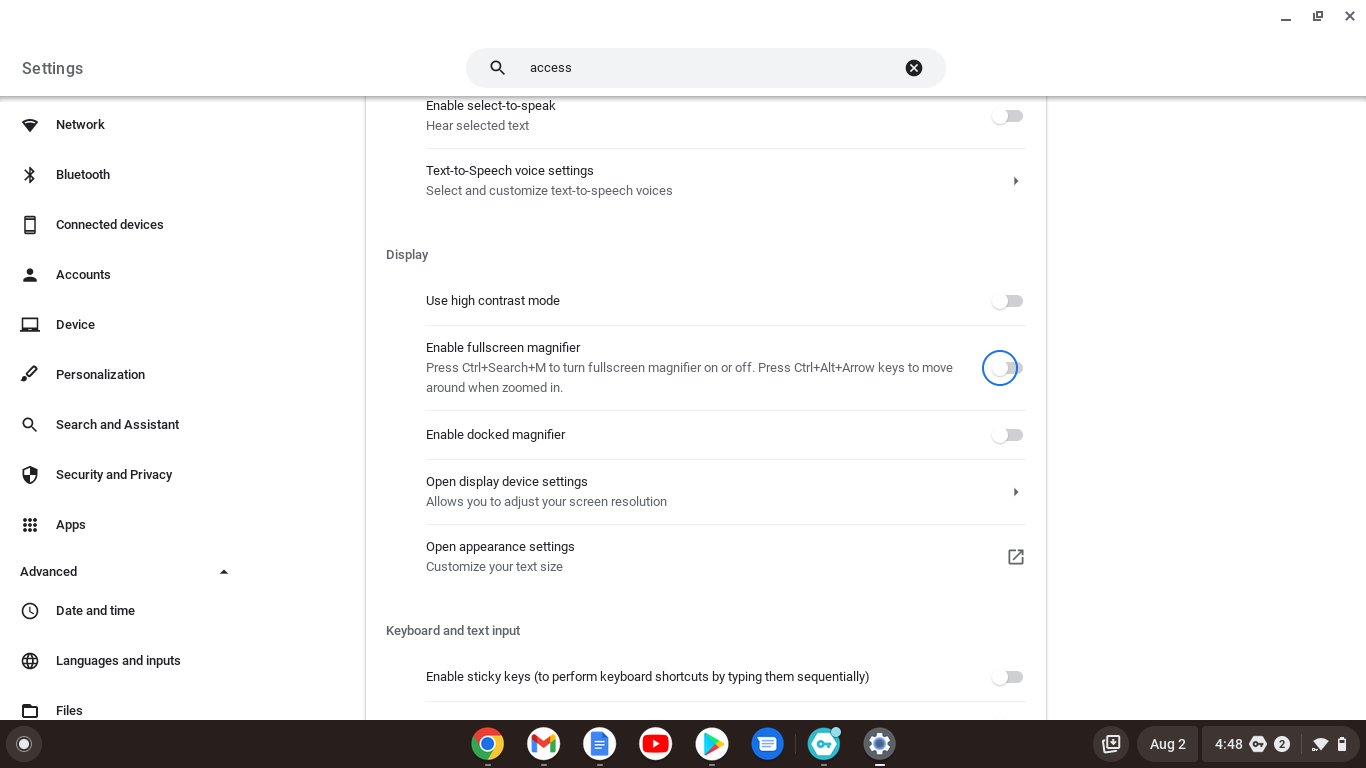
- Select “Enable Full-screen Magnifier,” and the whole screen will zoom in. Use your mouse to pan around the screen and control what you see.
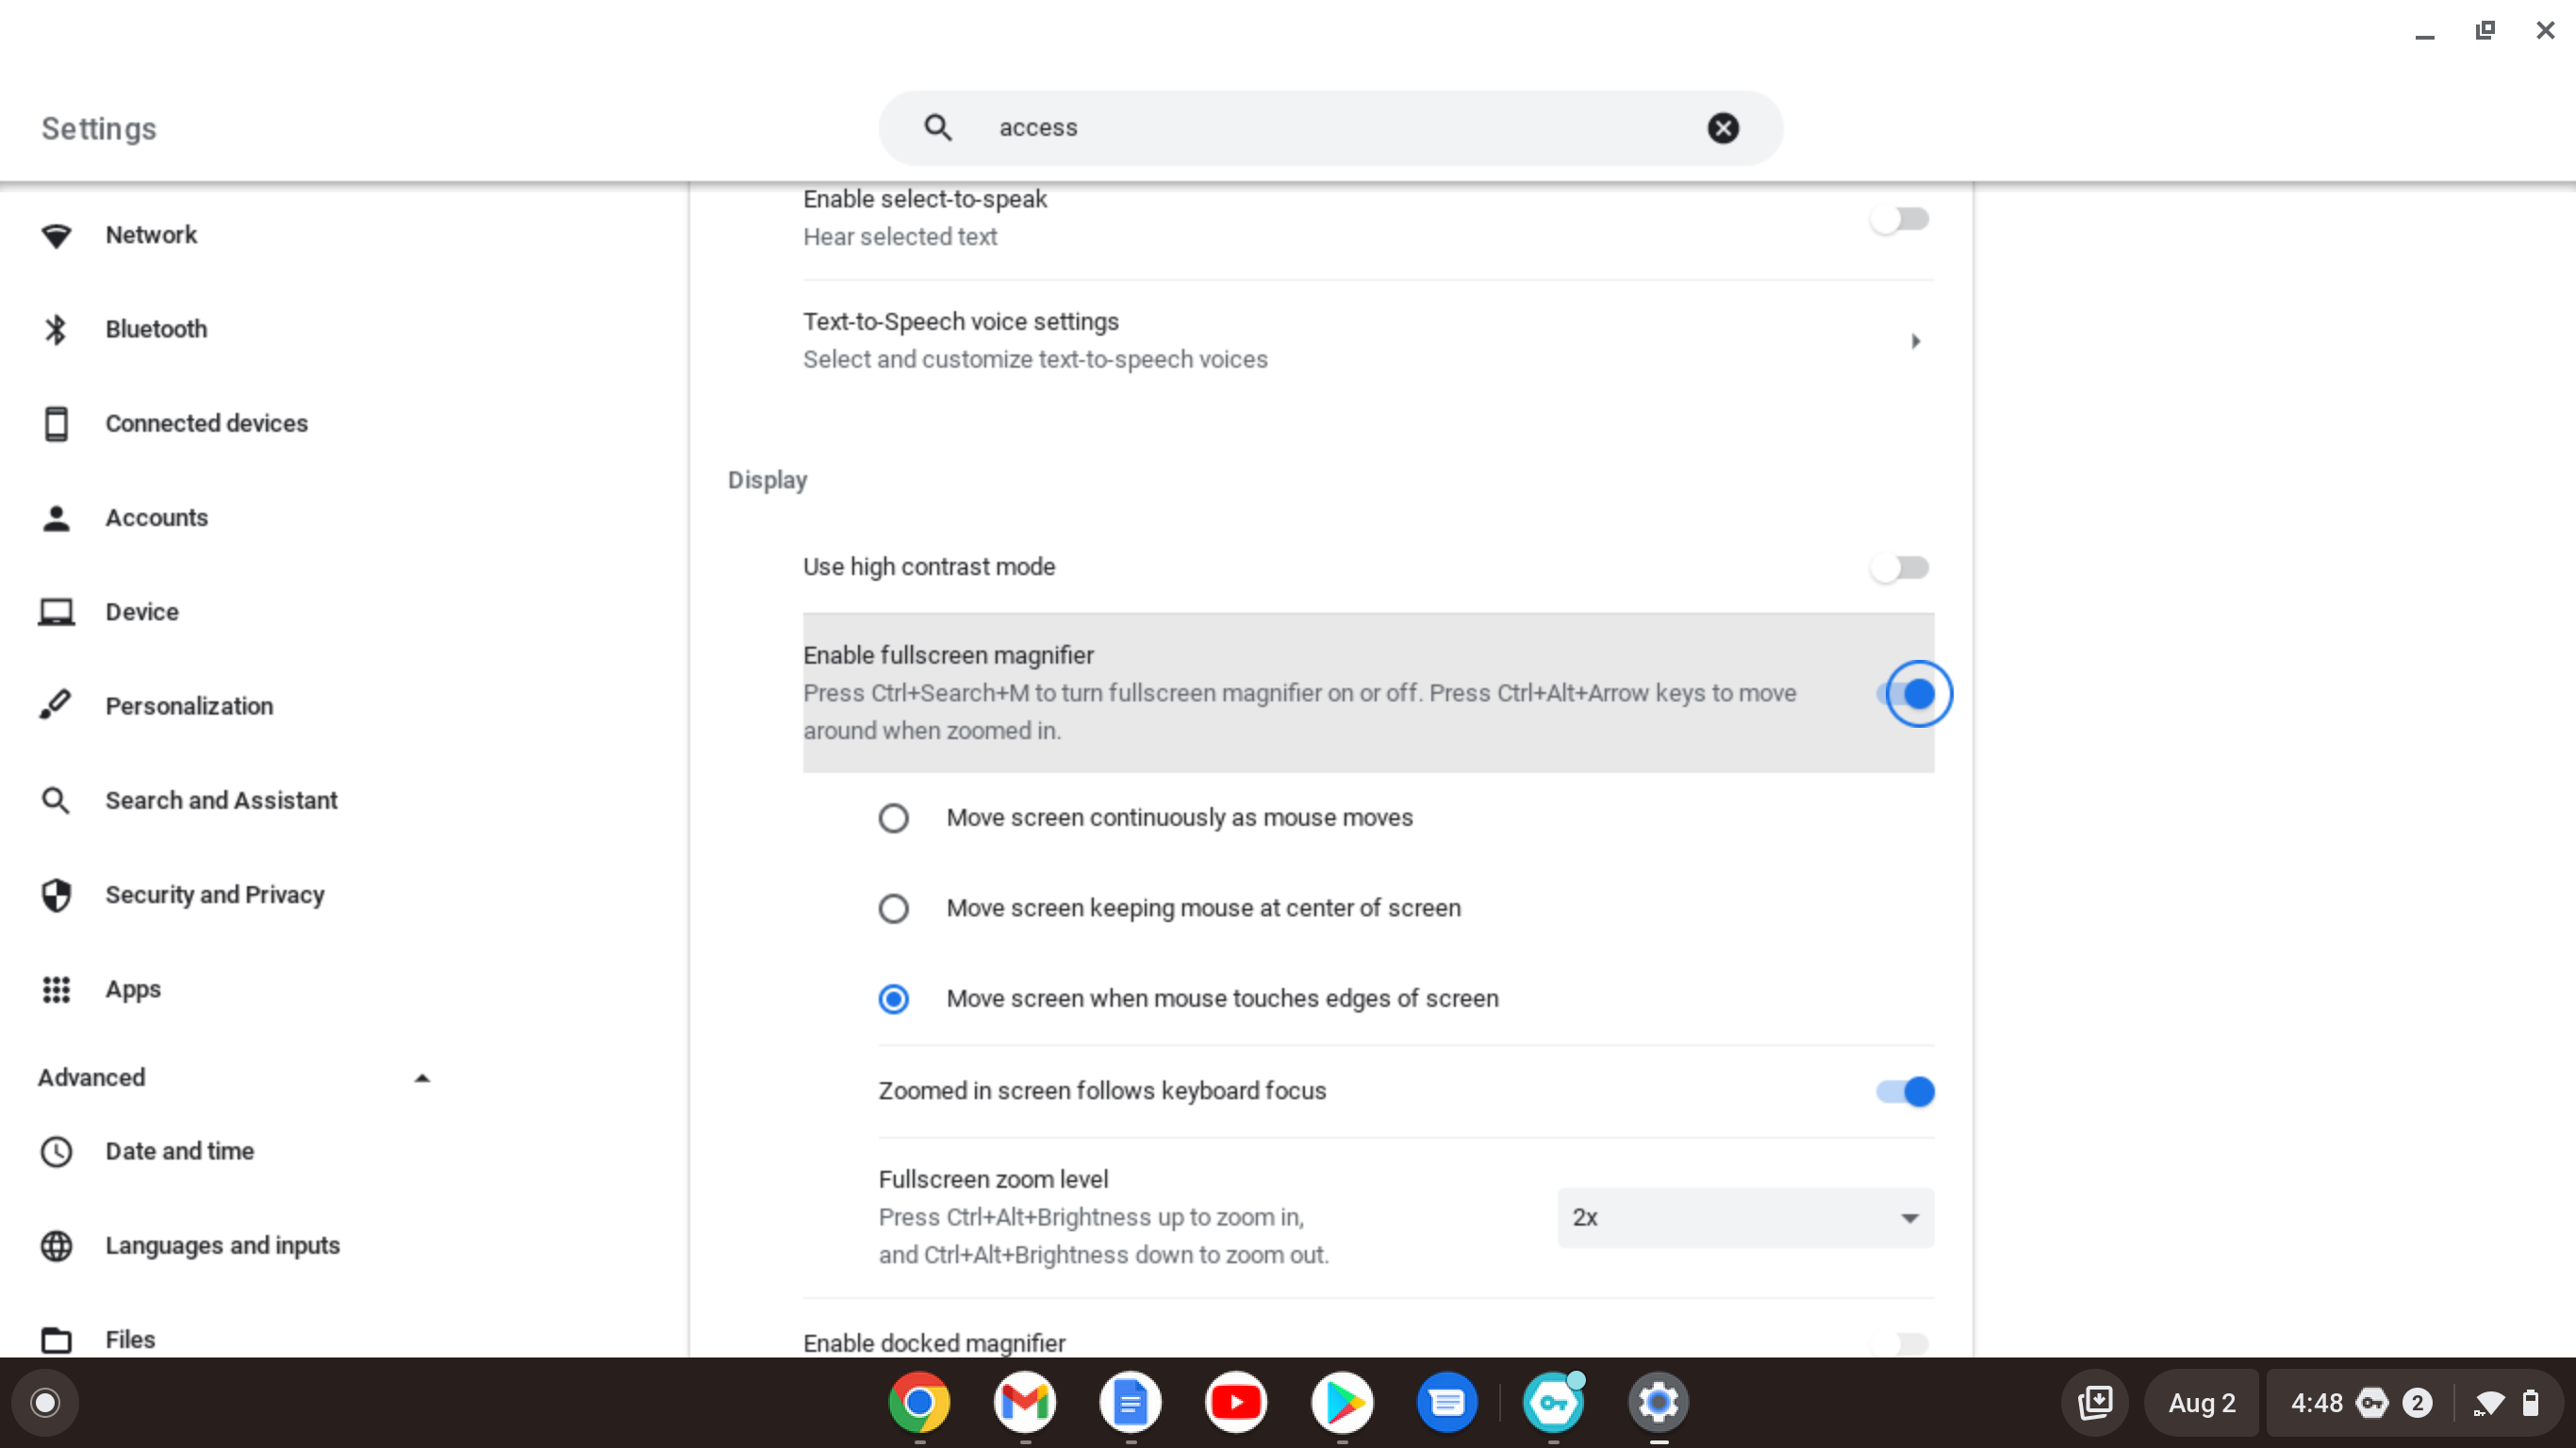
- Use the dropdown menu in the accessibility setting to adjust the zoom level up to 20x.
- To turn the full-screen magnifier off, either toggle the button off or press ctrl + search + m.
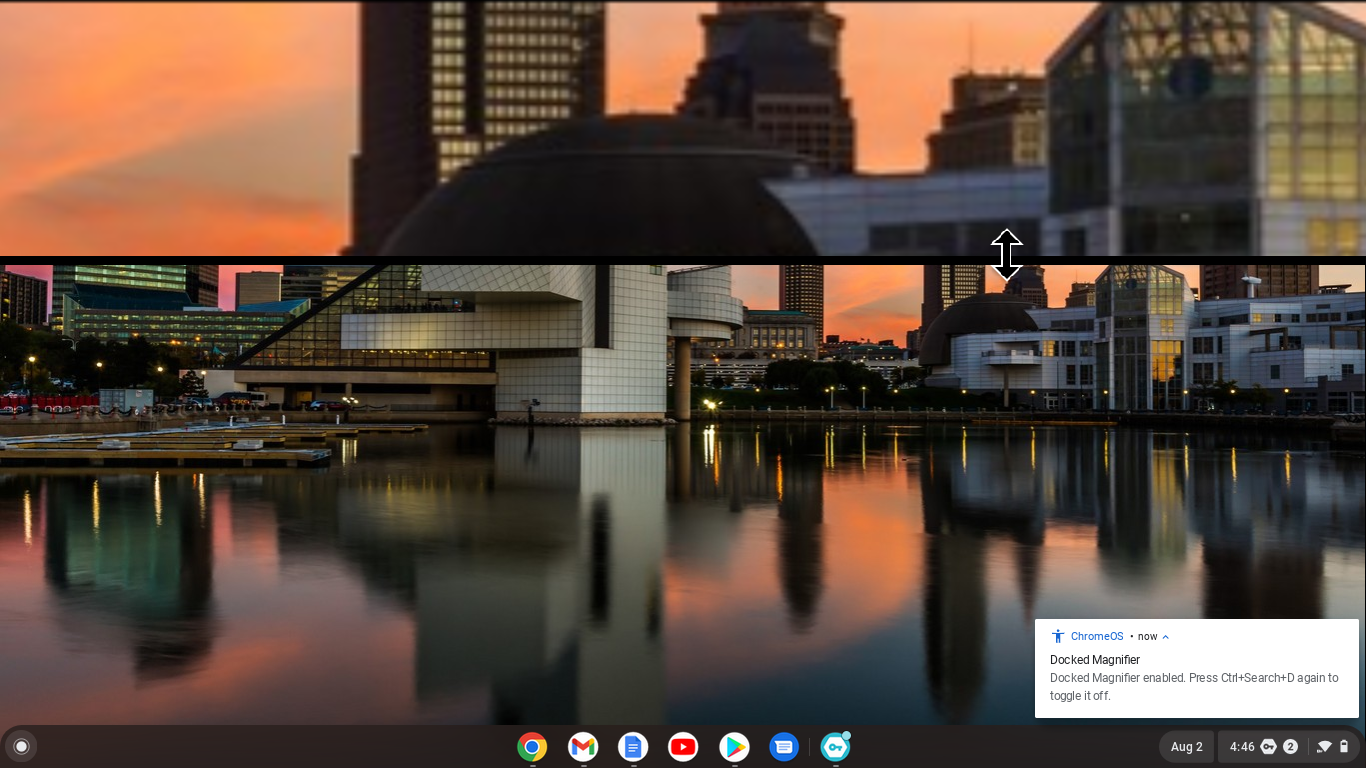
Docked magnifier
This is different from the full-screen magnifier in that it takes the top one-third of the screen as a magnified region and then resizes what’s there to fit into the bottom two-thirds. You can turn on the docked magnifier through Accessibility settings or by pressing the keyboard shortcut ctrl + search + d. Press the shortcut again to disable the magnifier.
Screen magnification allows us to see objects on the screen in greater detail than we might otherwise be able to. It’s like your own personal microscope that you can use to examine microscopic items. This article shows you how to configure your Chromebook for magnification. Please let me know in the comments section below if you have any questions.
About Victor Immanuel Oloo
Victor Immanuel Oloo is a tech writer based in Kampala, Uganda, with extensive experience in web 2.0 technologies, social media, and digital marketing. He covers the latest in mobile apps, smartphone reviews, and tech news, offering insightful analysis on the ever-evolving tech landscape. Victor’s deep understanding of both local and global trends provides readers with relevant, informed perspectives on how technology is shaping our world.
Discover more from Dignited
Subscribe to get the latest posts sent to your email.