Chromebooks don’t have cameras as advanced as expensive laptops, but you can still take good photos on them. If your work, for example, involves a lot of video calls and you can’t afford an external webcam, you can still tweak the Chromebook camera app and work like a pro.
Chromebooks come in different forms. Some have only the front camera, while others have a front and back camera. If you want to take photos and videos with your Chromebook, you’ll want to learn about the different camera and photo settings you can use to get the best quality images possible.
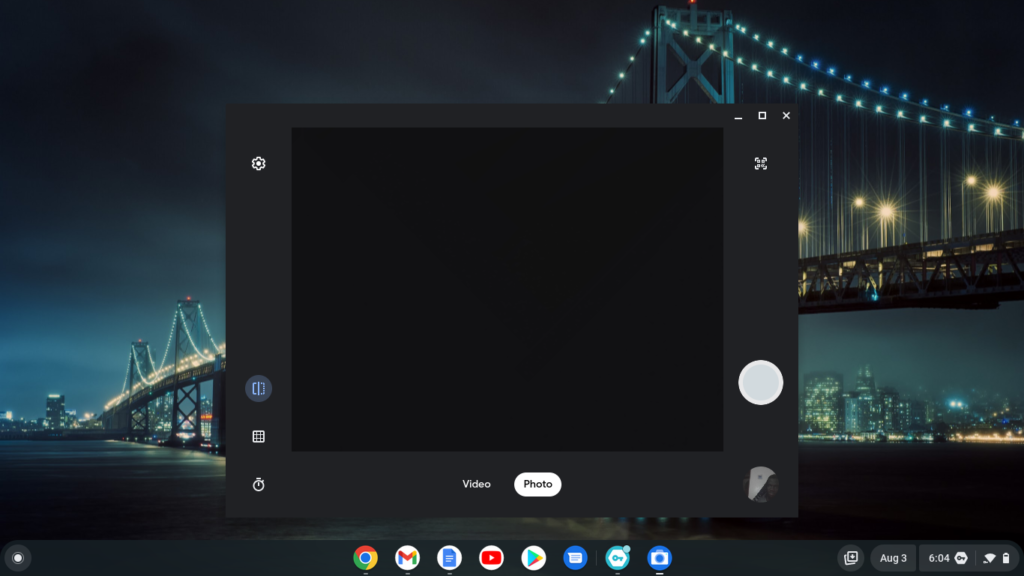
Opening the camera app
Chromebooks have a default camera app, but you can also download a third-party app from the Google Play Store. These third-party apps normally come with advanced settings and editing options. Regardless of the camera app you are using; you can open them the same way.
- Click the launcher icon at the bottom left-hand side of your Chromebook screen.
- Scroll to the camera app and then double-click it to open.
- You can also search the camera app using the Everything Button and double-click it to open.
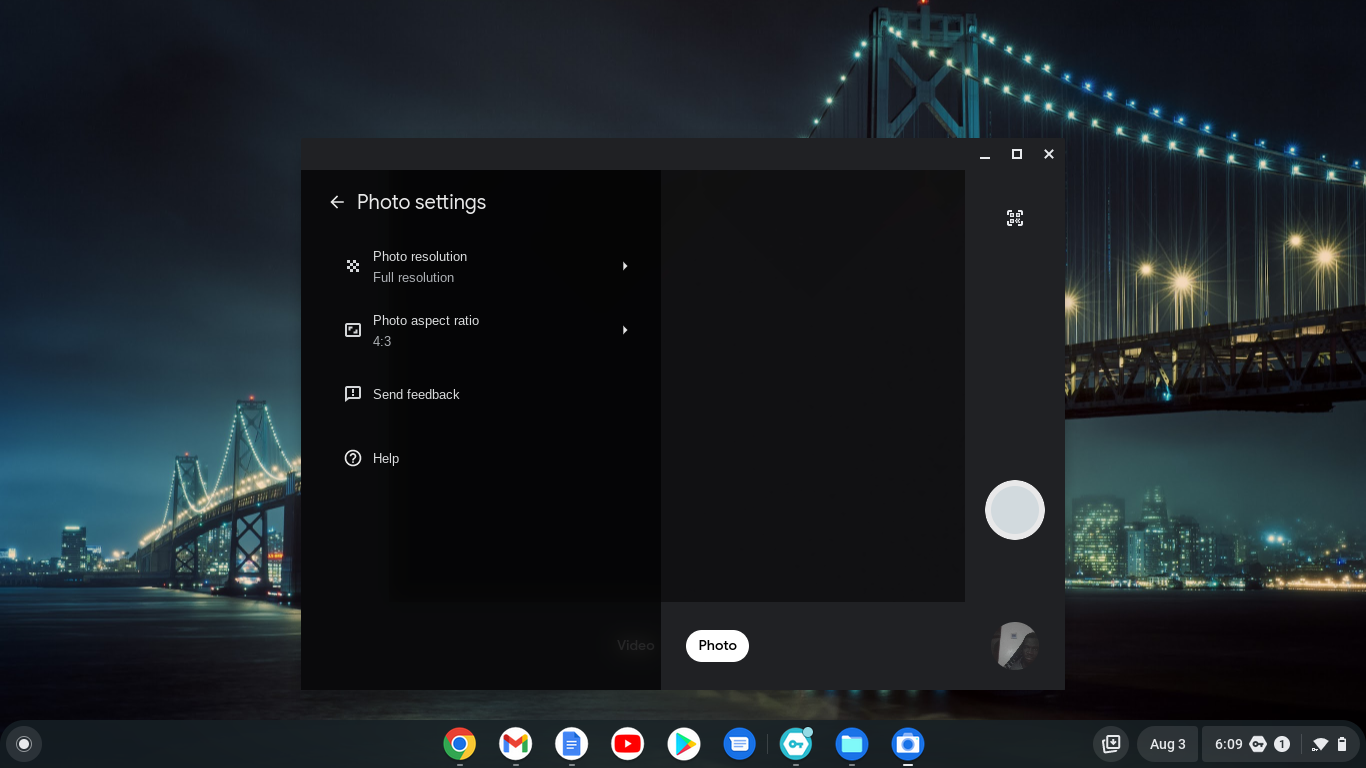
Change Camera Resolution
In simple terms, the camera resolution means how big your camera’s pictures can be before they start looking bad. The higher the resolution, the better. For Chromebooks with both front and back cameras, you will have to change the camera resolution separately. The process is the same for all cameras:
- Open the camera app and click on the settings icon on the left side of the camera app
- Click on photo resolution and select the option you want for your photos.
Using Gridlines in your Camera App
Gridlines help you position different aspects in your photo to come up with a great photo. The ideal position to position your object before taking a photo is where two gridlines intersect. You can choose a 3X3 grid, 4X4 grid, or golden ratio grid.
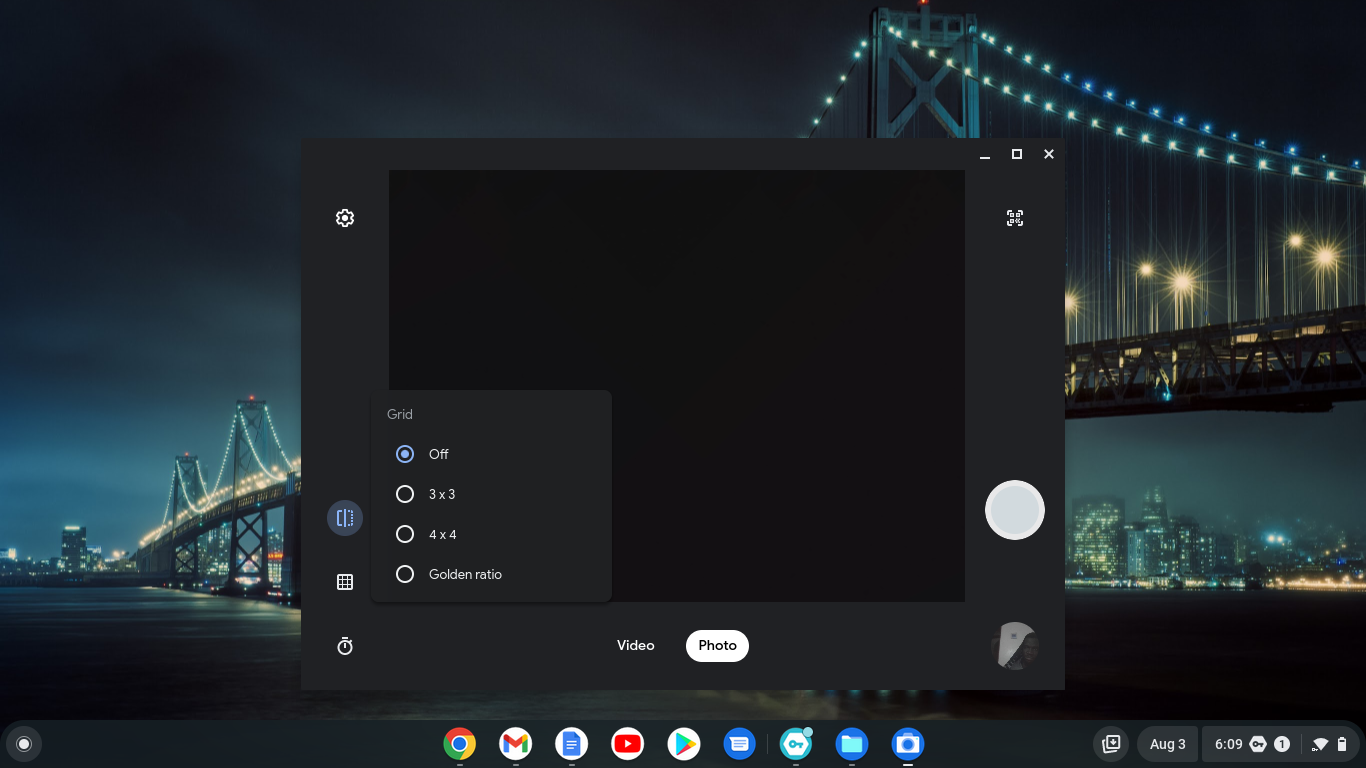
Click the grid icon on the left-hand side of the Camera app and select the gridline option of your choice and snap away.
Related Article: Turn your Smartphone camera into a Full HD Webcam with the Camo App
Using the Camera app timer
The timer can come in handy if you are taking photos of yourself and need time to pose before the photo can be taken.
- Click the clock icon on the bottom left-hand side of the camera app
- Select your timer duration; either 3 or 10 seconds.
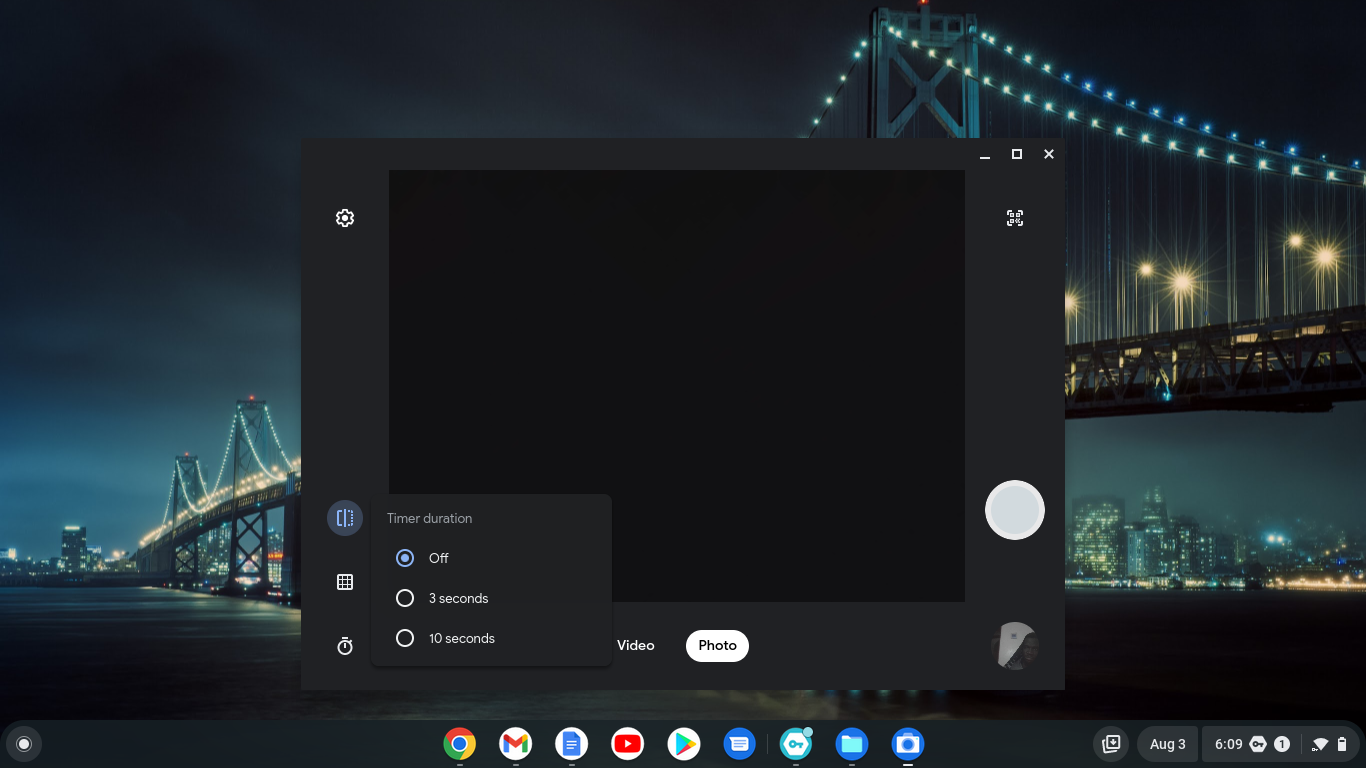
The next time you take a photo, it will count the number of seconds you set before it takes the picture.
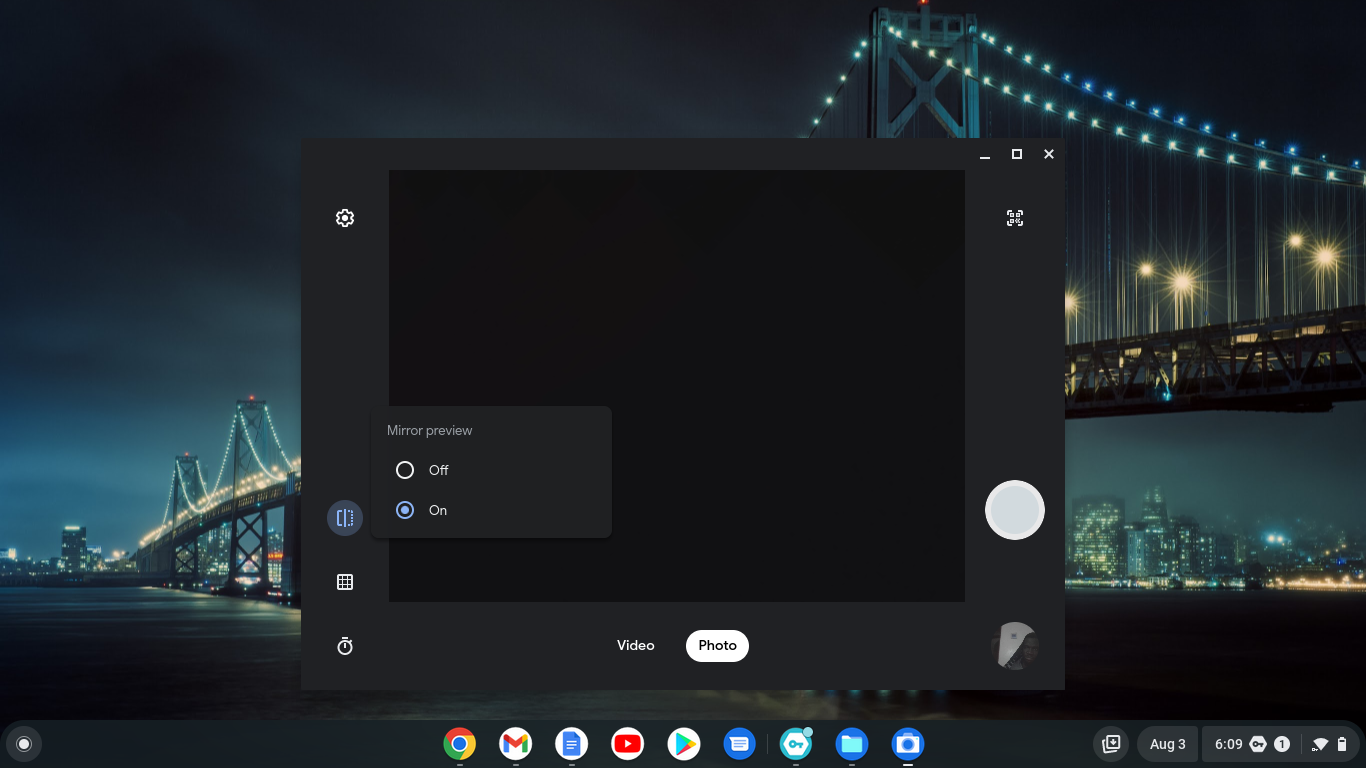
Mirroring using the camera app
This can be used to flip your photo left or right. You can experiment with it and see which side gives you a better picture.
- Click the mirror icon on the left-hand side of your camera app
- Turn mirroring on or off and see which one better suits your photo.
Why is my Chromebook camera app taking blurry pictures?
In case the pictures you take using your Chromebook camera are blurry, try out these hacks:
- Gently wipe the camera to remove any oil or dirt covering it.
- Remove any protective cover on the camera so that the lens isn’t covered by anything.
- Reduce the zoom level if your camera is zoomed in.
- Improve the lighting in your setup to have sharper pictures.
To sum it up, Chromebooks can capture practical photos good enough for basic needs like a quick zoom call. You can make the most of it without spending more on an advanced camera by tweaking a few camera settings. If you have questions about Chromebook cameras, let me know in the comments section.
Discover more from Dignited
Subscribe to get the latest posts sent to your email.