Technically, all electronic devices, gadgets
Majority of smartphone manufacturers are increasingly adding support for “Blue Light Filter” on their products as a built-in feature, and it’s already quite popular. What a sizable amount of Windows PC users aren’t cognizant of is the fact that the Windows 10 OS also has a similar feature built-in. Dubbed “Night Light“, the feature debuted on the Windows 10 OS about 2 years ago with the Creators Update. When activated, Night Light tones down the intensity and harshness of the light emitted from your screen and displays warmer
Here’s how to activate the Night Light feature on your Windows 10 PC. We’d also walk you through how you can automate the feature to be automatically activated at certain periods of the day.
How to Enable Night Light on Windows 10
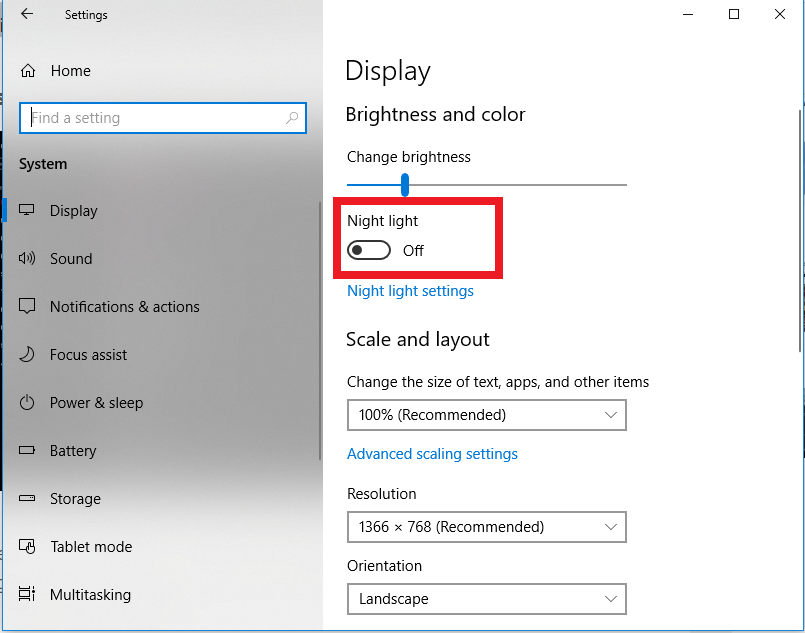
Open the Windows 10 Settings menu (Windows key + I)
Subsequently, navigate to System >> Display
On the Display page, toggle the Night Light button “ON”. If you don’t find a “Night Light” option or button, you should update your PC’s OS to the latest version. If, on the other hand, the Night Light option is grayed out, you should update your PC’s Display driver. Check out this guide on updating Drivers on Windows 10.
When you toggle on Night Light, an overlay of warmer color is displayed on your screen, toning down the intensity of blue light and blue light emission.
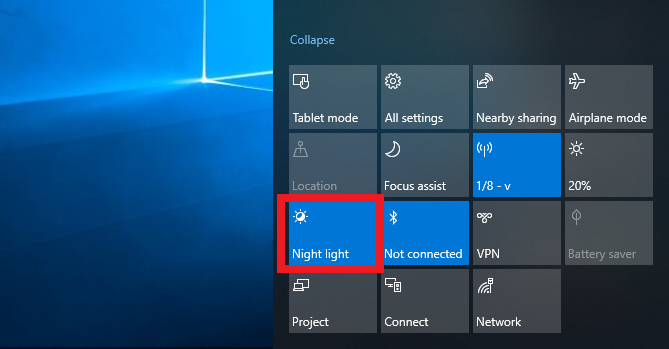
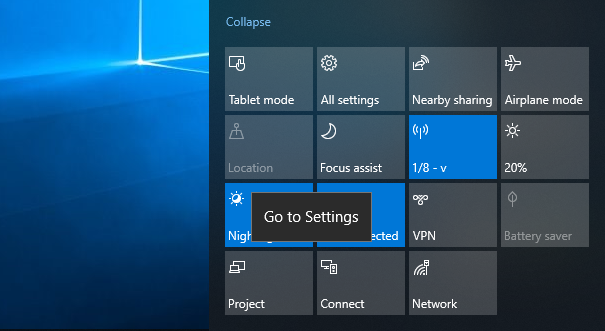
Alternatively, you can easily turn on Night Light from your PC’s ‘Action Center’. Tap the Action Center icon at the bottom-right corner of your PC’s screen. Click the “Night Light” option. If the Night Light option isn’t in the Action Center, you should update your PC’s OS to the latest version.
Automating and Configuring Night Light on Windows 10
Windows 10 also allows users
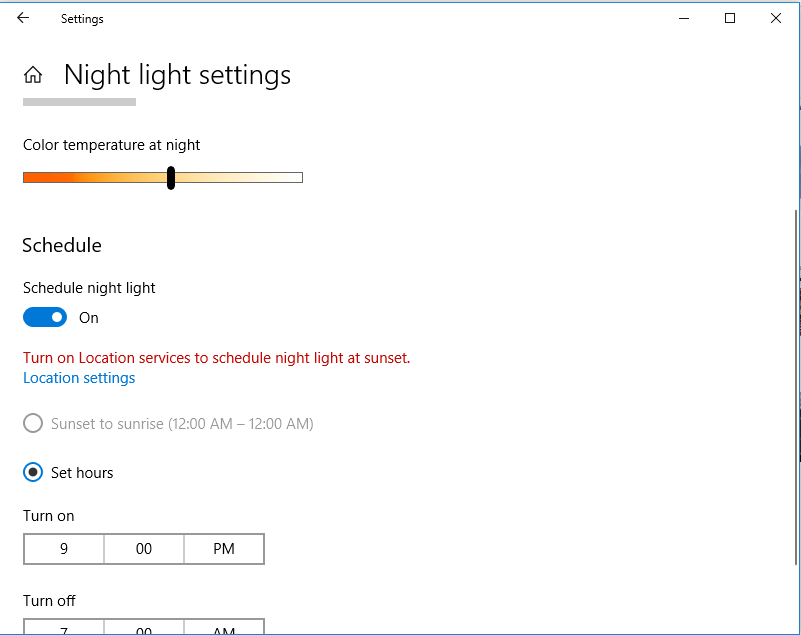
Navigate to Start >> Settings >> System >> Display >> and click Night light settings. You can also right-click on the Night Light icon in the Action center and tap “Go to Settings“.
On the settings page, there’s a slider which you can use to Adjust Color Temperature. When you move the slider forward, the color on the screen looks a lot warmer. Moving it backward makes the screen color cooler. The color changes as you drag the slider, so you can see what each brightness levels look like and choose the best suited.
There’s also a “Schedule Night Light” button. Toggle it on to manually configure the time (in hours and minutes) when you’d want the Night Light should go on and off. You can also schedule according to sunrise and sunset. Here, your PC will automatically detect your location and activate and deactivate Night Light based on the movement of the sun in your geographic location. To schedule according to sunrise and sunset, ensure Location Services is activated on your PC.
Discover more from Dignited
Subscribe to get the latest posts sent to your email.


