Once upon a time, Chrome OS was this hardware-tied thing you could only use by purchasing a Chromebook with Chrome OS already factory installed. On the other side of the fence, Neverware, an upstart New York company offered a Chromium OS(CloudReady), a workaround that brought Chrome OS-like experience to older computers.
It didn’t take long for Google to snatch up Neverware. Neverware’s CloudReady forms the basis of Chrome OS Flex and thus our topic for today. Google Chrome OS Flex promises to breathe new life in obsolete laptops and desktops collecting dust in computer graveyards in attics and basements. These obsolete computers are more often than not quite serviceable with a little care.
All right then, it’s time to dust off your old Windows or Mac and make it whole again. Granted, there might be some compatibility issues with some computers. Google has a whole bunch of certified device models verified to work. Some have minor or major issues and the rest just haven’t been tested. Google actually recommends slapping Chrome OS Flex on a flash drive and seeing how it goes. And that’s just we will do.
Minimum device requirements:
- Architecture: Intel or AMD x86-64-bit compatible device
- RAM: 4 GB
- Internal storage: 16 GB
- Bootable from USB drive
- BIOS: Full administrator access.
Google cautions that Intel GMA 500, 600, 3600, and 3650 graphics hardware made before 2010 might cause performance hiccups. This shouldn’t stop you from experimenting.
Install Chromebook Recovery Utility extension

If you don’t have Chrome browser already installed, this is your cue. Once you’re done, install the Chromebook Recovery Utility extension from the Chrome Web Store.
Unlike conventional operating systems, Chrome OS and indeed Chrome OS Flex do not provide an ISO. Not at anytime do we get a glimpse of the size or contents of Chrome OS Flex. Once installed on a flash drive, the OS doesn’t even register on my Windows machine.
Go to Extensions icon and launch the Chrome Recovery Utility.
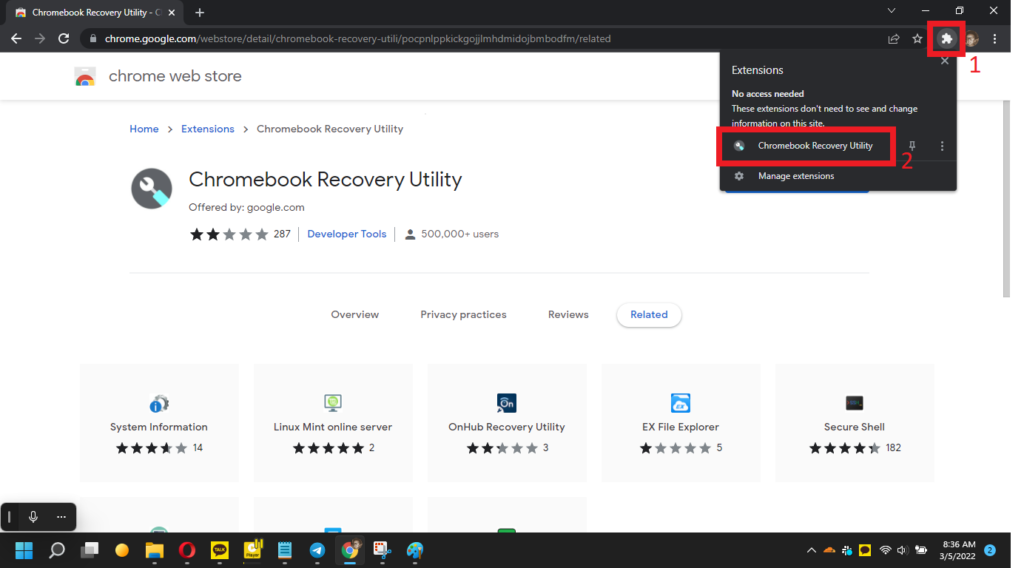
In the new Windows that pops up, Click on Get Started. Select “a model from a list” option. In place of Manufacturer, choose Google Chrome OS Flex and for Product, select Chrome OS Flex (Developer-Unstable)

Insert your USB flash drive or SD card and press Continue. Please note that USB 2.0 drives might pose some challenges booting up once you install on them. We used a 32GB SanDisk Ultra 3.0 flash drive.

Click on Create Now to create a recovery image. All data and partitions on your recovery media will be deleted.

Once the recovery media is ready, it won’t be recognizable on Windows and might even ask you to format the flash drive. Please don’t.
Restart your computer and immediately it boots up, press the boot menu key. Depending on which PC model, the boot menu key might be For a PC, the boot key can either be F1, F2, F9, F12, and even Delete, or Esc. On my old HP ProBook 450 G4, it’s F9.
Chrome OS Flex: What’s missing
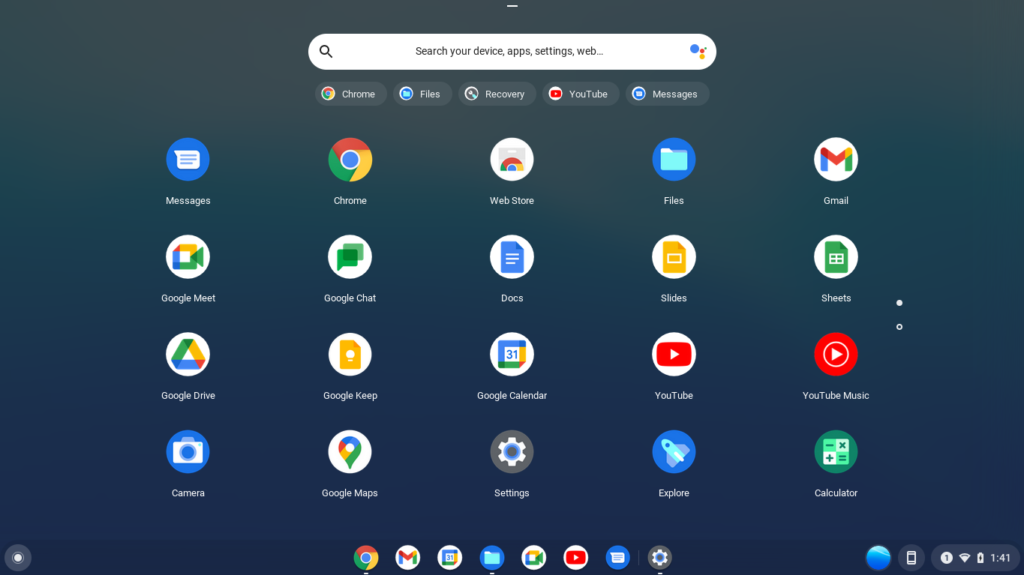
There’s a clear distinction between purchasing a fully-fledged Google Chrome OS and installing Chrome OS Flex on a old computer. For starters, Chrome OS Flex is a still in development stage and is clearly named ‘Developer Unstable’. In other words, Chrome OS Flex is still a ways to go to and hence shouldn’t be used as your main driver.
If you have followed this tutorial and installed Chrome OS Flex successfully, you will notice that a major component of Chrome OS is missing; Playstore. For a student PC, Playstore might in all honesty be a distraction, but for everybody else, it’s quite an inconvenience.
Discover more from Dignited
Subscribe to get the latest posts sent to your email.


