Chromebooks aren’t just great for typing up classwork and sending emails. You can also use them to open and edit photos! This certainly won’t replace your desktop or laptop since Chromebooks do not support many professional photo editing apps available on macOS and Windows. However, it does mean that a Chromebook can do more than most people think.
Learn how to open and edit photos on a Chromebook with this step-by-step guide. We’ll look at the different options available such as using the in-built tools plus third-party tools.
Editing photos in the Gallery app
The Gallery app comes pre-installed on a Chromebook, and it helps you view the photos and videos stored on your Chromebook. This app also comes with an editing mode that you can use to;
- Crop a photo
- Adjust the brightness of a photo
- Resize and rotate a photo
- Annotate a photo
- Rescale a photo
To edit a photo in the Gallery app;
- Open the Files app and then double click to open the image you want to edit. By default, this image will be opened in the Gallery app.
- You will see different editing options on the top right-hand side of the window. The options include; crop/rotate, rescale, and lighting filters.
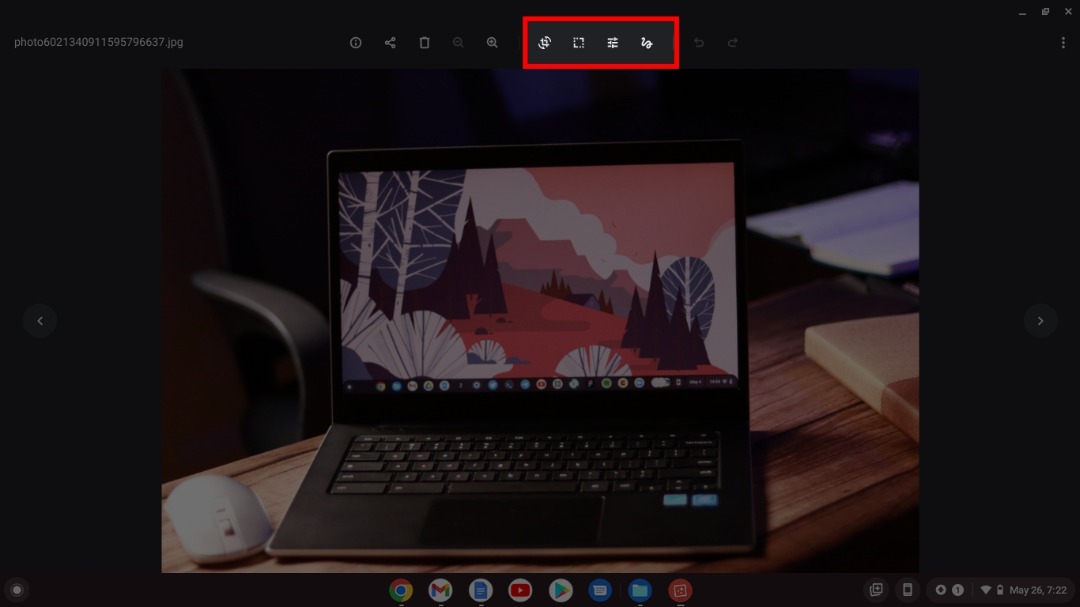
- To crop the photo, click on the crop option and drag the photo’s sides. You can also crop it to one of the pre-determined sizes.
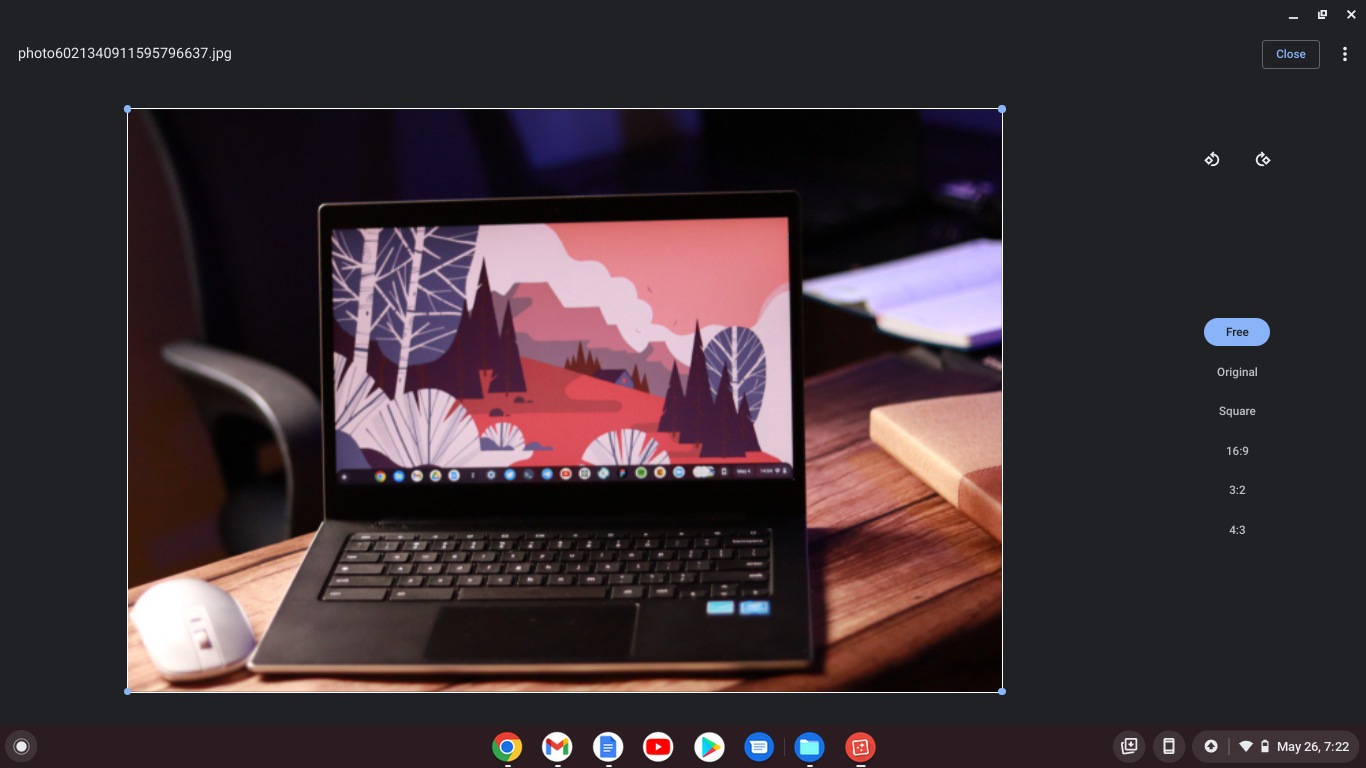
- You can press ctrl + z or the back arrow to undo an edit made.
The changes made after editing a photo in the Gallery app will overwrite the original, so it is important that you save a copy of the photo first in case you do not like how the edit looks.
Related Article: Photoshop Web: Here’s What You Should Know
Editing photos in the Google Photos app
The Google Photos app, which many people use to back up their photos, also has an editing tool. Editing your photo in Google Photos gives you more control of the lighting and colouring than in the Gallery app. Google Photos also has a web-based version that works as seamlessly as the app.
To edit photos in the Google Photos app;
- Open the Google Photos app or website and open the photo you want to edit.
- Click on the sliders icon in the bottom bar of the window to enter Edit mode.
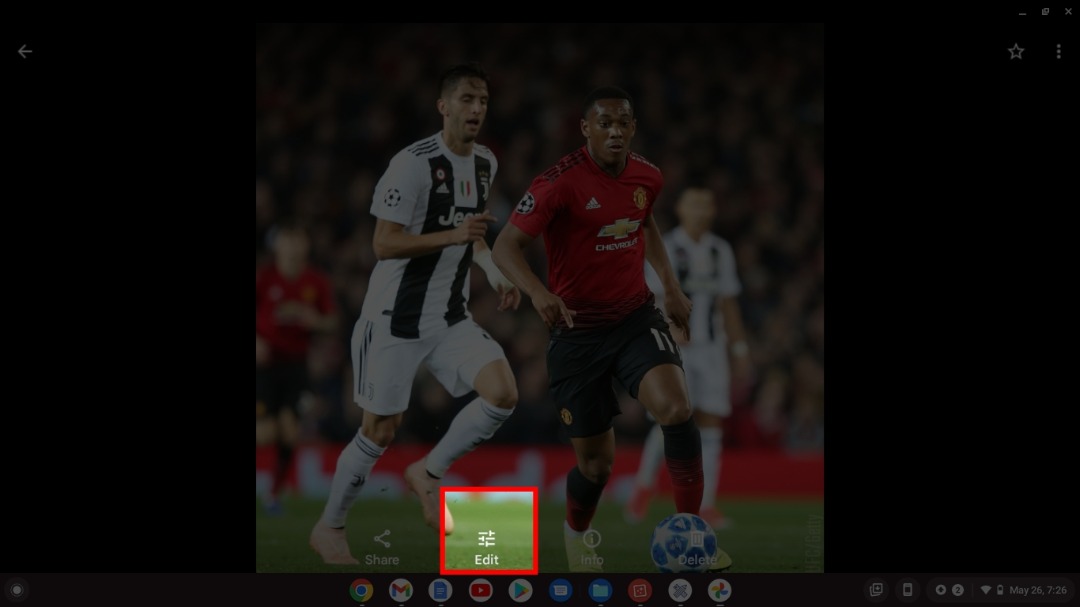
- You can select any presets to apply to your photo in the filters tab.
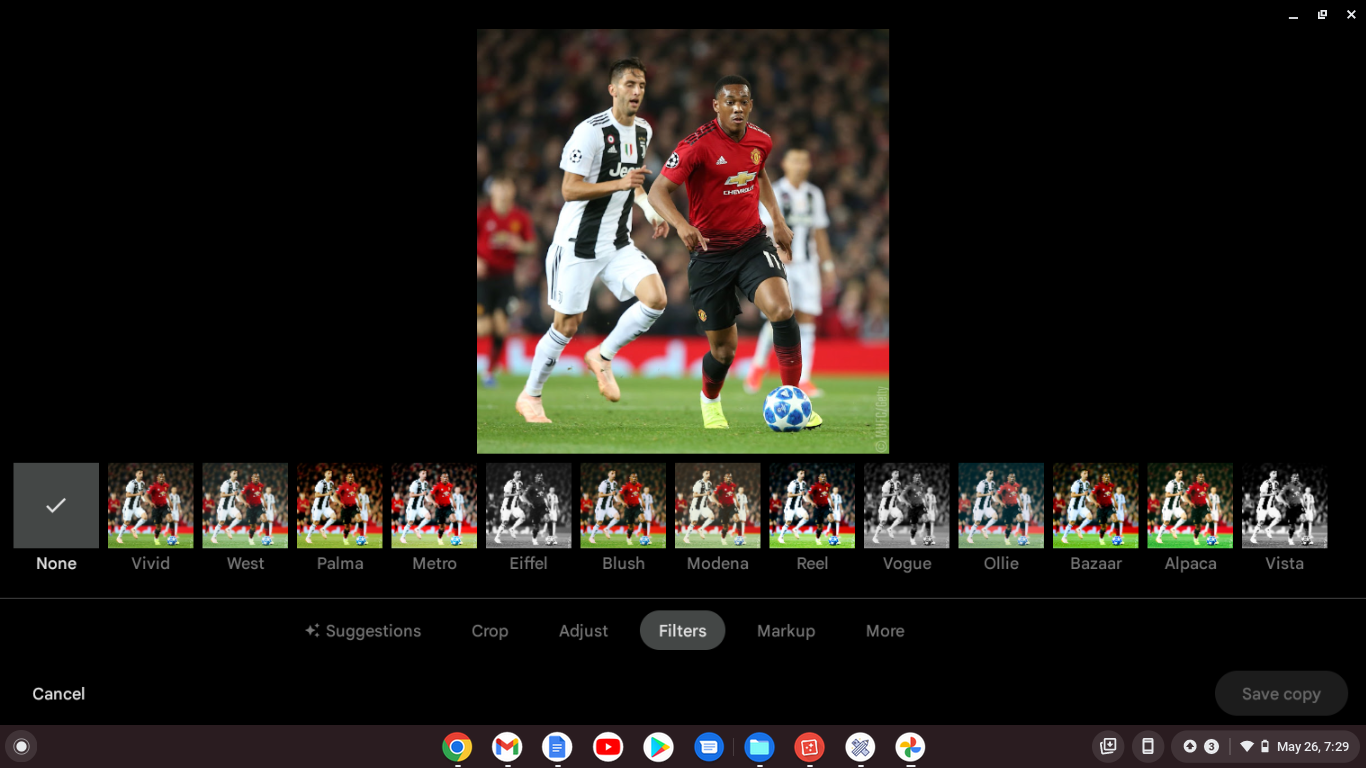
- Double click on any filter of your choice and use the slider below it to adjust its potency.
- You can also switch to the adjustments tab represented by the slider icon to edit the photo’s colours, contrast, and brightness.
- To crop or rotate the photo, select the crop/rotate icon.
Using third-party editing tools
There are several third-party options for editing photos on a Chromebook. You can choose to use Android photo editing apps, web-based editing tools, and Linux apps. Here are examples of some of the best photo editing tools to use on your Chromebook:
- Adobe Lightroom app for Android
- Canva with both app and web versions
- Snapseed app for Android
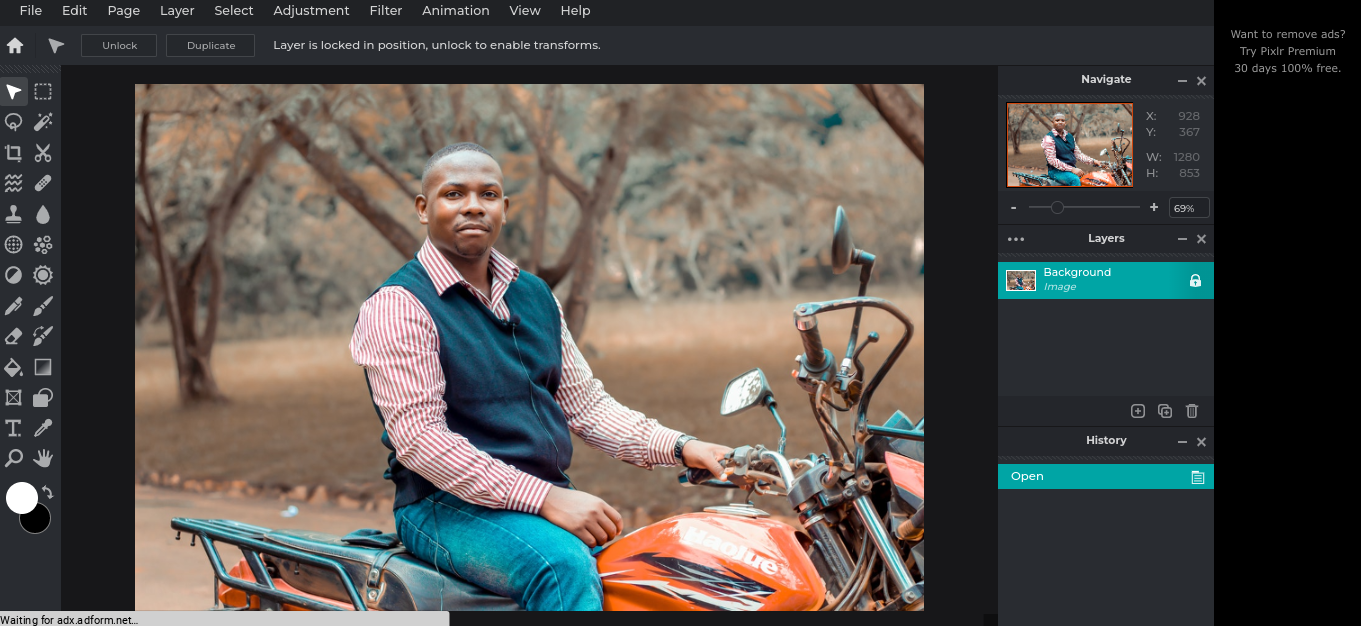
- Pixlr E web app
- Gimp Linux app
See Also: How to Set up Linux on your Chromebook
These third-party tools offer more options to edit your photos and have a high probability of giving you professional quality images. Which one you choose depends on what you need it for. Gimp, Pixlr, and Canva are great options for advanced graphic design, and Adobe Lightroom and Snapseed are great options to retouch your photos.
So, that’s it. Thanks to the built-in functionality, Android apps from the Google Play store, Linux apps, and web options, you can edit photos on a Chromebook. Some Chromebooks, such as the Google Pixelbook Go, have high specifications, making it possible to use more advanced image editing tools like Gimp.
Discover more from Dignited
Subscribe to get the latest posts sent to your email.


