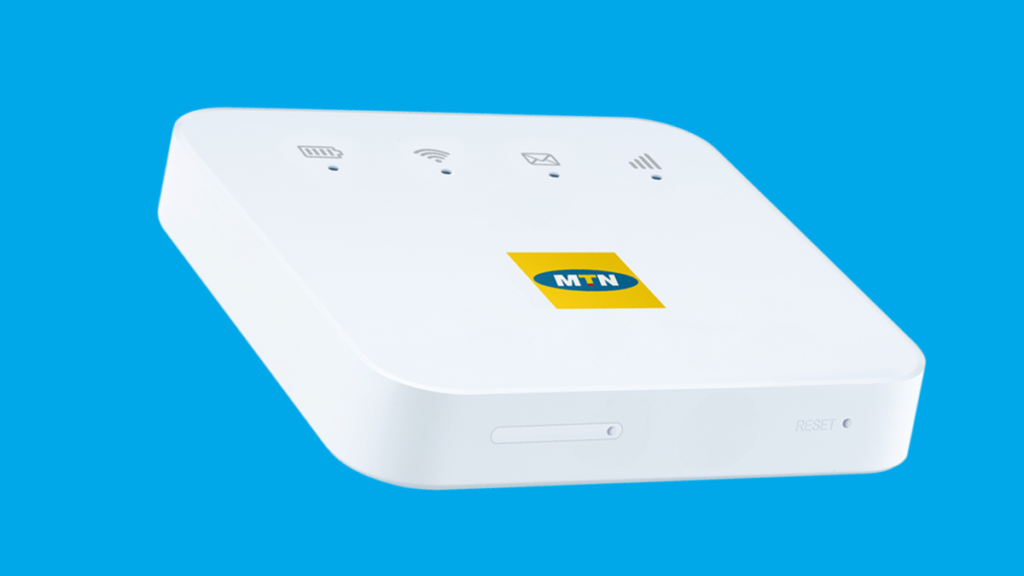
Having looked at the review of the MTN Wakanet Pocket MiFi sometime back. You may want to understand the web interface which acts as the device manager and how you can change default settings, tweak WiFi features, and get comfortable with the MiFi. Let’s learn how to configure and manage this MiFi in this article.
We shall learn how to set maximum devices, change default WiFi credentials, understand all the main features of the dashboard, see connected devices, access the web interface, and more. Let’s set the ball rolling.
Also Read: MTN WakaNet Pocket MiFi review: Keep your devices connected while on the Go for just Ugx 75,000
Before we continue, you need to switch on the device and connect to it. The WiFi SSID is the default Wifi name and WiFi Key is the WiFi password. These are behind the device on the sticky note. You don’t need to have data and am assuming you have already registered the MTN SIM Card from approved service centers.
How to access the web interface
At the back of your device, there is a sticky note with most of the information that we shall need to get started. Accessing the web interface is a straightforward process; Visit; https://192.168.1.1/ in your favorite web browser and you will get something like this;
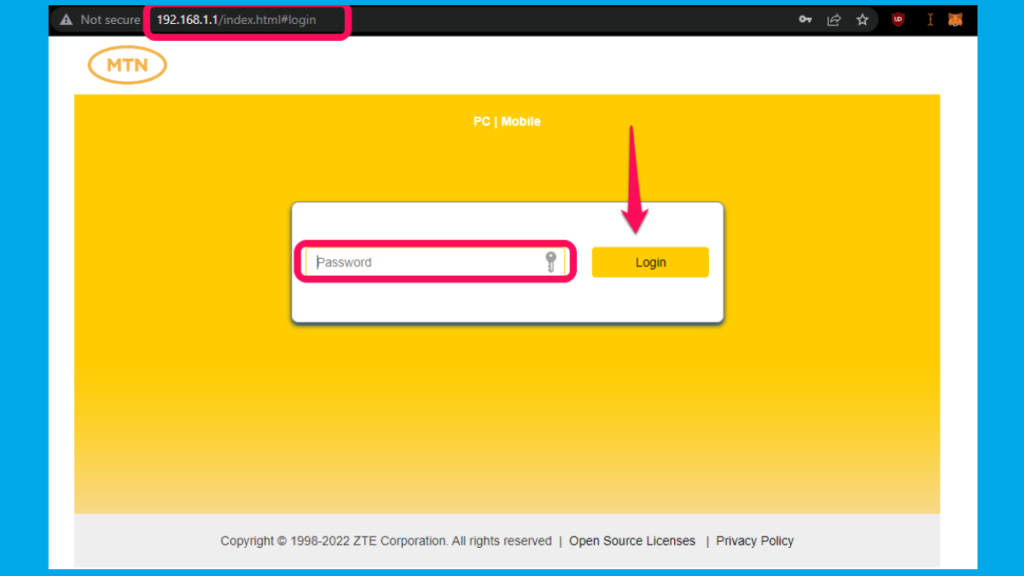
Enter the password; which is admin by default;
Change the default password for the device manager
Now to change the default password; Click on Modify Password; Enter the old default password, and enter the new one;
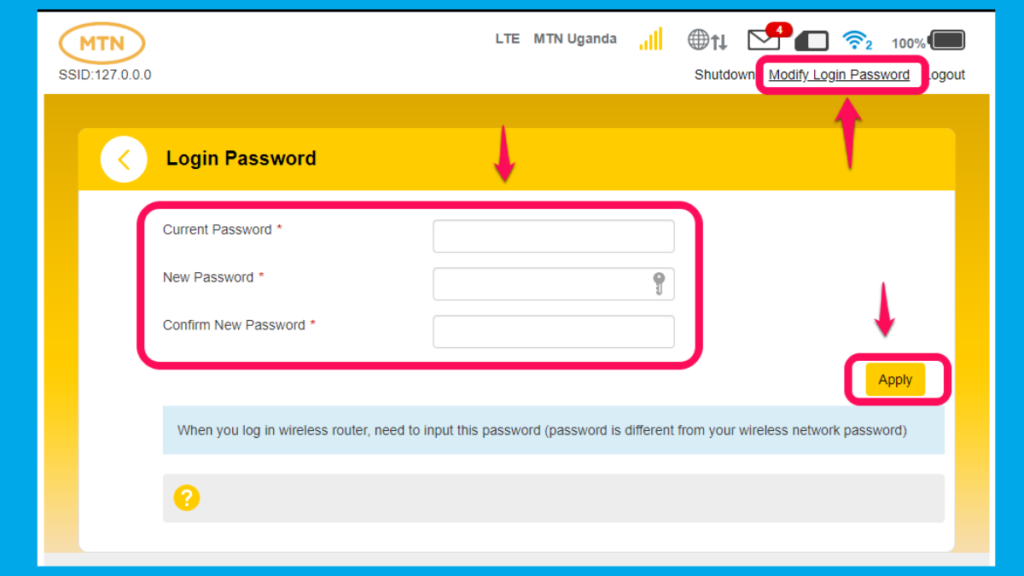
Please note, that you can only change the password not the device web interface IP address.
The Dashboard explained
The dashboard acts as the home page for the web interface of the device; It has six main sections as highlighted below;
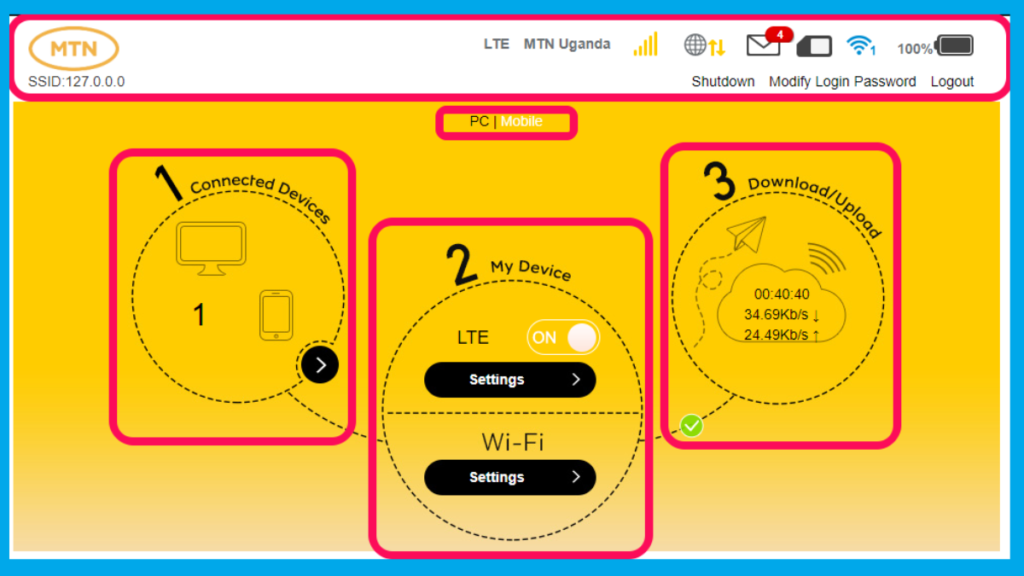
The first one is basically the nav/status bar with information about the device; battery percentage since no LCD screen, connected devices, network type, connection, and approved SIM card inserted. It also has the SSID name, (please note, that I have already changed mine to 127.0.0.0 as you can see from the screenshot above). It also has shutdown & log-out buttons.
The fields labeled 1,2,3 help you see connected devices, tweak wifi settings, and see the network speeds respectively. If you scroll down, you will see the following which is basically network status in detailed info;
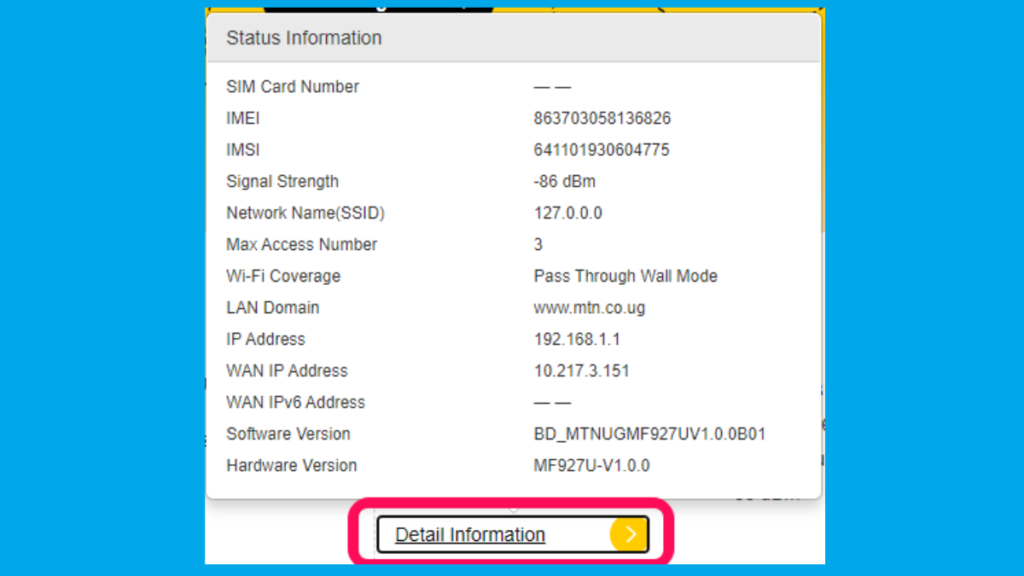
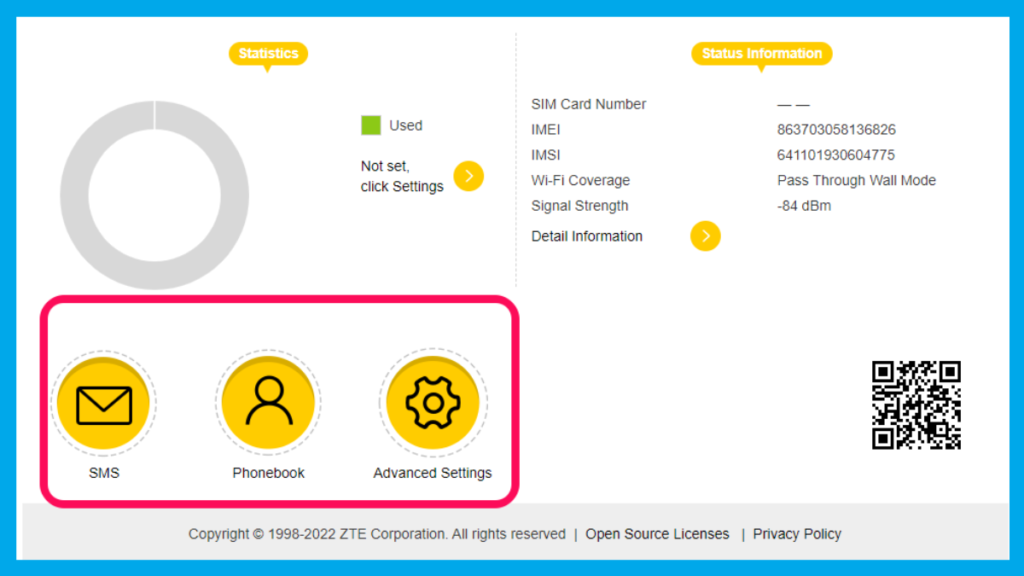
The other three options are for viewing SMS, creation of contacts, and advanced settings.
Change default WIfi username and password
The WiFi SSID name and password are different from the device manager credentials. Now, to change the default MTN_……. and a random WiFi alphanumeric Key; Visit WiFi Settings under field 2 from the dashboard;
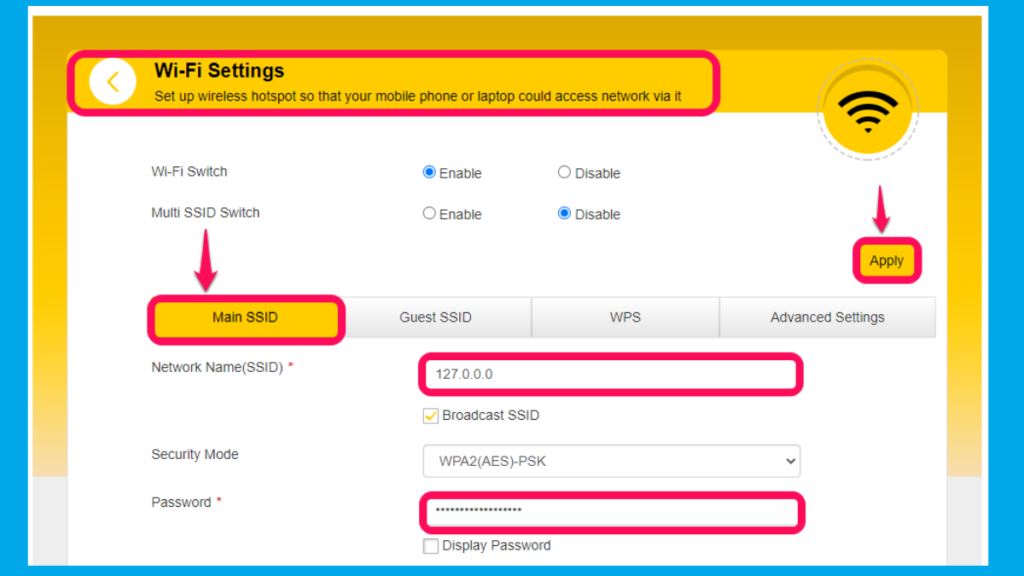
After changing the defaults that are highlighted above, now scroll down and set your maximum devices and hit apply button;
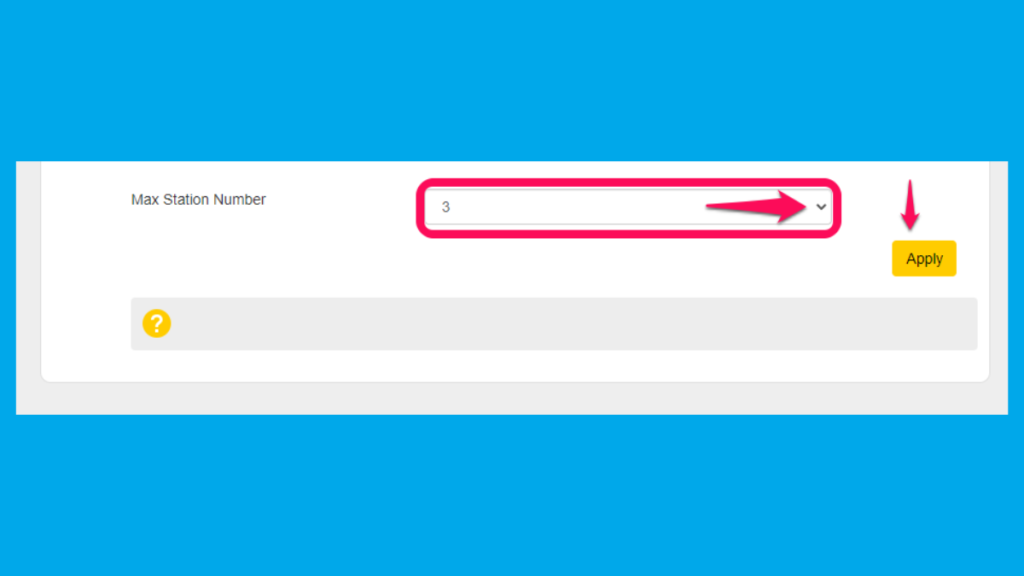
The web interface will auto-log you out and you will have to login back in every time you change these. You will have to reconnect all your devices with a new name and password.
Other Tweaks
If you want to see connected devices, visit the section labeled 1 from the dashboard;
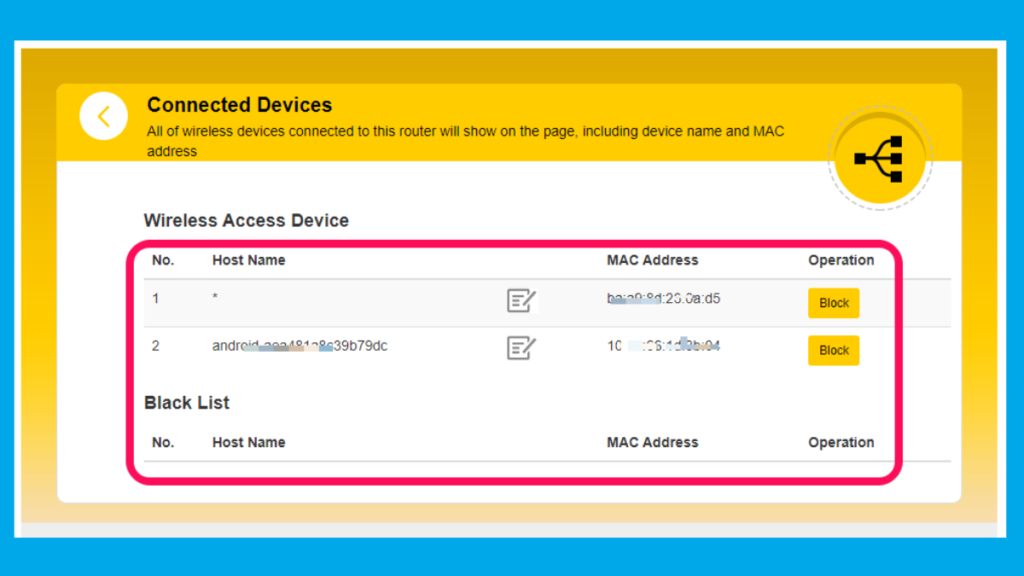
If you have allowed devices, you can manage them, rename, or block them. You can also create contacts with the Phonebook widget. View and manage messages with the SMS Widget.
Advanced Settings
There are advanced sections in the device manager mainly for techies and technical people. These include;
- Network Modes & Bands
- Guest SSID
- DHCP Settings
- Firewall Settings
- .. and many more
I advise you to leave them if you don’t know what you are doing. But you can always reset the device. The APN and other MTN Network-related settings are automatic, you may not need to do much with them.
Conclusion
That’s it for this article, hope you learned how to change the main defaults. Do let me know if you have any issues configuring your device. If you want to use the SIM Card for calling after creating contacts, you will have to visit the MTN Service center again such that they allow that feature.
Remember to access the dashboard/device manager on the web; you need to have connected to the WiFi first if you keep changing them.
Discover more from Dignited
Subscribe to get the latest posts sent to your email.


