Google Photos is a photo and video sharing and storage service developed by Google. It allows users to store an unlimited number of photos and videos in high quality and offers features such as photo organization, sharing, and editing. The service was launched in 2015 and has since become one of the most popular photo management and sharing platforms in the world.
Starting from June 1, 2021, Google began asking users to pay for additional storage if they exceed their free 15 GB of storage across Google Drive, Gmail, and Google Photos. Before this, Google offered unlimited free storage for high-quality photos on Google Photos, but this change means that users will now have to pay for storage if they want to keep their original, full-resolution photos and videos on the platform.
Related:
- Google Account Storage: How to Upgrade Your Storage Space
- What Happens When Your Gmail and Google Drive Runs Out of Storage
With the change in storage policies, many users are now looking for ways to reduce their storage needs on Google Photos. Fortunately, there is an easy and effective solution: compressing your photos. By compressing your photos, you can significantly reduce their file size and save valuable storage space. In this blog post, we’ll walk you through the process of compressing your photos in Google Photos, so you can save money and keep your memories safe. Whether you’re a seasoned Google Photos user or a newcomer, this guide will help you optimize your storage and keep your photos and videos organized and accessible.
How to Compress your Google Photos and Save on Storage
To do this, simply follow these simple steps. For better luck, we’d recommend doing this on a PC as on mobile, things seem to get switched around ever so often.
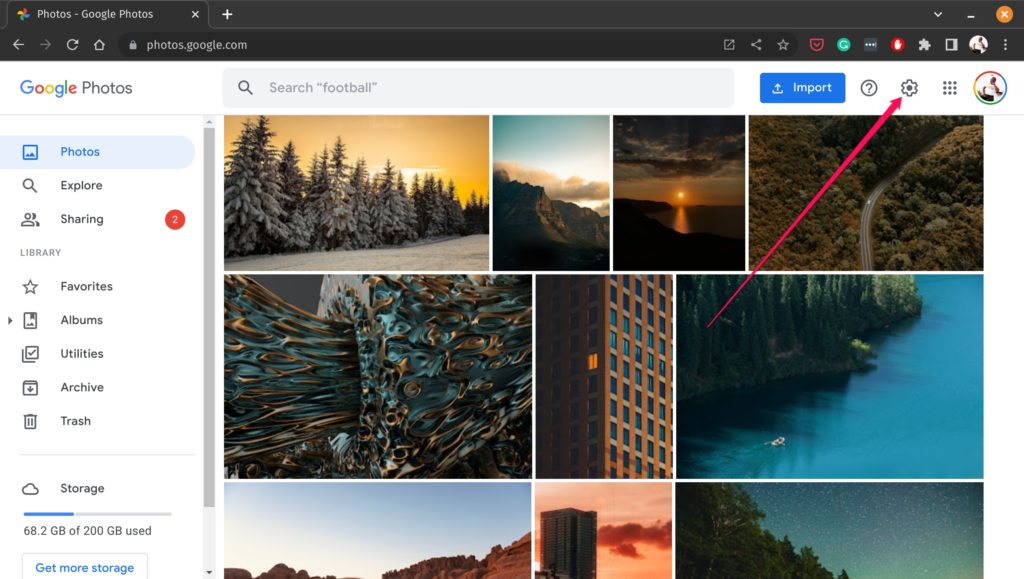
- Log onto the Google Photos website (photos.google.com) using your web browser. Sign in to your account using your Google account credentials.
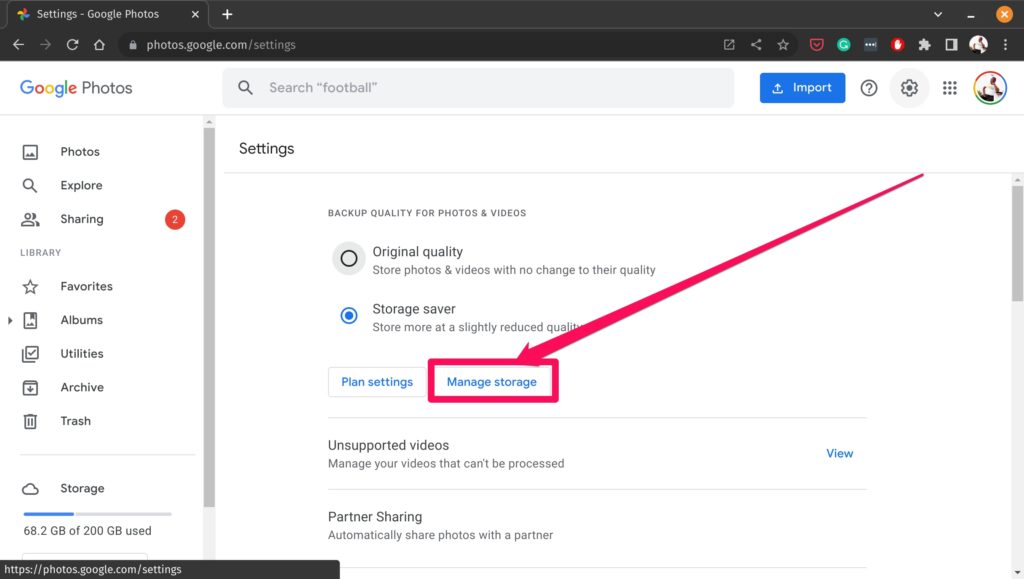
- Click on the “Manage Storage” option, which can usually be found in the drop-down menu under your account icon in the top right corner of the screen.
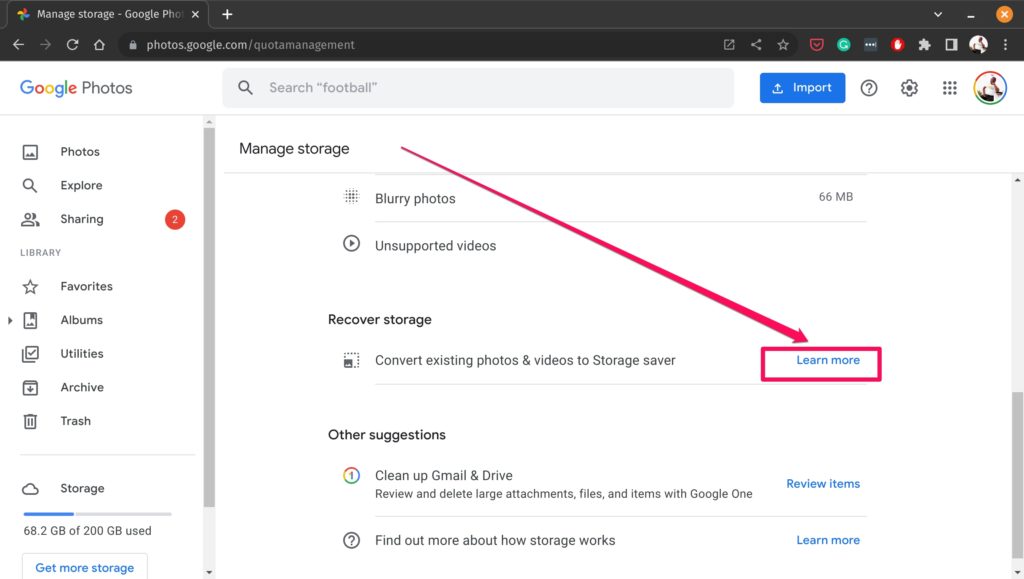
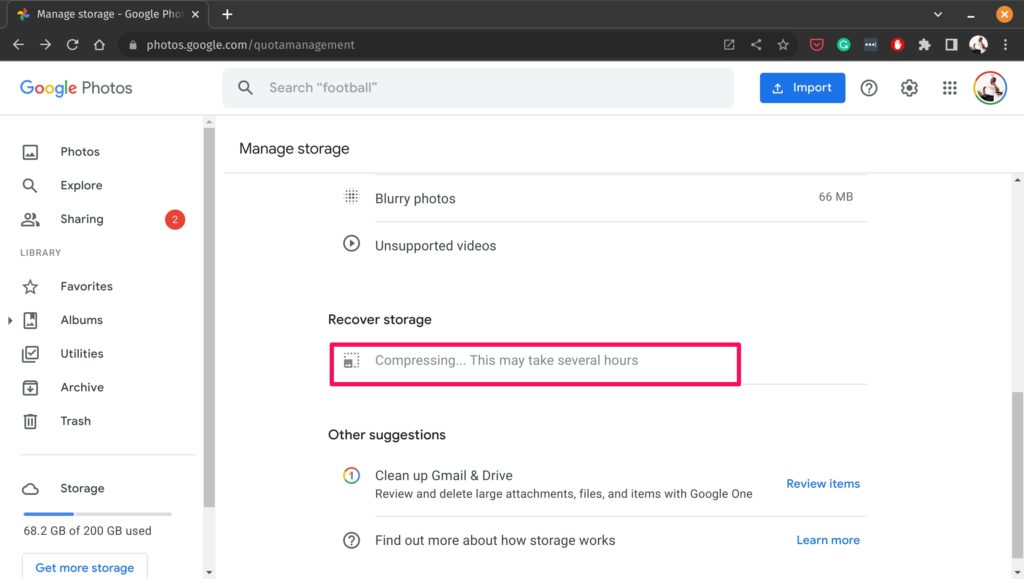
- In the “Manage Storage” section, click on “Learn more” under the “Recover Storage” section.
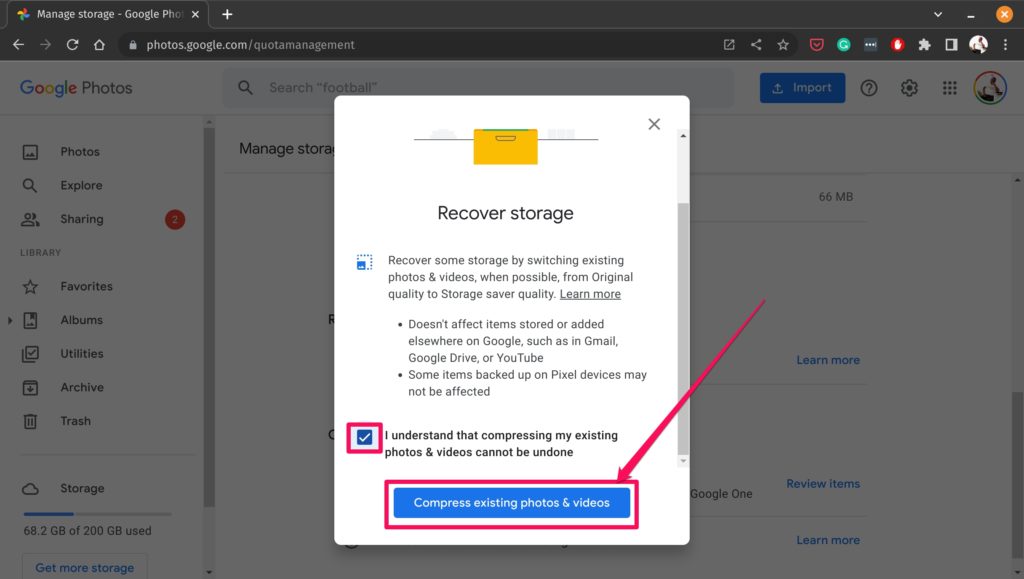
- Read the disclaimer for compressing photos, which explains that compressing photos is a one-way process and cannot be undone. Agree to the disclaimer by checking the provided box.
- Click on the “Compress Existing Photos and Videos” button. Wait for the compression process to complete, which may take a few minutes or hours depending on the number of photos and videos you have stored in your account.
By following these steps, you’ll be able to compress your existing photos and videos in Google Photos using a web browser. This will help you recover valuable storage space in your account, allowing you to store more photos and videos without having to pay for additional storage.
Related:
So there you have it, folks! By compressing your photos and videos in Google Photos, you can now keep all of your precious memories safe, organized, and easily accessible without having to break the bank. No more worrying about storage limits – just more space for all the new memories waiting to be made. Happy compressing!
Discover more from Dignited
Subscribe to get the latest posts sent to your email.


