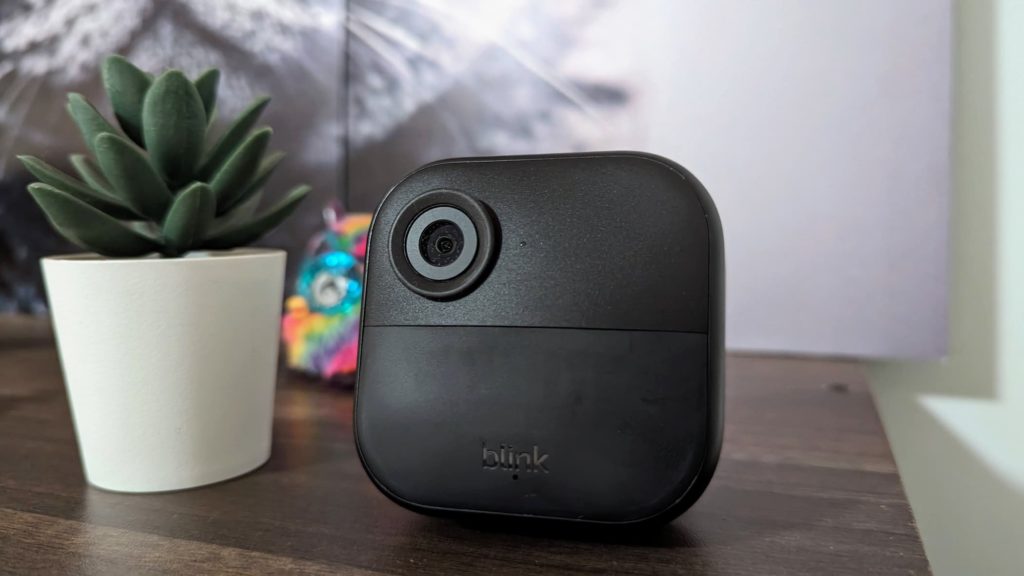
The Blink Outdoor 4 is a popular wireless security camera and a product from Amazon. However, its setup process might seem unconventional compared to some other wireless cameras. For that reason, we’ve created a comprehensive step-by-step guide that covers everything from initial setup to configuring your camera settings. But before diving into the setup process, let’s explore how your Blink Outdoor Camera 4 actually works. The system consists of two key components:
The Blink Camera: This captures video footage and sends it to the Sync Module.
The Blink Sync Module: This acts as the bridge between your camera and your Wi-Fi router, allowing you to access your security feed from anywhere. Each Sync Module can handle up to ten devices and operates on a 2.4 GHz Wi-Fi connection.
Blink Outdoor Cameras themselves don’t have built-in Wi-Fi. Instead, the Sync Module acts as a middleman, relaying information between your camera and your router. This is crucial for setting up your camera and using it with the Blink app.
Set Up the Blink Sync Module 2
- Download and create an account with Blink.
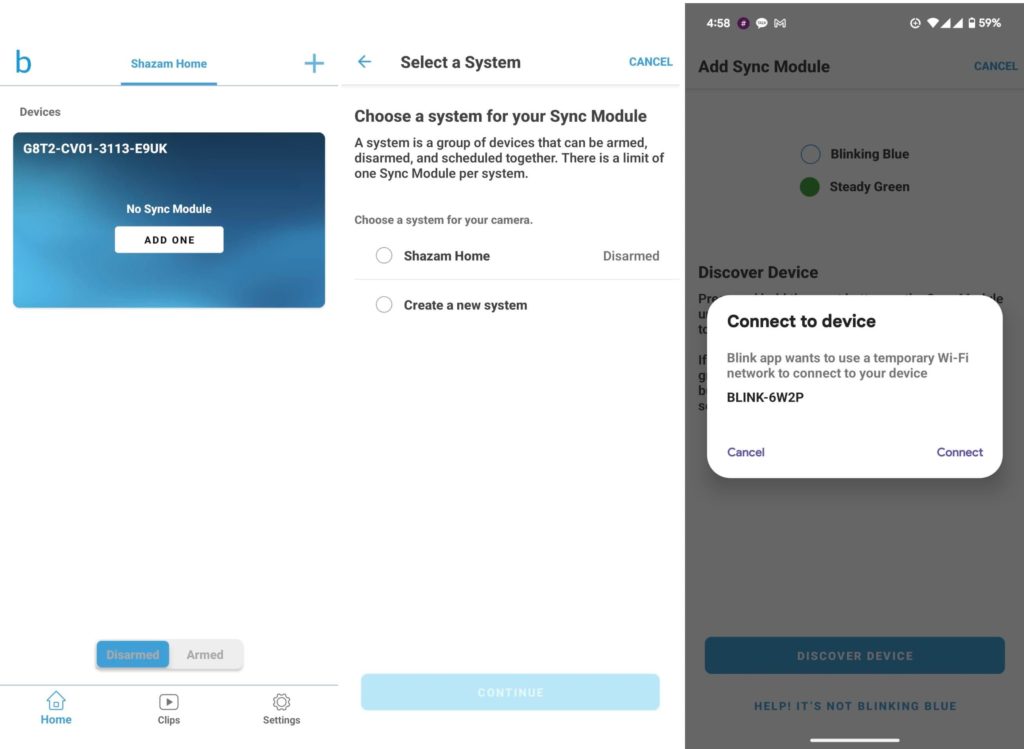
- Open the Blink App: Under devices, tap on No Sync Module: Add one. Alternatively, tap the + icon in the top-right corner and choose “Sync Module”
- Scan or Enter Code: Scan the QR code on the back of your Sync Module or manually enter the serial code.
- Name Your System: Give your Blink system a name and tap Done.
- Wait for Lights: The Sync Module will flash blue with a steady green light. Tap “Discover Device” when this happens.
- Join Wi-Fi: Tap “Join” on the Blink network that appears (starts with BLINK-XXXX).
- Connect to Home Network: Choose your Wi-Fi network, enter your password, and wait for the connection to establish.
- Module Added: You’ll receive a notification confirming the Sync Module is added. Tap “Done.”
Note: If you have a Sync Module 2, you don’t need a Blink subscription plan to record motion clips. You can add local storage using a pen drive/ flash drive. However, a Sync Module 1 requires a subscription since it lacks local storage.
2. Add Cameras to Your System
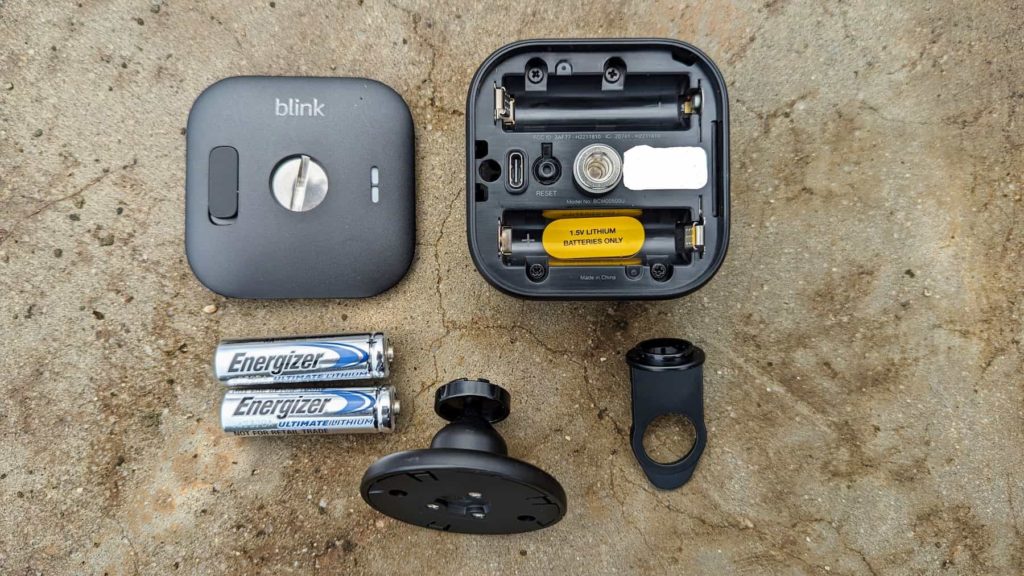
- Insert Batteries: Unscrew the back panel of the camera and insert the included batteries. Use the provided tool or a flat-head screwdriver or cutlery if you must.
- Add New Device: Tap the + icon in the Blink app and choose “Wireless Cameras.”
- Scan QR Code: Open the battery compartment and scan the QR code inside. Screw the backplate back on securely.
- Select System: Choose the system you want to add the camera to.
- Camera Added: The app will notify you if the camera is found and added successfully. Tap “Next.”
Read more:
- YI 1080P Home Camera Review: an affordable subscription-free security camera
- Xiaomi Mi Home Security Camera 360 1080P Review
- Mi 360 Home Security Camera 2K Pro Full Review
3. Mount Your Camera
- Choose Location: Blink’s suggestions can help you choose the best location for your camera.
- Mounting Options: The camera includes mounting hardware for screwing or using the no-drill method.
- No-Drill Option: Slide the no-drill mount onto the camera. Hang the camera on a hook or in between slats.
- Screw Mount: Screw the mount into place and then slide the camera onto the bracket.
4. Customize Settings
- Open the Blink App: Select your camera and access the settings menu.
- Adjust Motion Detection: Adjust sensitivity, zones, and recording duration.
- Set Notifications: Choose how you want to be notified about motion events.
- Live View and Two-Way Audio: View the live feed, talk to visitors, and listen to audio.
About Sydney Mugerwa
Sydney Mugerwa is a seasoned consumer tech writer based in Kampala, Uganda, with a passion for reviewing the latest gadgets and smart devices. From smartphones and wearables to smart home products and cameras, Sydney breaks down the complexities of consumer tech, making it easy to understand through detailed reviews and how-to guides. His mission is to simplify tech jargon and help readers make informed decisions in the ever-evolving world of technology.
Discover more from Dignited
Subscribe to get the latest posts sent to your email.