Adobe Photoshop is a powerful image editing software without peer. Unfortunately, it’s also not something a newbie can easily use off the bat. But Microsoft Word is as easy as it comes. It’s obviously not an image editing software in any sense of the world. But don’t you go underestimating what it can do.
MS Word does have a few tricks up its sleeve. You will have to admit, learning to manipulate Photoshop to do such simple tasks like removing an image background is like learning Swordcraft so that you can peel potatoes.
For our tutorial, we will use Microsoft Word 2016, a random image from our gallery and nothing else. The following steps will guide you on how you can remove a background image in the easiest way possible.
Update: Given the popularity of this tutorial, we have made the video version you can watch below.
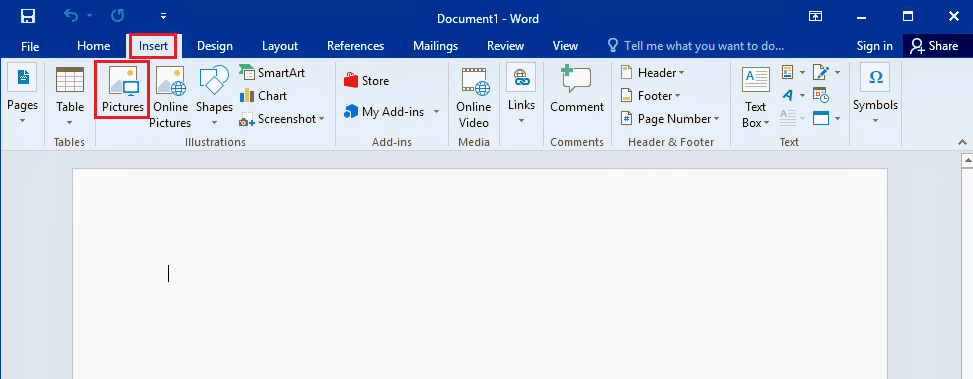
Step 1> Select the ‘Insert Tab’

For our tutorial, we need a test subject. So how about we go hunting for an image? MS Word handles more than text as you are very well aware, so inserting an image shouldn’t be much of an issue. After selecting ‘Insert‘, let’s go ahead and tap on ‘Pictures‘ to select one from our local disk.
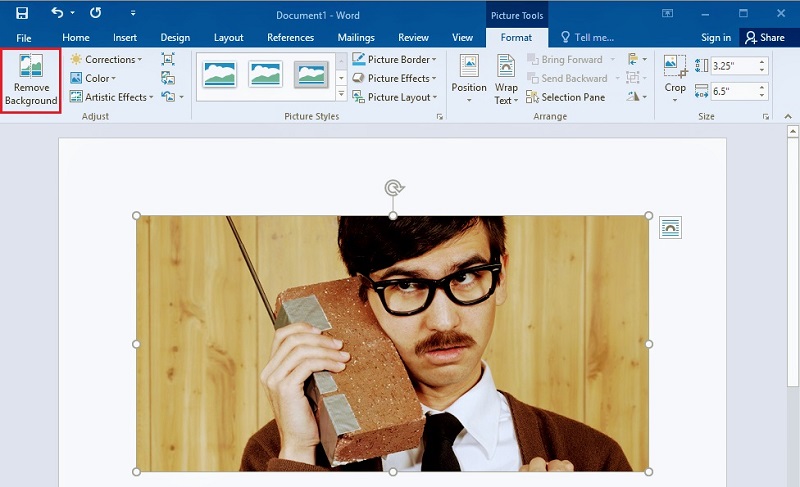
Step 2>Select ‘Remove Background’

Once you have uploaded your image, Microsoft Word is smart enough to know to go into Picture Mode. Clicking on your image will bring up the Picture Tools which aid you in editing your image, as good as any editing software out there. What we require in this instance is ‘Remove Background’ located on your top left. Don’t be shy. Go ahead and click on it.
Related: How to Merge Two Images into One with Microsoft Paint
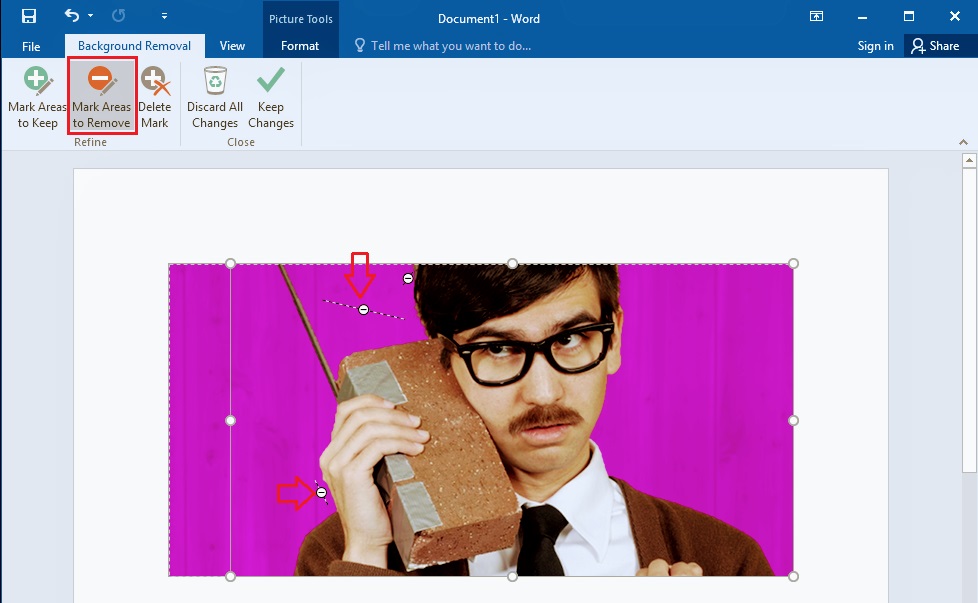
Step 3> Mark Areas to Remove

Clicking ‘Background Removal‘ brings up another set of tools. These comprise, ‘Mark Areas to Keep, Mark Areas to Remove, Delete Mark, Discard all Changes, and Keep Changes.‘ There’s also a bunch of nodes you can use to select the area you wish to work with. Alrighty then! Adjust those nodes accordingly to get your desired region to work with.
If there is any area you have missed, click on ‘Mark Areas to Remove.’ A pencil icon will appear. Use it to draw a thin line in the area you wish to get rid of. The reverse is true. ‘Mark Areas to Keep‘ in the same fashion. Once you have your desired outcome, click on ‘Keep Changes’
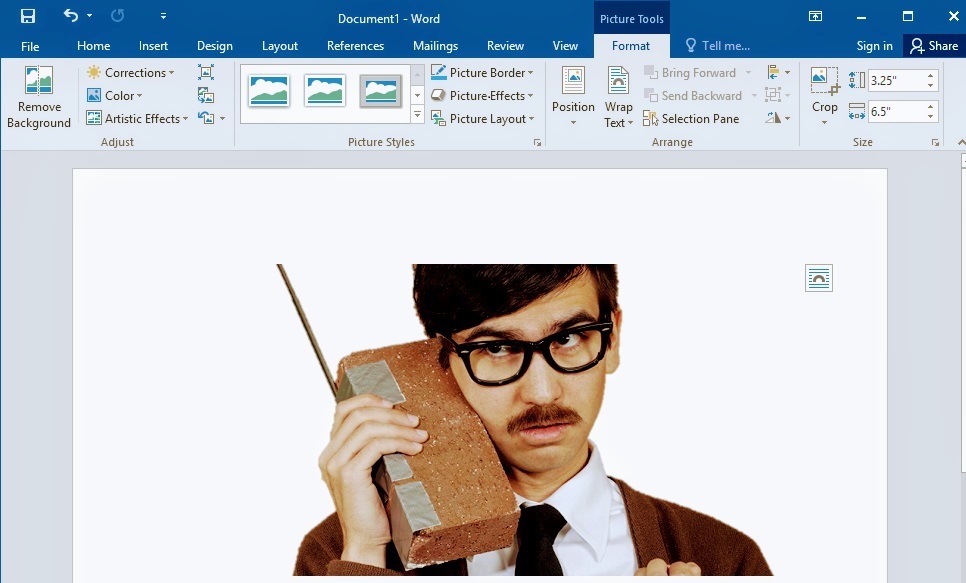
Step 4>Voila!

Voila! You’re good to go! Microsoft Word has a few more tricks for the curious. You can replace the now blank background canvas with any color of your choice. We personally loved the solid colors. You can add filters to your image and whatnot. So have at it!
Discover more from Dignited
Subscribe to get the latest posts sent to your email.


