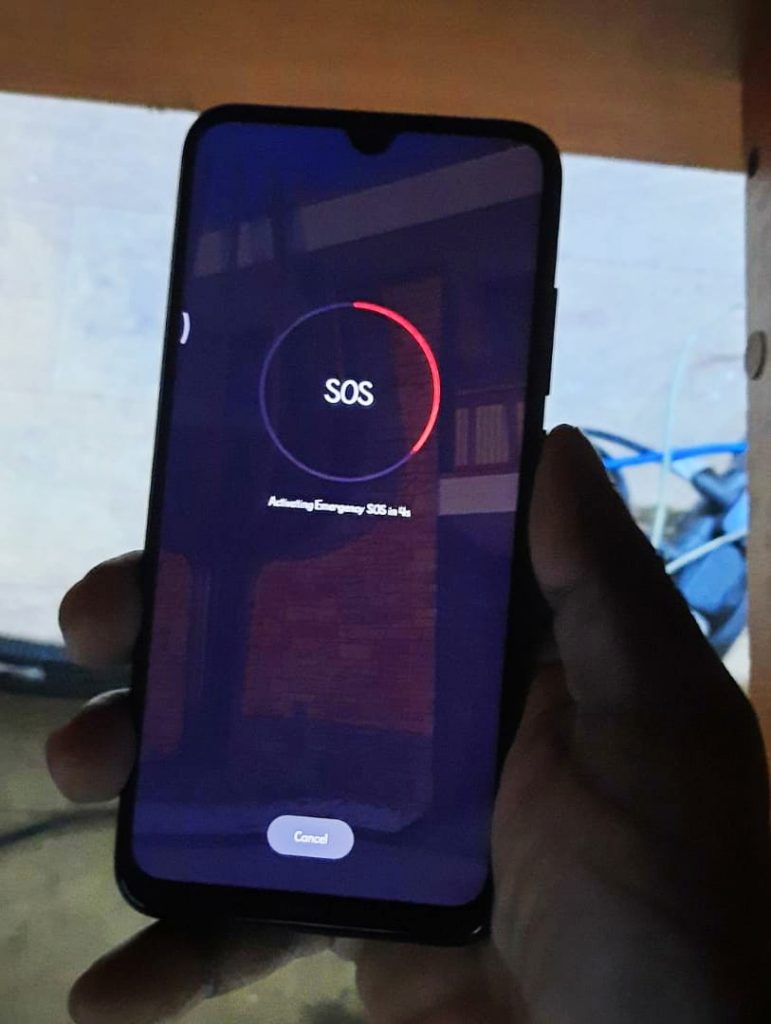
There are numerous reasons you would want to have your emergency contact or info on your Android phone. Besides the obvious fact that an emergency contact can come to your rescue when you need it or provide vital information for whoever does. It can also easily come in handy even when you misplace your phone as it helps whoever finds it to be able to get it back to you with the emergency information on your phone. The advantage of emergency information is that it is easily accessed without even having to unlock your phone.
Also, emergency information can include important medical info or the contact of someone that can provide it just in case a first responder or medical personnel needs to attend to you. For these reasons and more, emergency contact information is quite important and you can set it up on your Android phone following the steps in this article. On Android smartphones, you can typically activate the emergency SOS by pressing your power button 5 times or in the power menu when you press down the power button.
Table of Content
- How to Set Up Emergency Rescue Contact Information
- How to view Emergency Info or Contact on Android
- Wrapping Up
How to Set Up Emergency Rescue Contact Information
Despite any Android skin your phone might have, you can easily find Emergency contact and info settings under ‘Security’ or ‘About phone’ in the phone settings or under ‘Contacts’. Depending on the phone, you can set different info but they all generally allow you set an ICE contact or even alert emergency services in your country.
On some Android phones, you can set emergency info by swiping up on the lock screen, click on emergency or emergency call and click on emergency info. Click on the edit icon on the top right corner as shown below. The edit button might be different on your phone depending on the brand.
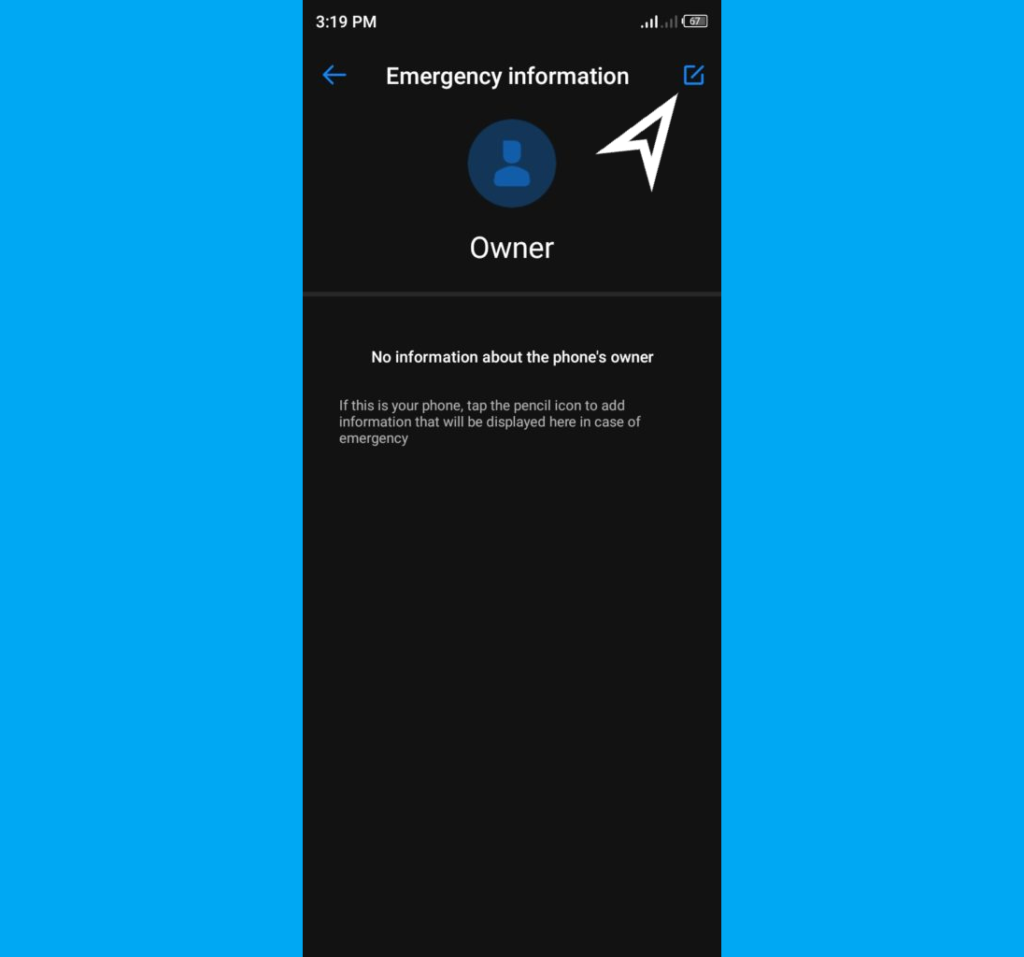
That being said, we will be checking out different steps on a case by case basis based on the UI of your phone.
On Google Pixel (Android 12)
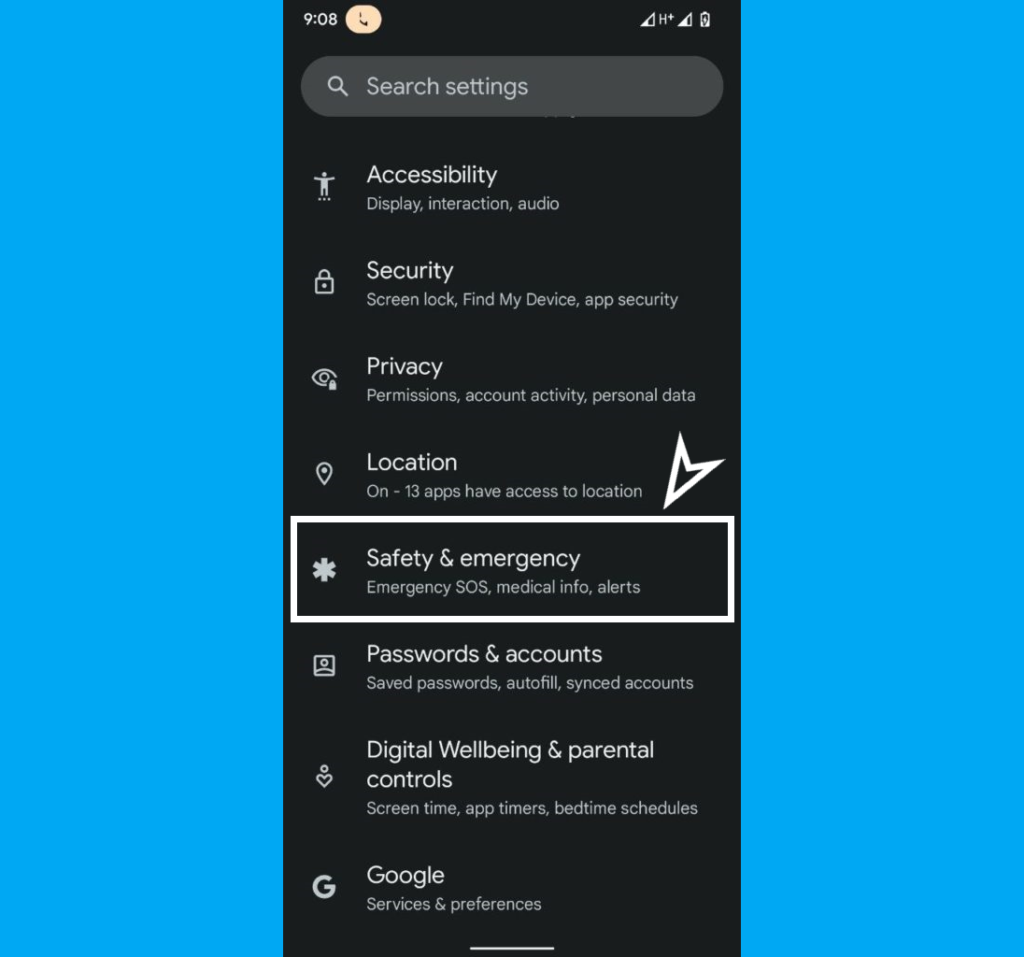
Heading to the Settings on a Pixel phone, scroll down to Safety and emergency and click it.
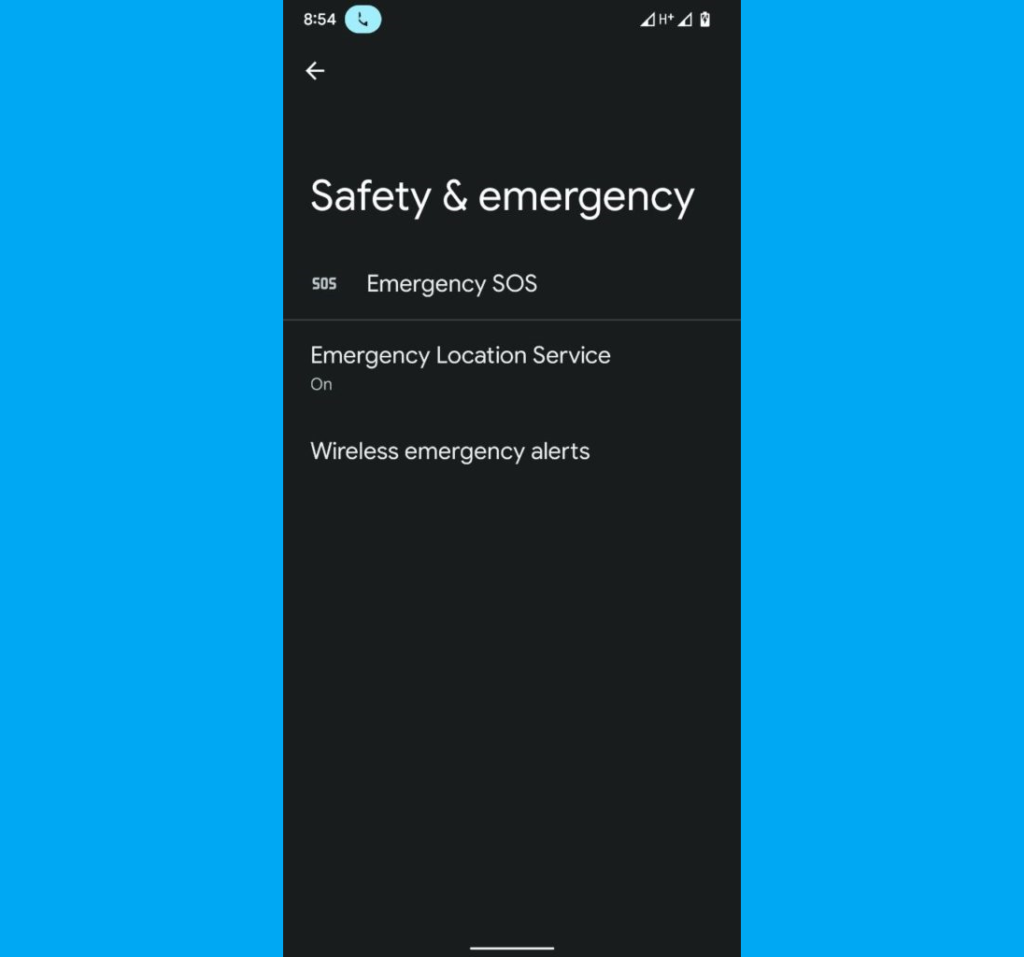
From here you would be able to set Emergency SOS, Emergency Location Service and Wireless emergency alerts.
SEE: Smartphone charging cables buying guide
On MIUI (Xiaomi, Poco, Blackshark, Redmi)
If you’re using a Xiaomi, Redmi, Blackshark and Poco smartphone then you can simply set emergency contact information by heading to your Settings and click on Password and Security.
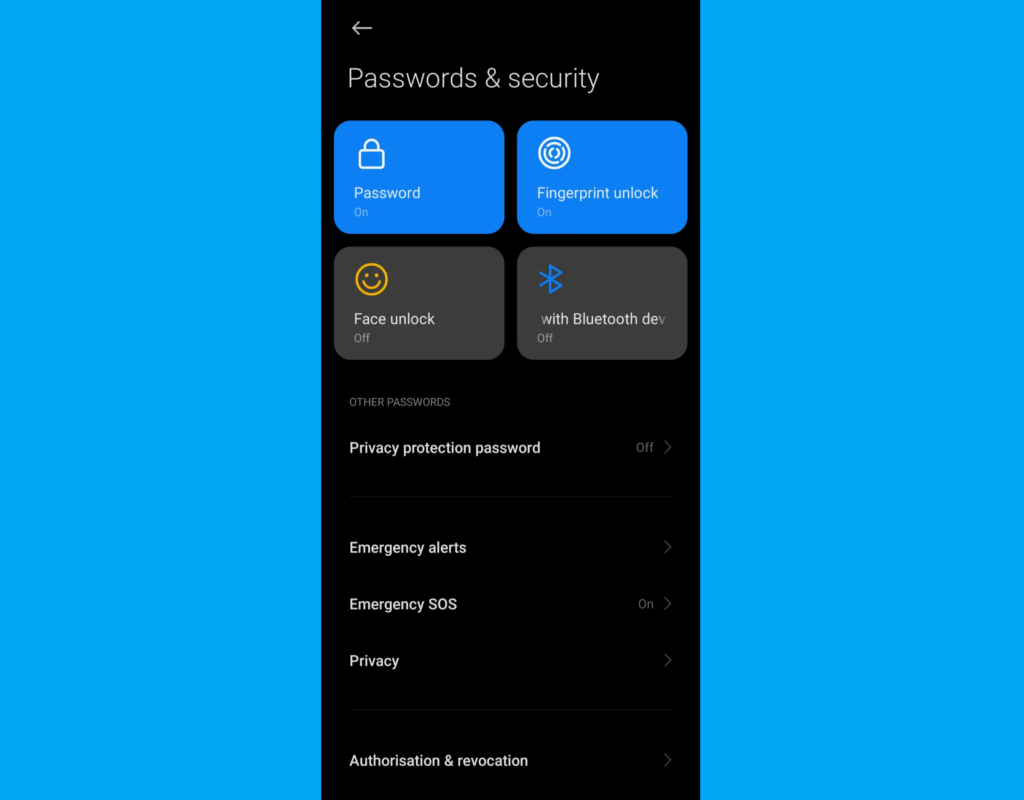
From there click on Emergency SOS. Then toggle it on and to do that you’ll have to add at least one ICE contact. You can always go back to add or remove the contacts by clicking on Emergency contacts.
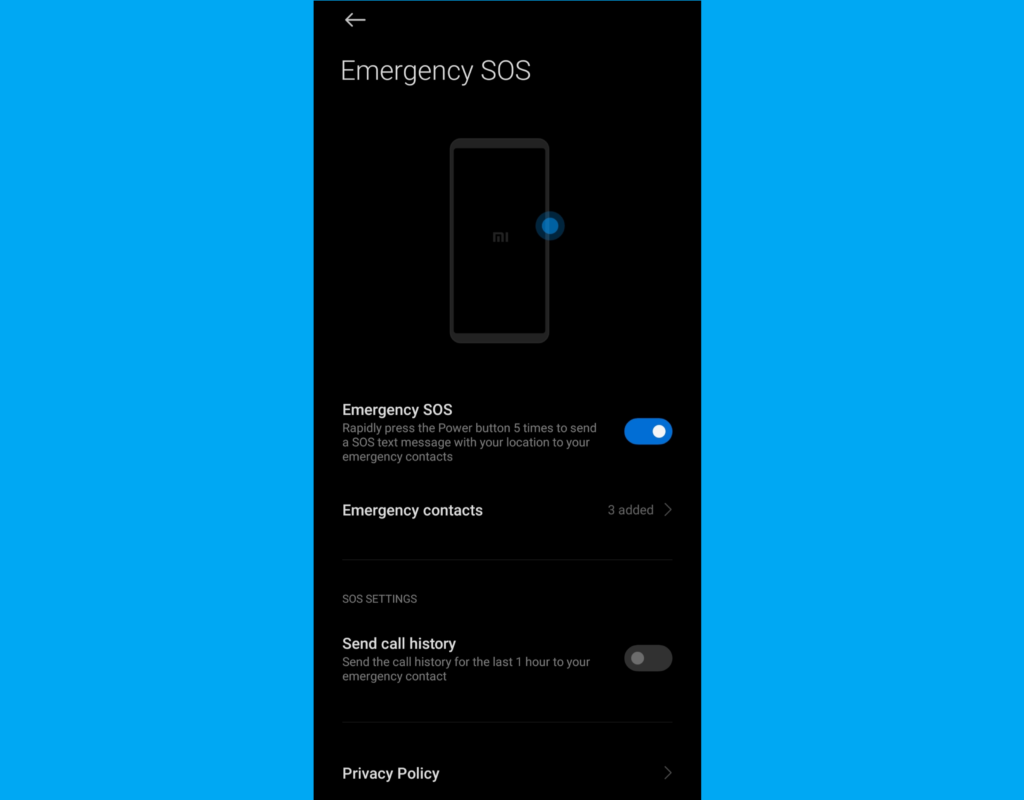
You can also choose to send the call history of the last one hour whenever Emergency SOS is activated.
On HiOS / XOS (Infinix, Tecno)
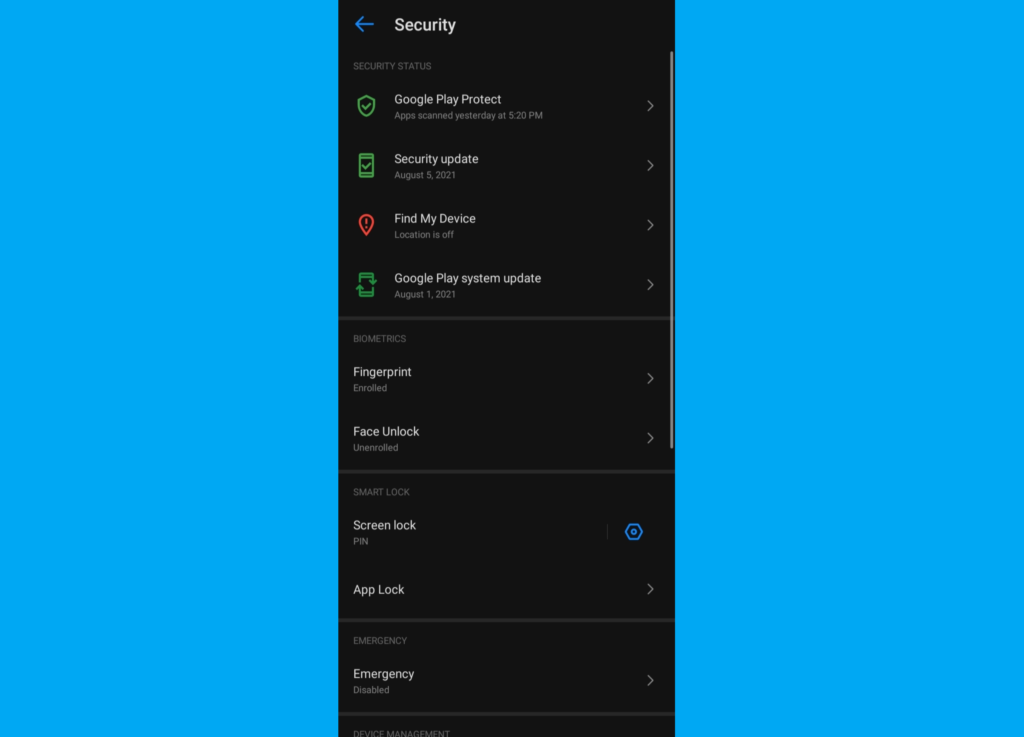
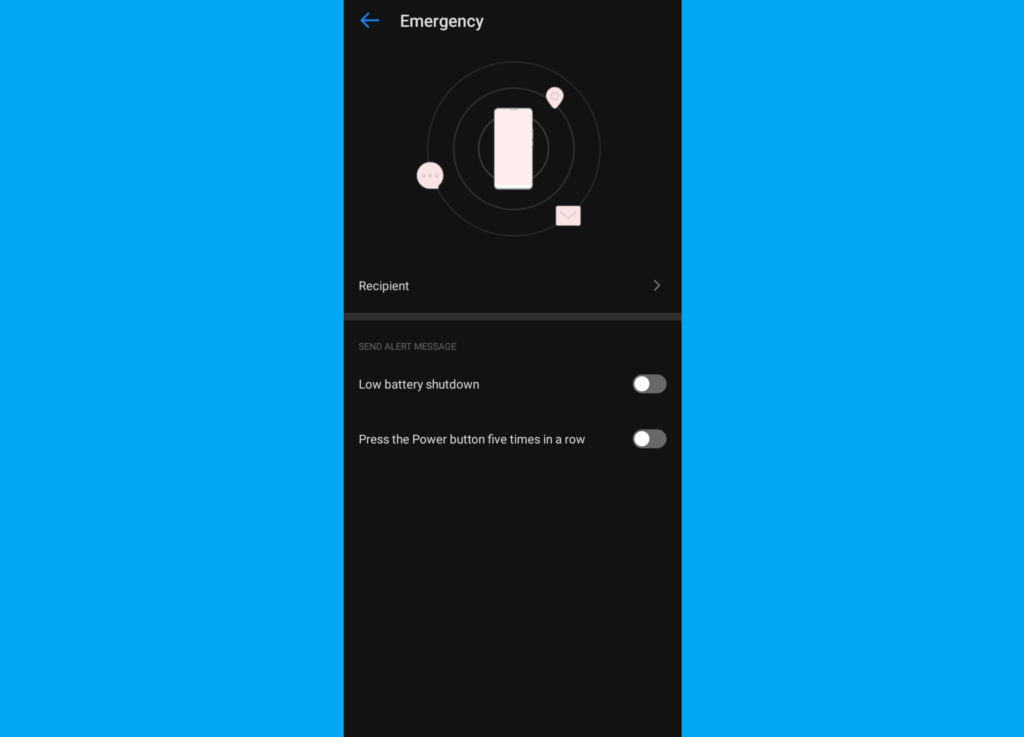
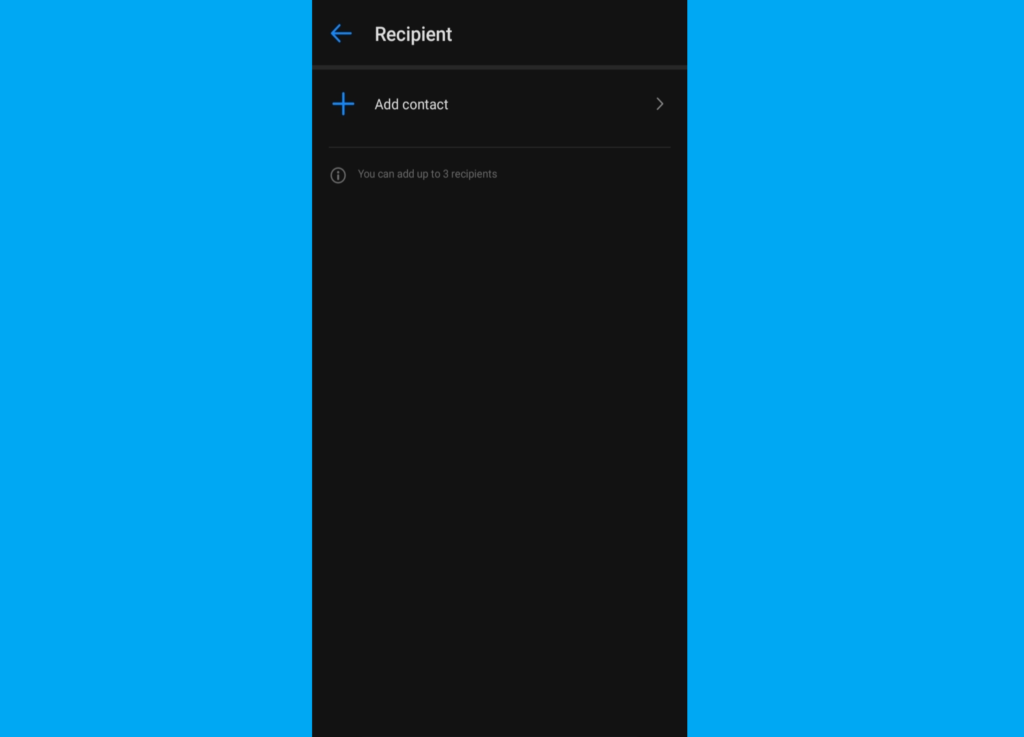
Moving on, this is meant for Tecno, Infinix and iTel smartphones. You can easily set emergency contact information in a similar way on the device by heading into Settings, click on Security and then Emergency. From there you can click on Recipient to add emergency contact(s). You should also toggle on the ‘Press the power button five times in a row’ to activate Emergency SOS.
Read More: Used or Refurbished: Second Hand Smartphone Buying Guide
On OxygenOS / ColorOS / Realme UI (OnePlus, Oppo, Realme)
Oppo and Realme smartphones maintain a similar trend as previously seen. Here you can set emergency info under Security in the phone Settings.
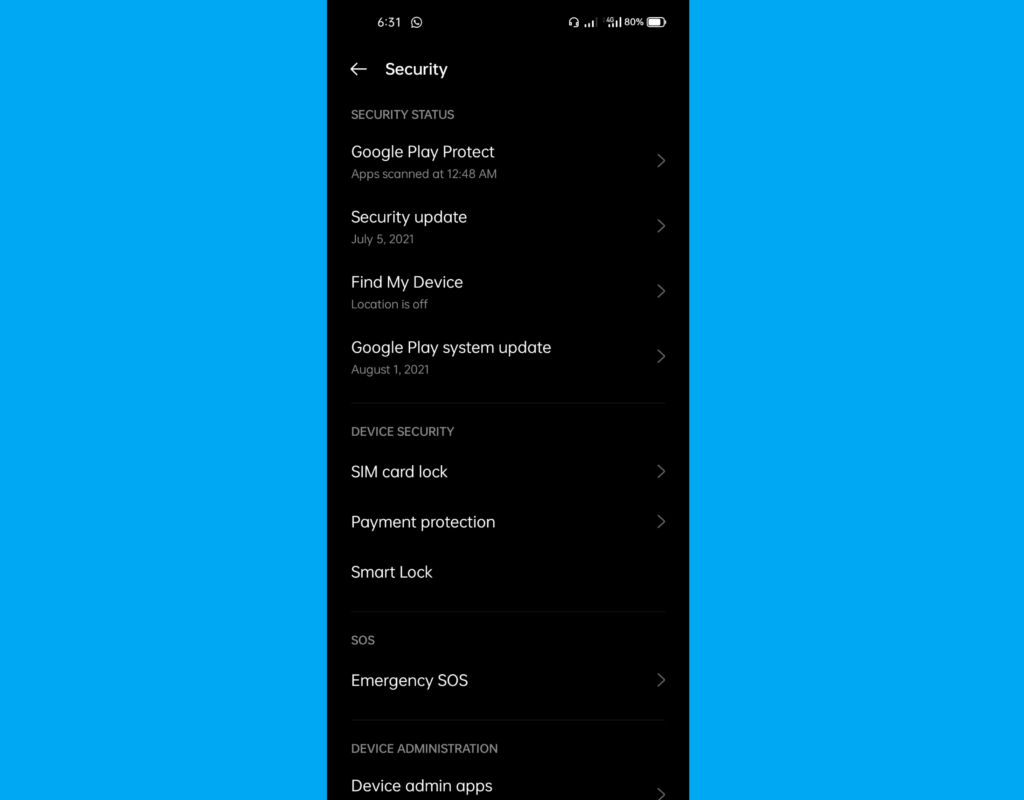
You can then choose to add your emergency contact and also medical information which includes your name, age, blood type, and any medical info you’d like to be known in the case of an emergency under Emergency Information.
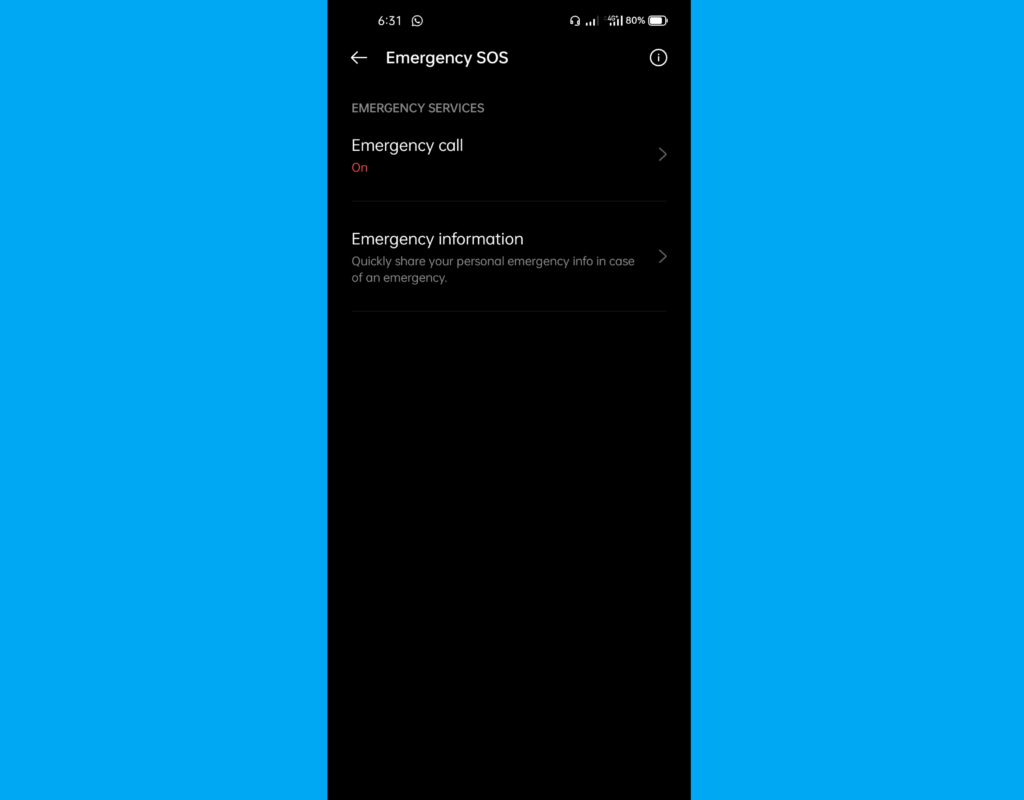
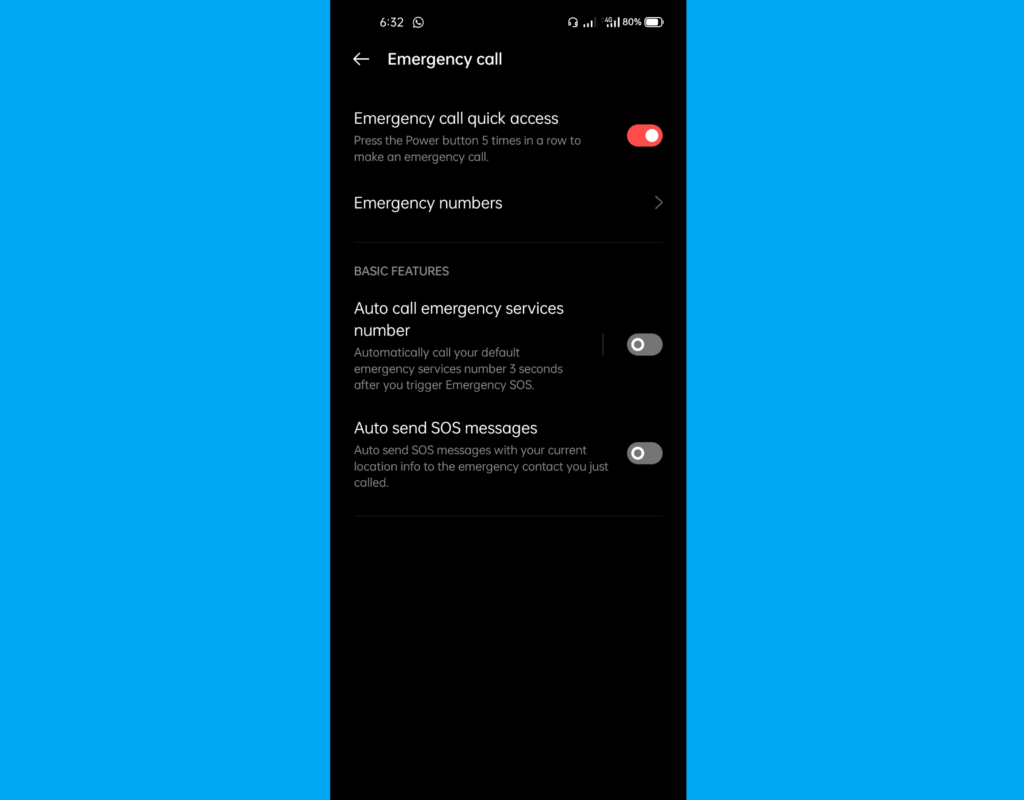
Entering an emergency call, you will be able to set your emergency contact and if you’d like your location as an emergency message to your emergency contacts or call the emergency service number in your country. Likewise, you can also activate quick access which triggers Emergency SOS once you press your power button 5 times.
On One UI (Samsung)
Things are a bit different on Samsung phones as you need not enter the Phone Settings to set up emergency contact or information. Instead, on Samsung just head to your contact and click on the first contact which is yours and is labelled ‘Me’ by default or the name you set it to be.
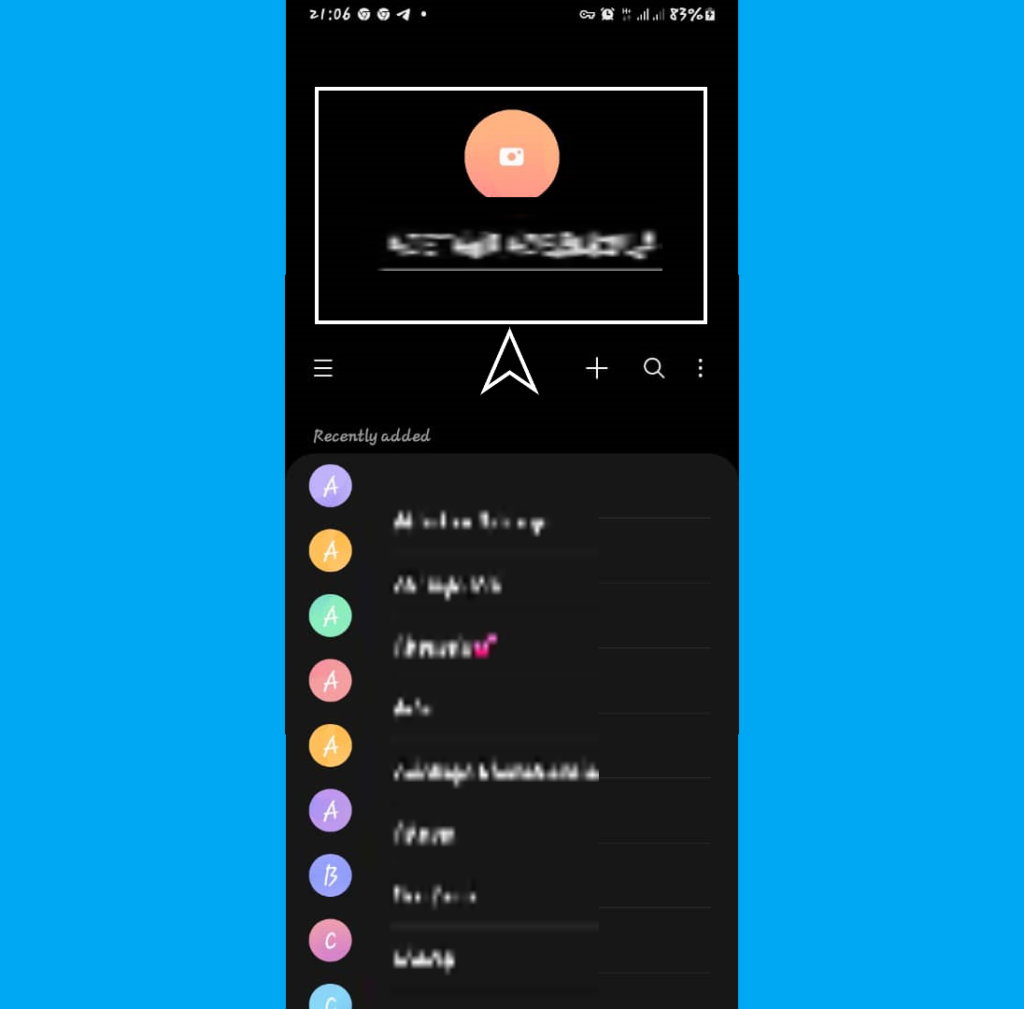
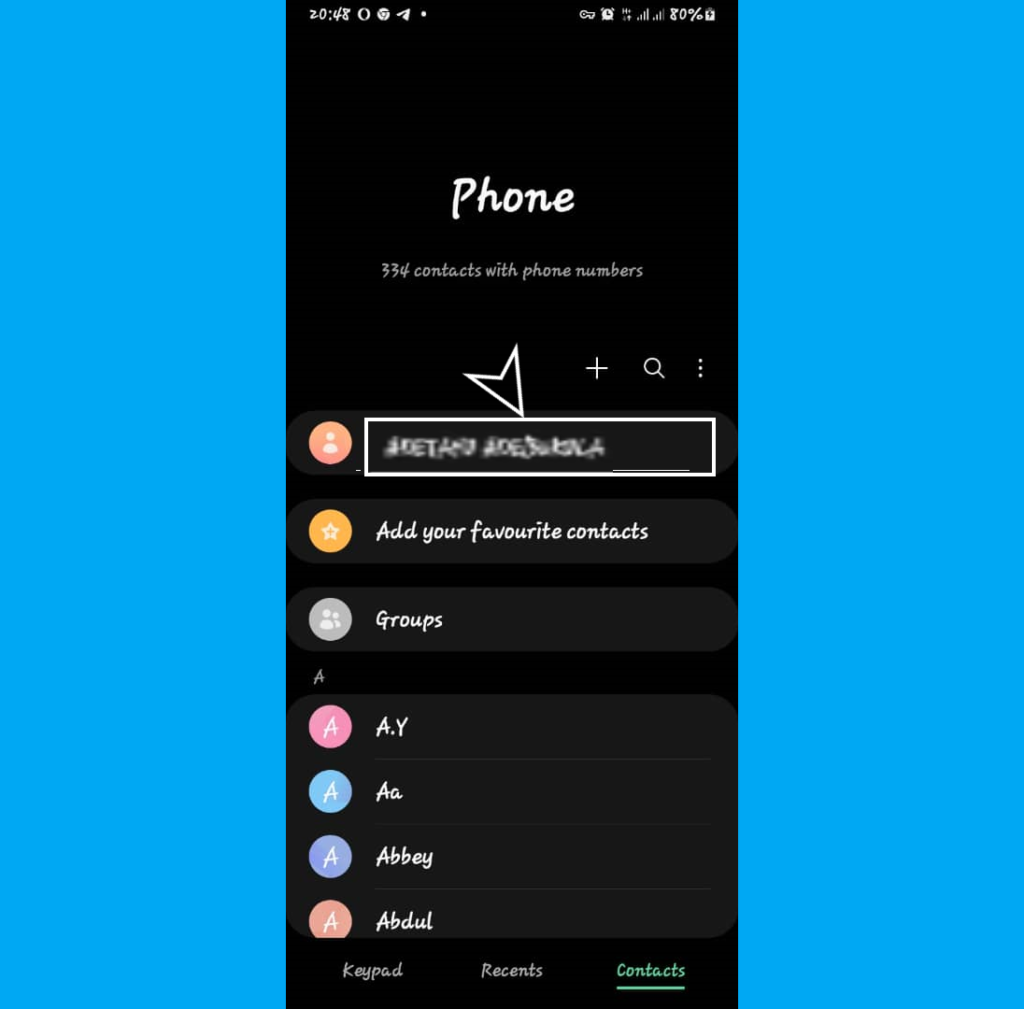
Click on it as highlighted above and scroll down to the emergency info section.
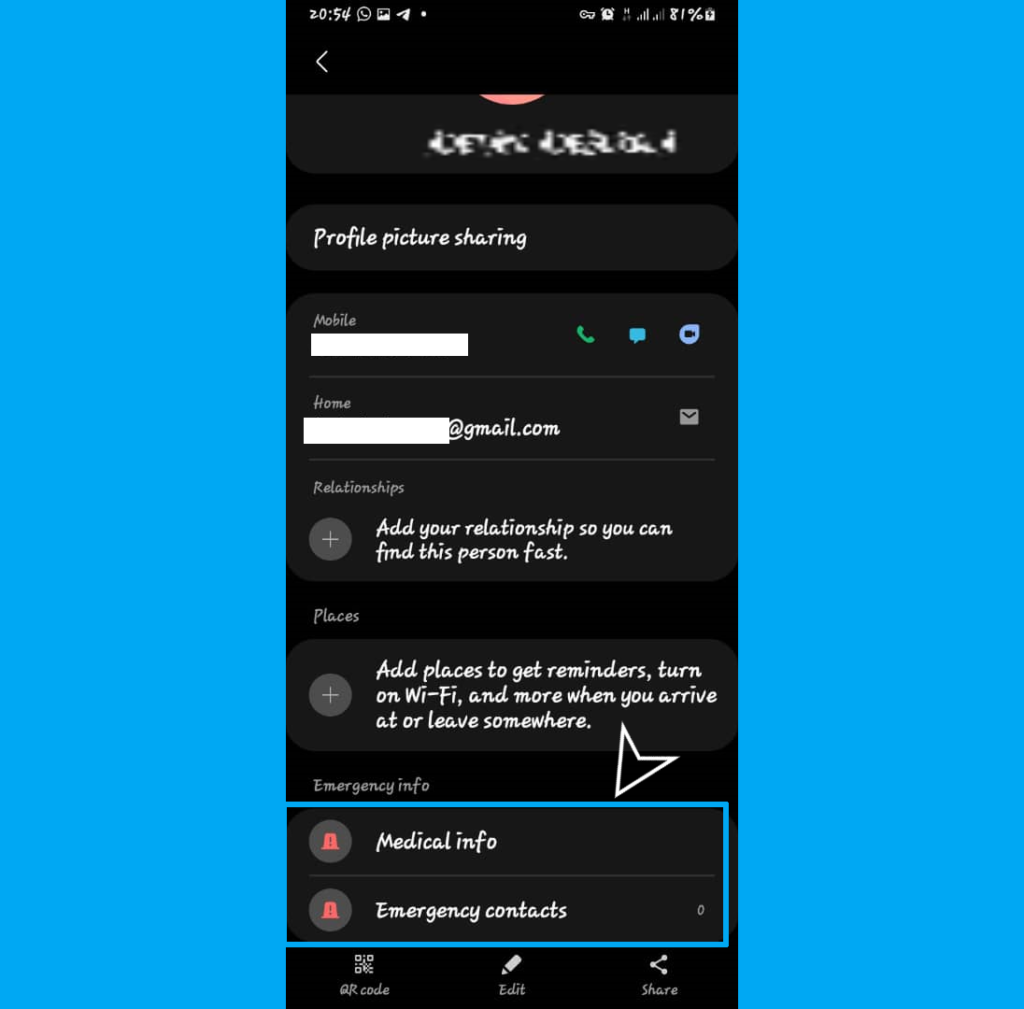
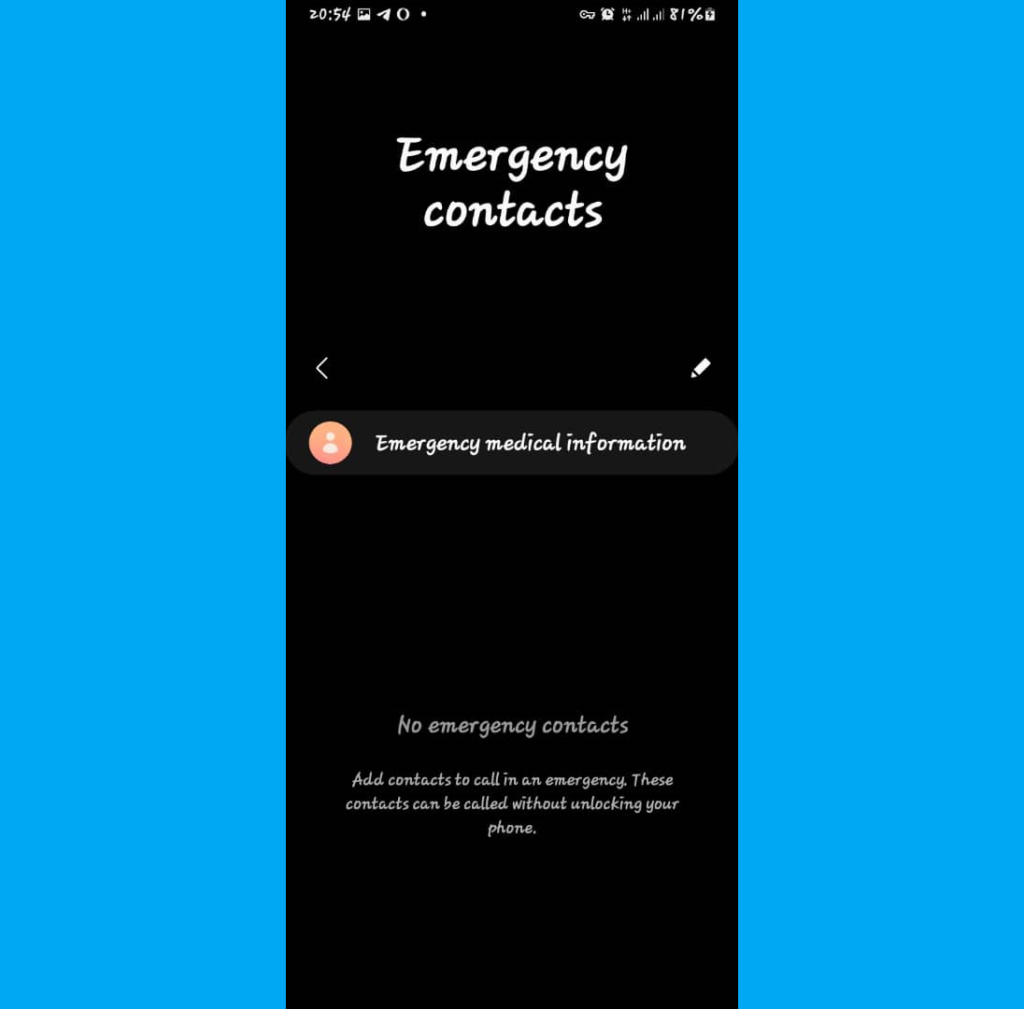
Here you would be able to add your medical info as your medical card as well as emergency contacts.
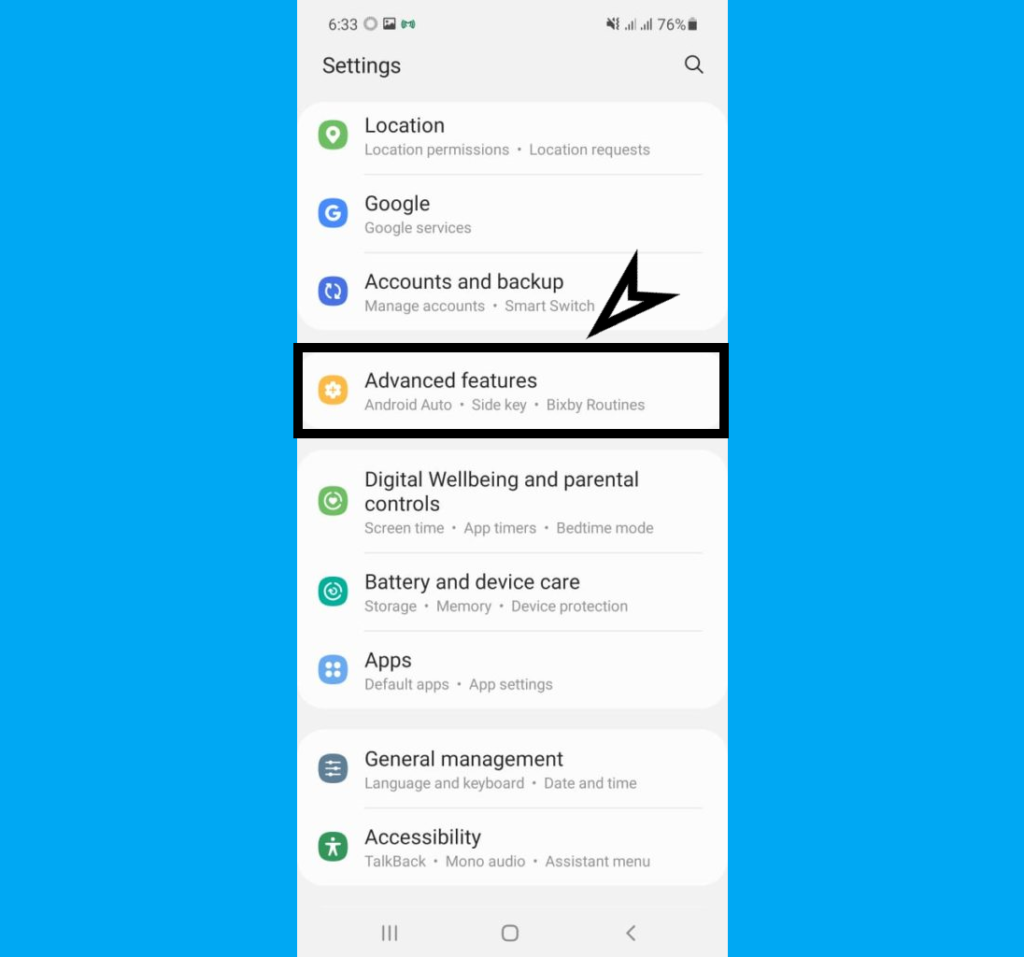
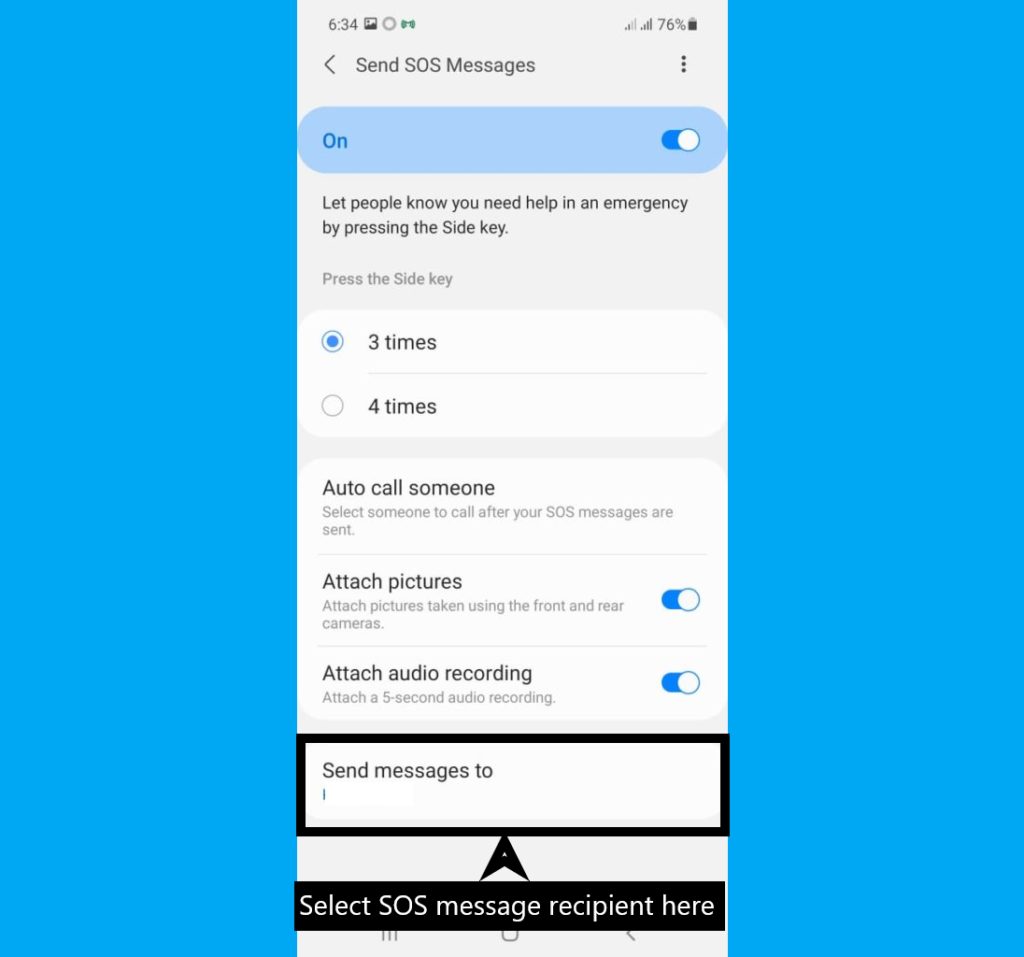
Also, you would want to turn on Emergency SOS messages which you can do by going into Advance features in your Samsung phone settings as shown below.
Click on Send SOS messages.
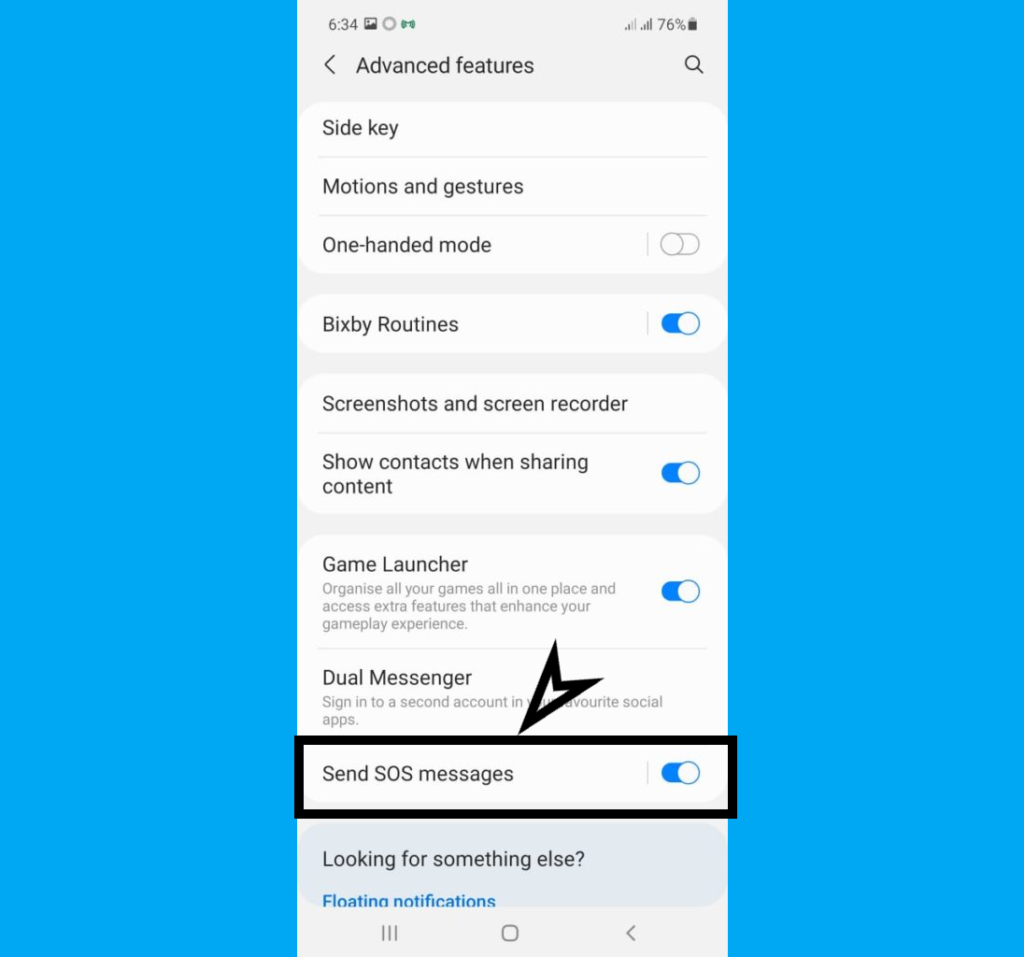
Then you can choose how to activate emergency SOS as well as choose a recipient of your SOS messages. You can also decide if you want to Auto call someone (you can set this to be 911, 112, 999 or whatever the emergency service number in your country is), Attach pictures and Attach audio recording as well.
How to View Emergency Info or Contact on Android
You can view emergency info and even call emergency contacts without having to unlock an Android Phone. To do this you can either do 1, 2 or 3 below.
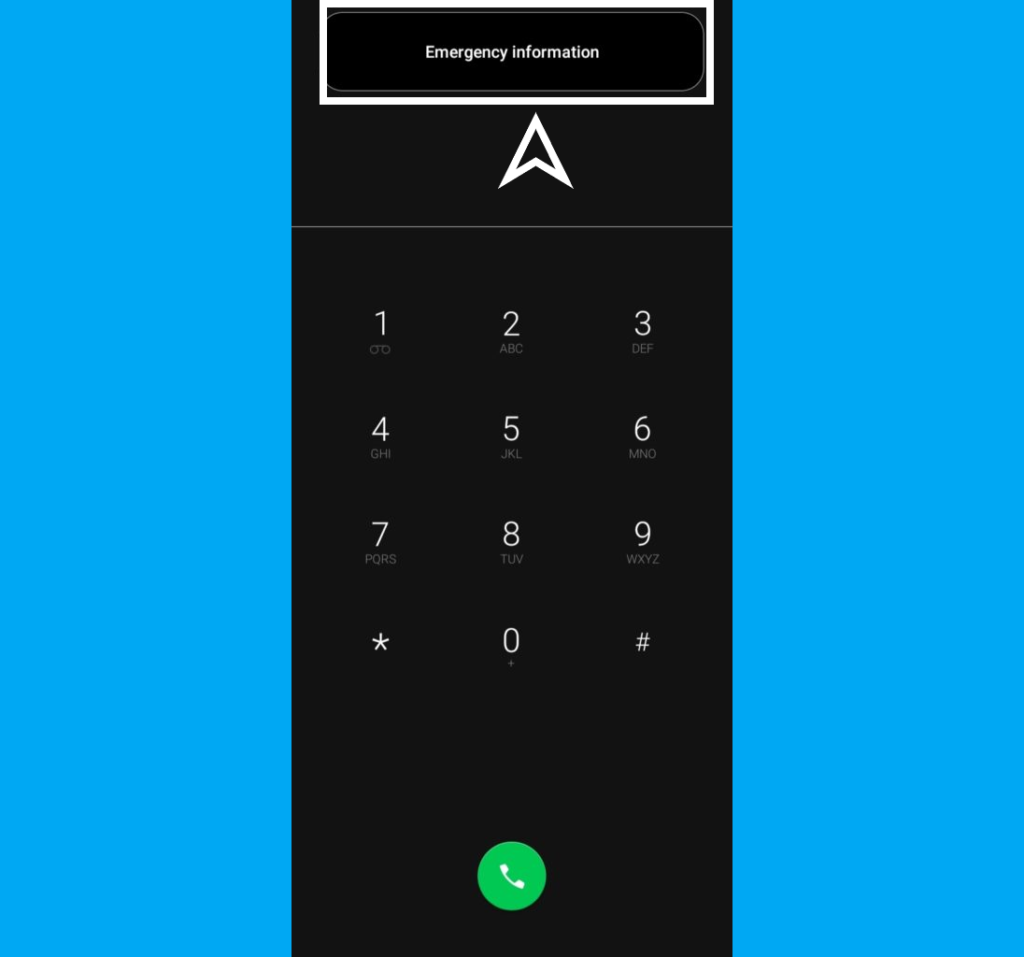
1 Swipe up from the lock screen and click on emergency call or just emergency on some phones. Click on it and you should see emergency information somewhere on the screen, tap on it (twice on some phones). This does not does not work on all android phones.
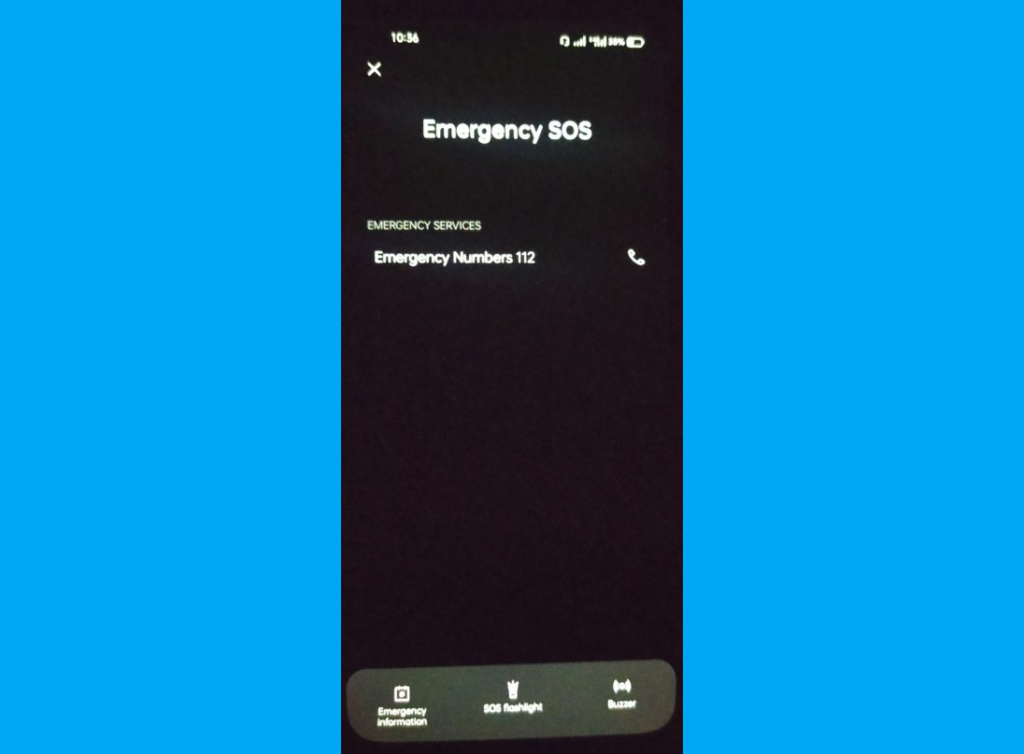
2. For most Android smartphones you would be able to access emergency contacts or information by pressing the power button 5 times.
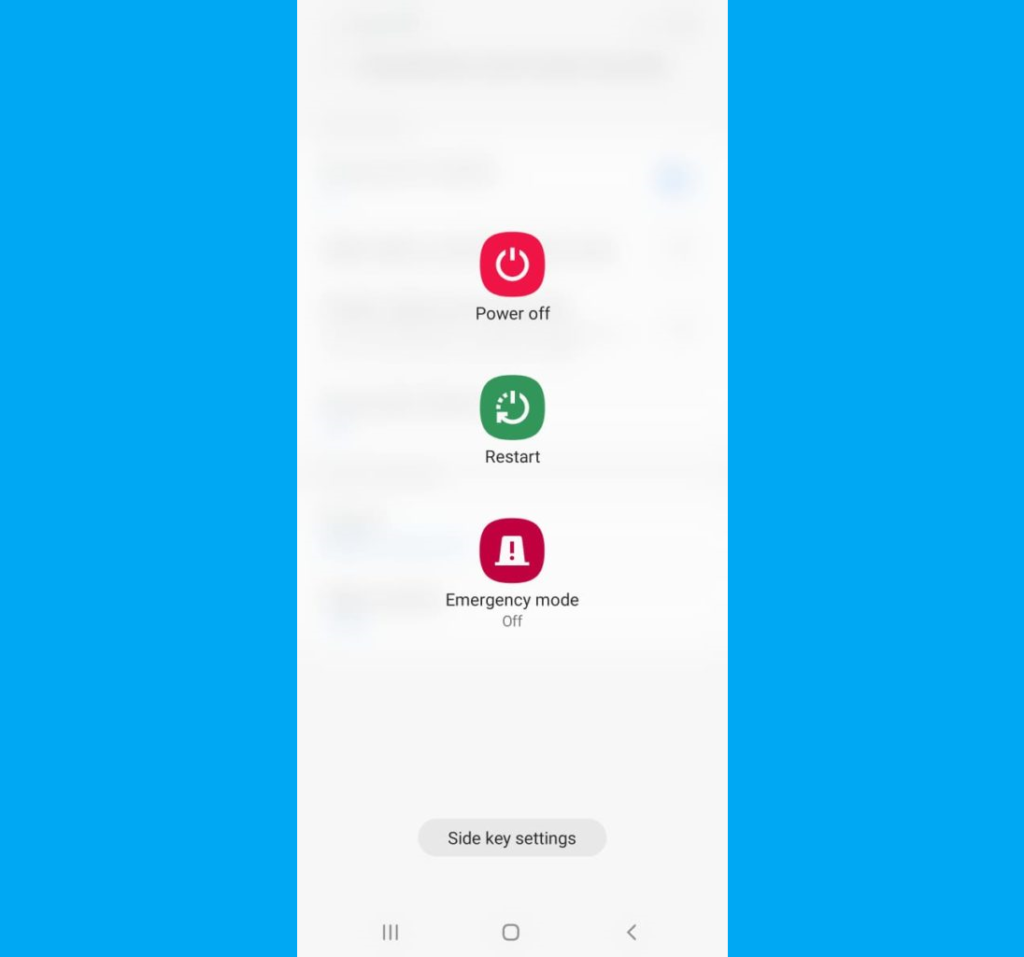
3. In some other Android phones, press the power button with the volume button until it brings up the menu where you would see ‘Power Off’, Restart and Emergency mode. Click on emergency mode and you should be able to see emergency info and contacts that you can call.
Wrapping Up
There are different Android phones from different OEMs which often choose to have their own user interface over the Android OS. This makes emergency information settings a different experience across the board. On these different UIs, emergency contact info might be in the same, similar or entirely different places.
In general, no matter the Android phone you’re using you can go into your settings and just type in “emergency” into the search bar or your contacts like you have on Samsung and you’d see where you can set up emergency info and contact(s). Did this work on your Android phone? Let us know in the comment section.
Discover more from Dignited
Subscribe to get the latest posts sent to your email.


