Apple has made it quite easy to use closed captions on your Mac. Closed captions can be used in different cases. From language barriers to hearing impairments, or just for the sake of it. You can enable this on your Mac so it shows up while you’re watching movies or TV shows.
When you enable closed captions on Mac, you also have control over how it appears. You can decide to go ahead to customize the look and feel of the caption and see a preview as you do so. This is in terms of the physical attributes e.g font, size e.t.c
In this post, we’ll show you how to enable and customize closed captions on your Mac using Apple’s Subtitles for the Deaf or Hard-of-Hearing (SDH) feature. This feature is meant for users who are Deaf or Hard of Hearing or who fail to understand the language being spoken in the video. Read through.
Enable and Customize Closed Captions On Mac
Follow the steps below to enable and customize closed captions on your Mac.
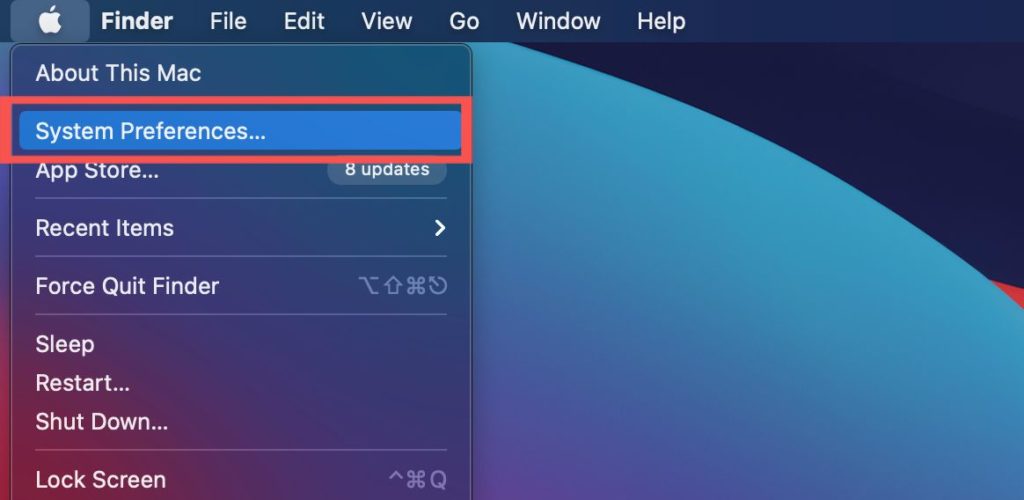
- Click on the Apple icon at the top left corner and select System Preferences.
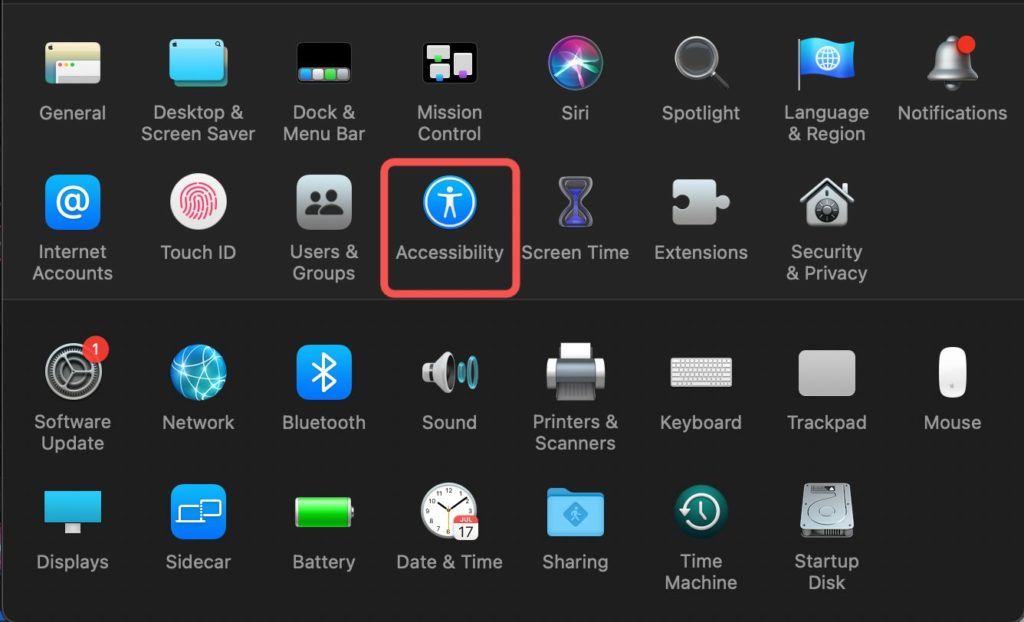
- Select Accessibility from the grid list of apps shown.
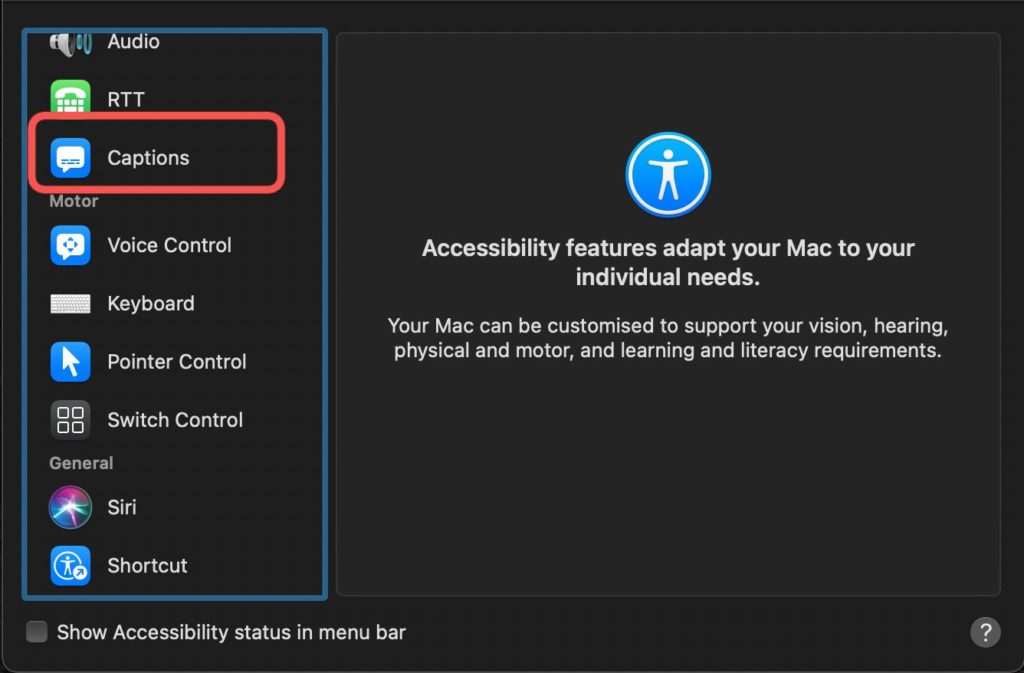
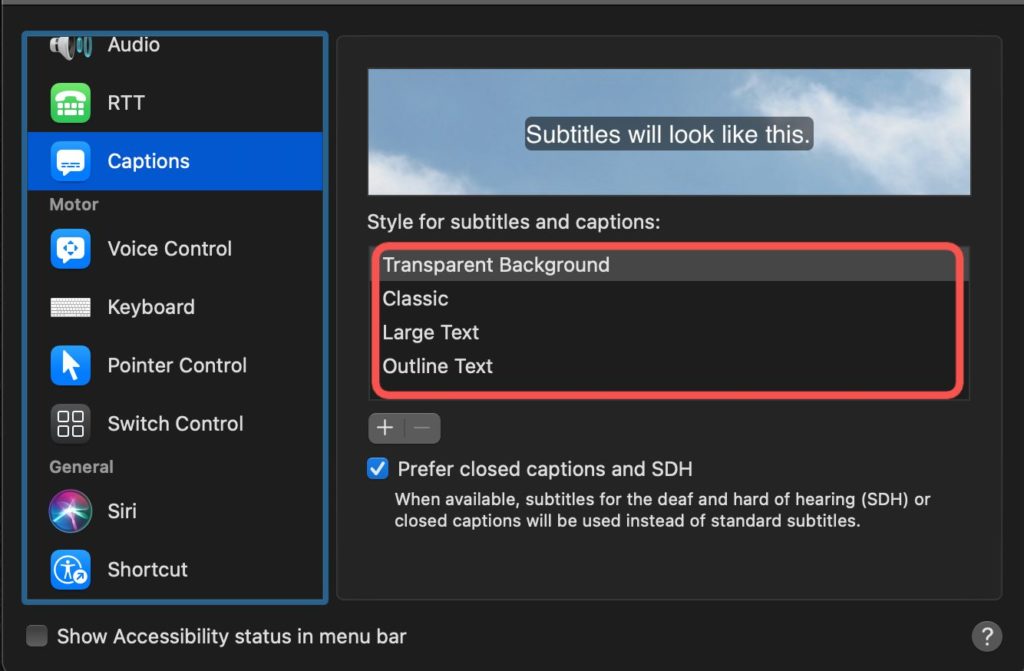
- On the left part of the modal that shows up, select Captions.
- Select the Prefer closed captions and SDH option.
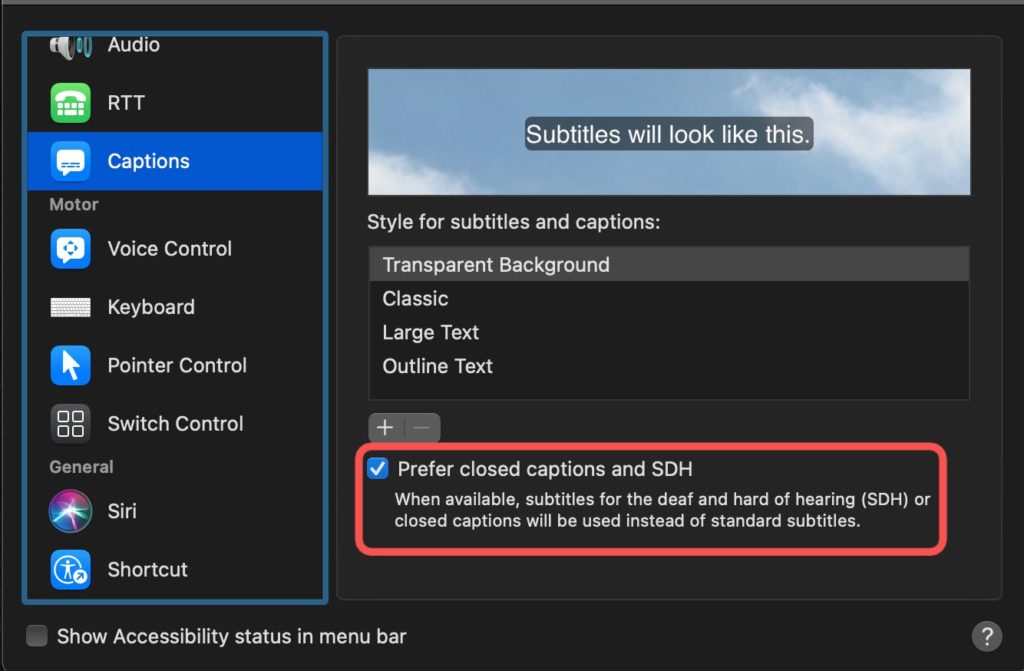
- Select a caption style between Transparent Background, Classic, Large Text, and Outline Text.
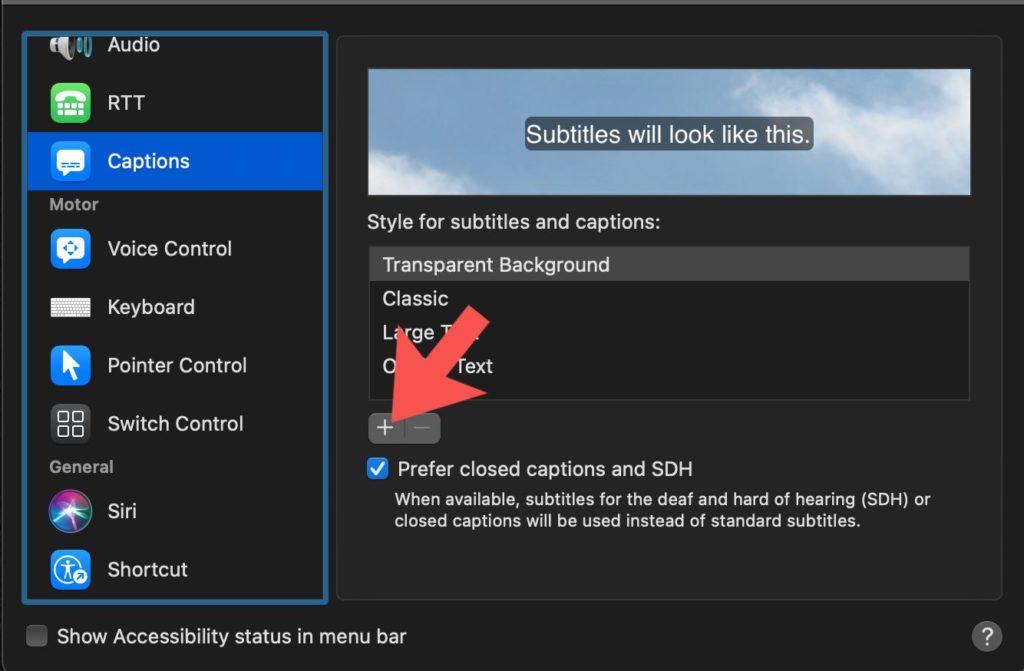
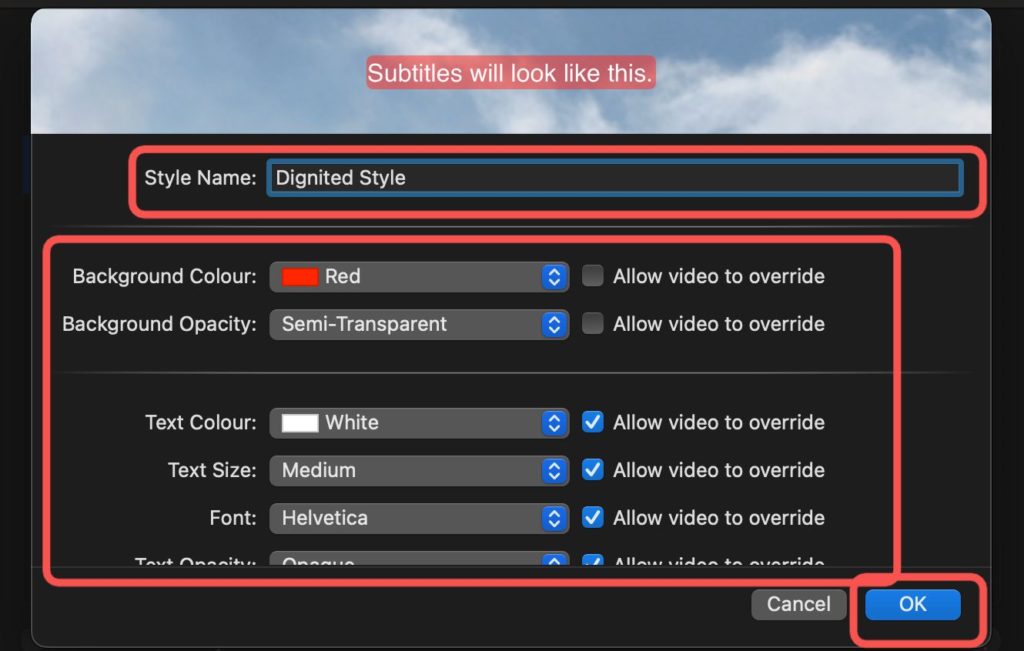
- Click on the + button to further customize options and create your own style with things like background color, background opacity, text color, text size, font, text opacity, text edges, highlight color, highlight opacity, and more. These will dictate how your closed captions are shown.
- Select OK once you’re done setting your preferred styles.
Using Closed Captions On Your Mac
After enabling the closed captions on your MacBook, follow the quick steps below to use it while watching a video.
- Open a video in QuickTime Player.
- Click on the View menu.

- Select Subtitles.
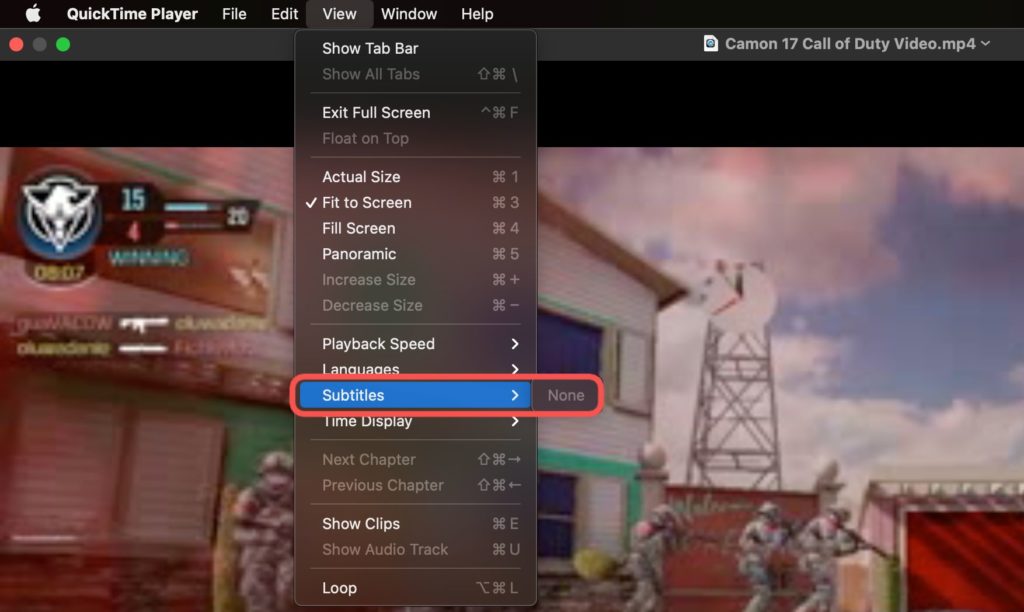
- If the video has closed caption available, select from the options that shows up. If not, you’d see None.
And that makes it a lot easier to watch videos where the audio isn’t very clear or the user has accessibility issues. Please, feel free to use the comment section below if you face issues with enable, customizing, or using closed captions on your MacBook. We’re happy to help out.
Discover more from Dignited
Subscribe to get the latest posts sent to your email.


