Undoubtedly, Google Docs contributed immensely to the paradigm shift of how we work, collaborate, and share documents. And as useful as Google Docs is, it can really get messy when you have a large number of files stored on the platform. Organizing and managing them can become really challenging. To solve this problem, Google introduced the folder feature. This feature helps users organize their Google Docs files into named folders. Good thing is, you can quickly add folders right from a document you’re working on.
Here is how to create a folder in Google Docs and organize your files.
Related Article: What is Smart Compose, and How do You Use it in Google Docs?
How to Create a Folder in Google Docs

- Visit docs.google.com and double-click to open one of your documents.
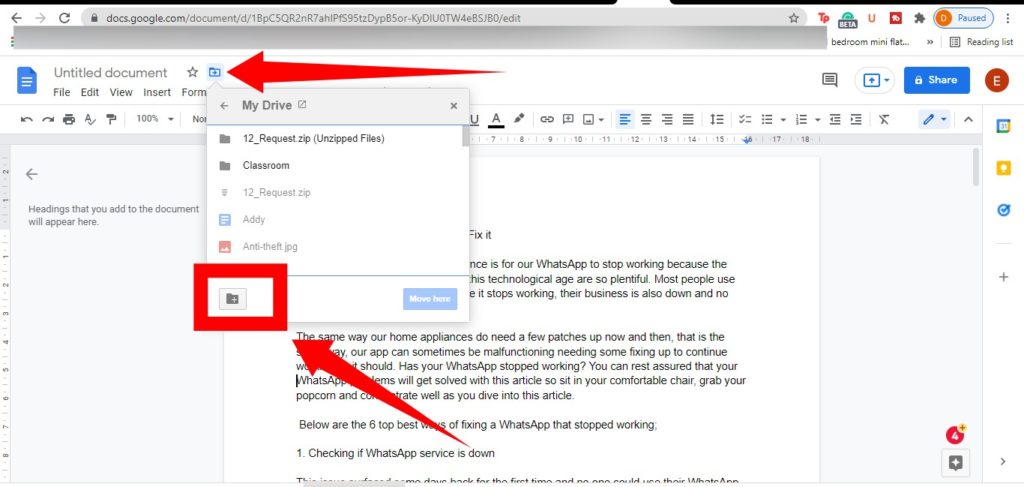
- Then click the Move icon at the top – next to your document’s title – to create a new folder. There are cases where the folder icon itself will be displayed instead.
- When the menu opens, tap on the folder icon (with the plus sign) at the bottom of the menu. Then name your new folder and click the check mark next to the naming text box to save it.
- You can then tap on the blue “Move here” button to move the currently opened document into the newly created folder. The created folder in Google Docs will automatically be saved in Google Drive.
Related Article: 5 Google Docs Tools to Improve on Your Productivity
How to Access Your Folder

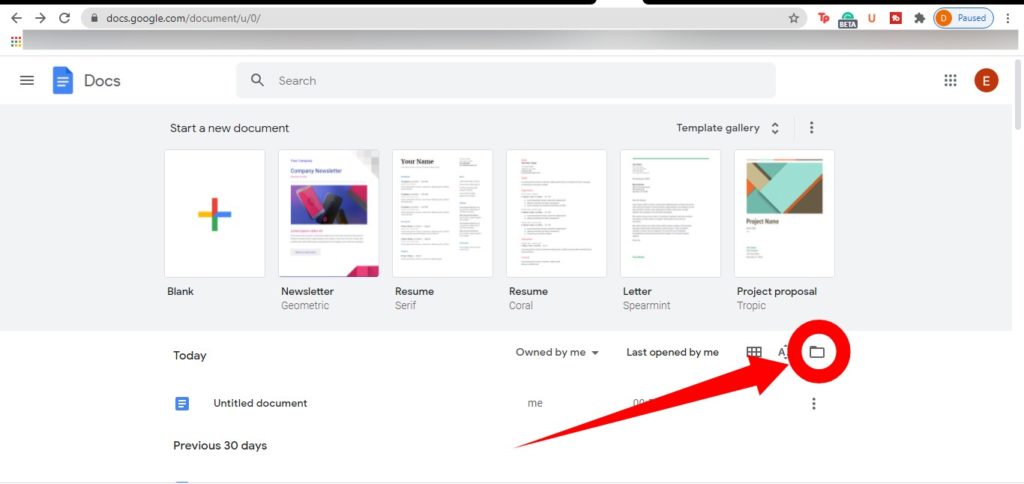
- To access all your created folders and files saved in them, go back to your Google Docs homepage and click on the folder icon at the far-right side of your screen.

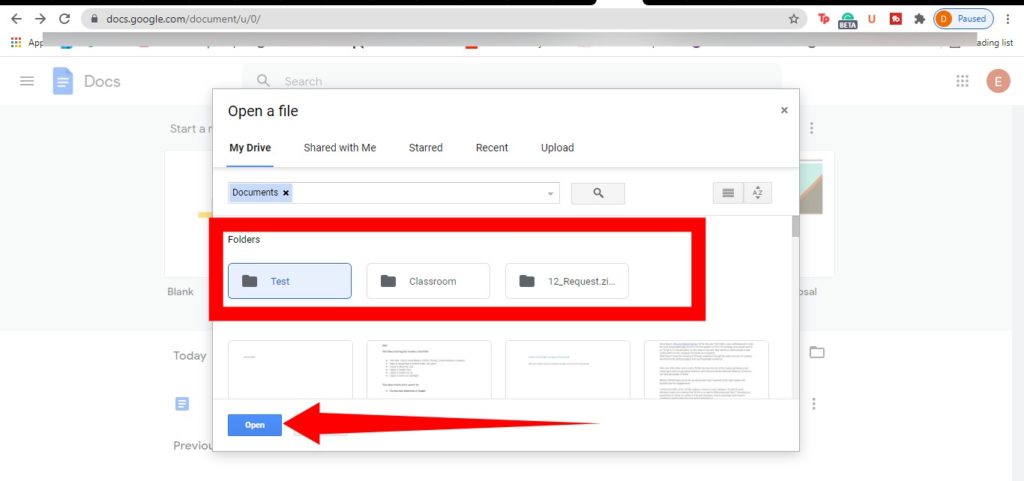
- You will find all your created folders under the My Drive section
- Select the folder you want to access and then tap Open at the bottom.
All files you create at docs.google.com are also automatically added to your account’s Google Drive. You can access them from your Google drive at any time.
Discover more from Dignited
Subscribe to get the latest posts sent to your email.


