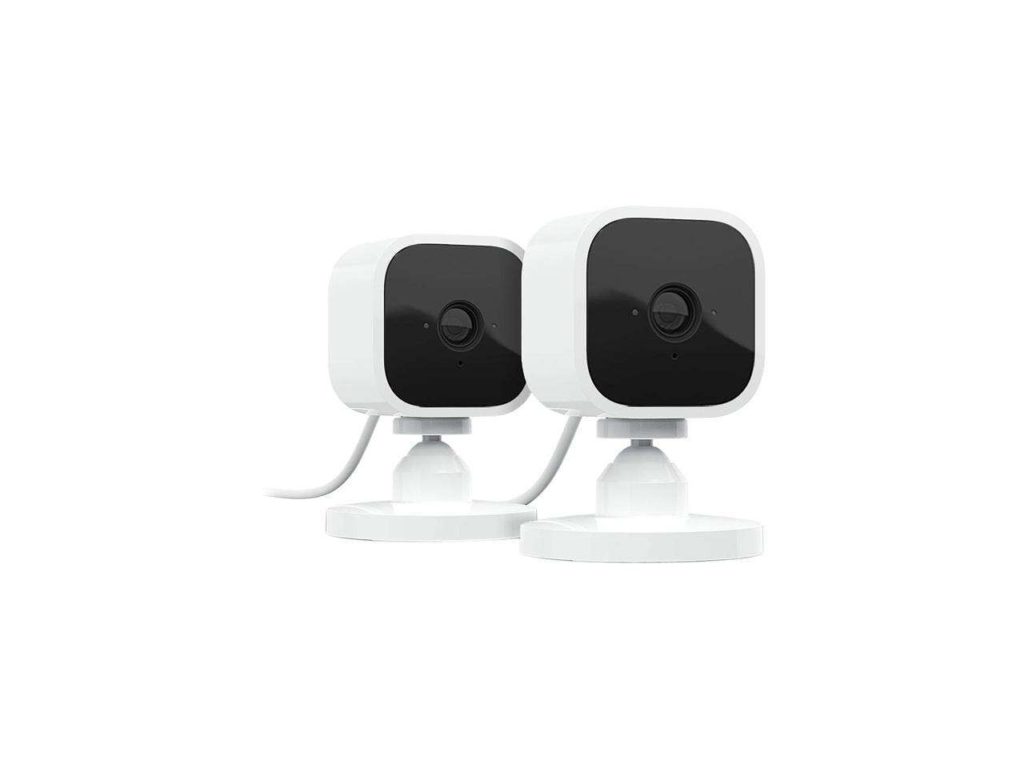
Before now, Closed-Circuit Television (or CCTV as it is commonly called) was the way to go when considering a monitoring device for your home or office. They are, however, gradually going out of fashion. This is partly because CCTVs are quite expensive to own and installation also requires technical know-how. Smart cameras are becoming the new big thing, replacing CCTV cameras very quickly – there’s a reason that is. Smart cameras (like the Blink mini Smart Camera) offer smart connectivity, cloud storage, and an easy way to set up a security system in your home or office.
The Blink mini Smart Camera is a smart indoor camera by Amazon, and it is one of the most affordable and effective smart home indoor cameras you can get your hands on. This article is a step-by-step guide to set up your Blink camera (if you’ve just purchased one).
What You Need to Set it Up
Internet Connection
The Blink mini smart camera needs an active, high-speed internet connection to work: A DSL, cable, or fiber with a minimum upload speed of 2 Mbps. Also, you should note that the Blink mini smart camera typically connects to a 2.4GHz WiFi band internet router.
Stable Electricity
The Blink mini smart camera is a plug-in smart camera. This means, it only works when it is plugged into an electric outlet. You shouldn’t expect more than that from a $35 (on Amazon) smart camera. So, while setting this device up, keep in mind that you can only use it in an area in your home or office close to an outlet.
The Blink Mobile App
You will also need to download the Blink Home Monitor app on your mobile device. This is where all the configuration and connections of the Blink mini smart camera aredone. It is also where you watch live camera feeds from wherever you decide to set up the camera.
Download the Blink App
- To begin the setup process, you will need to first download the Blink Home Monitor app on your mobile device. It is available for both IOS and Android device users.
- After downloading and installing the app on your device, you will then need to set up you profile on the app.
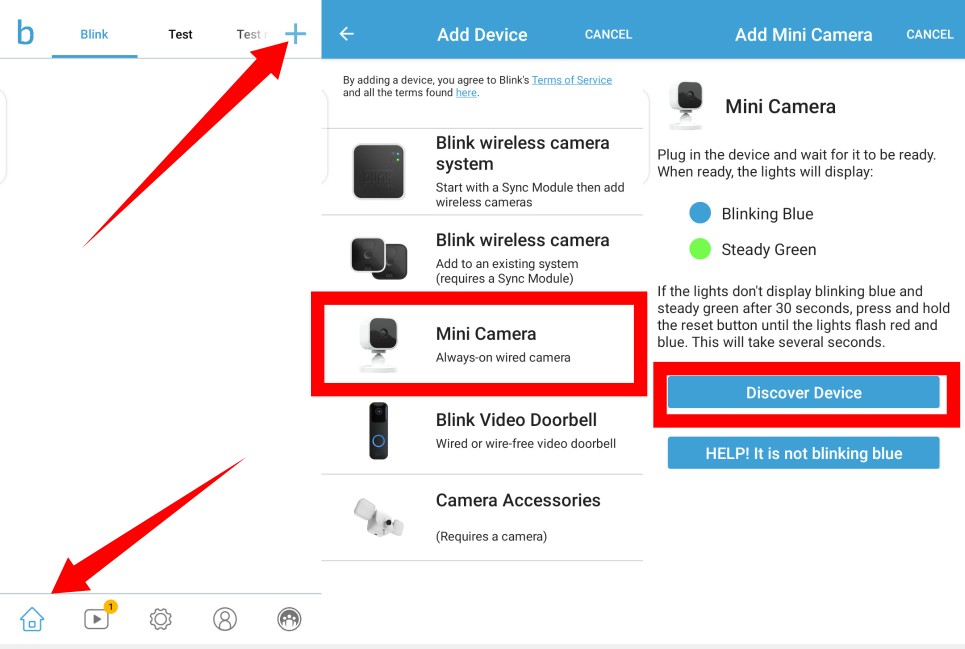
- Next, tap the + sign icon sitting at the top-right corner of the app home page to connect a Blink device. In this case, we’re connecting a Blink mini camera.
- You will then be required to capture the QR code on the device (It is at the back of the camera), or enter the serial number of the device manually, and then give the device a name.
- The next thing to do is to plug in your Blink mini Smart Camera and wait for the lights to appear. The blinking blue and steady green lights are indications that the camera is ready for set up. Click Discover Device on the app to continue.
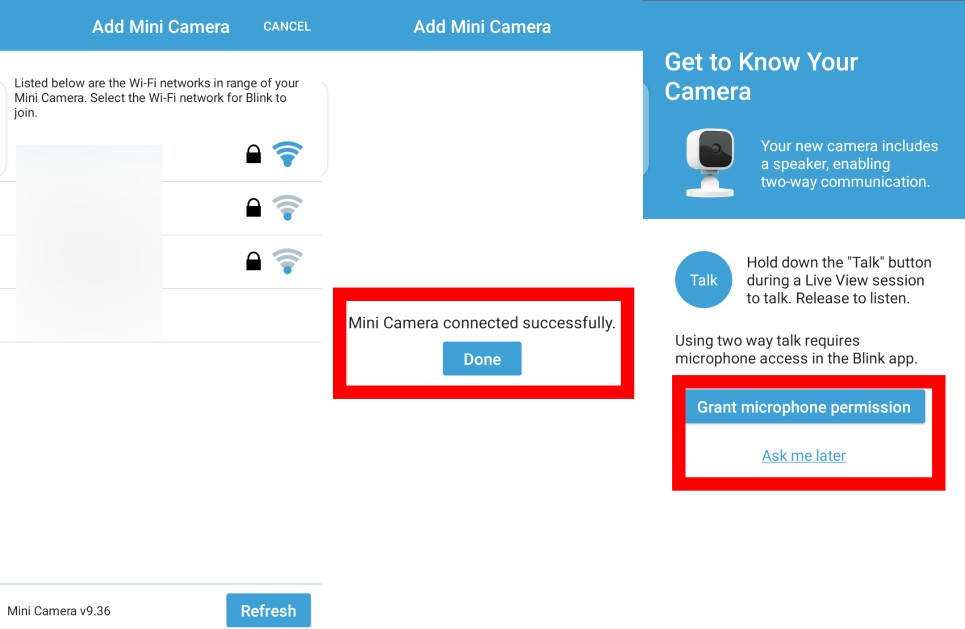
- You will then need to select your Wifi network and enter the password. Click Done when the camera connects successfully.
- A Get to Know Your Camera page will appear requesting that you to grant microphone permission. The camera includes a speaker which enables two-way communication. Tap Grant microphone permission or Ask me Later.
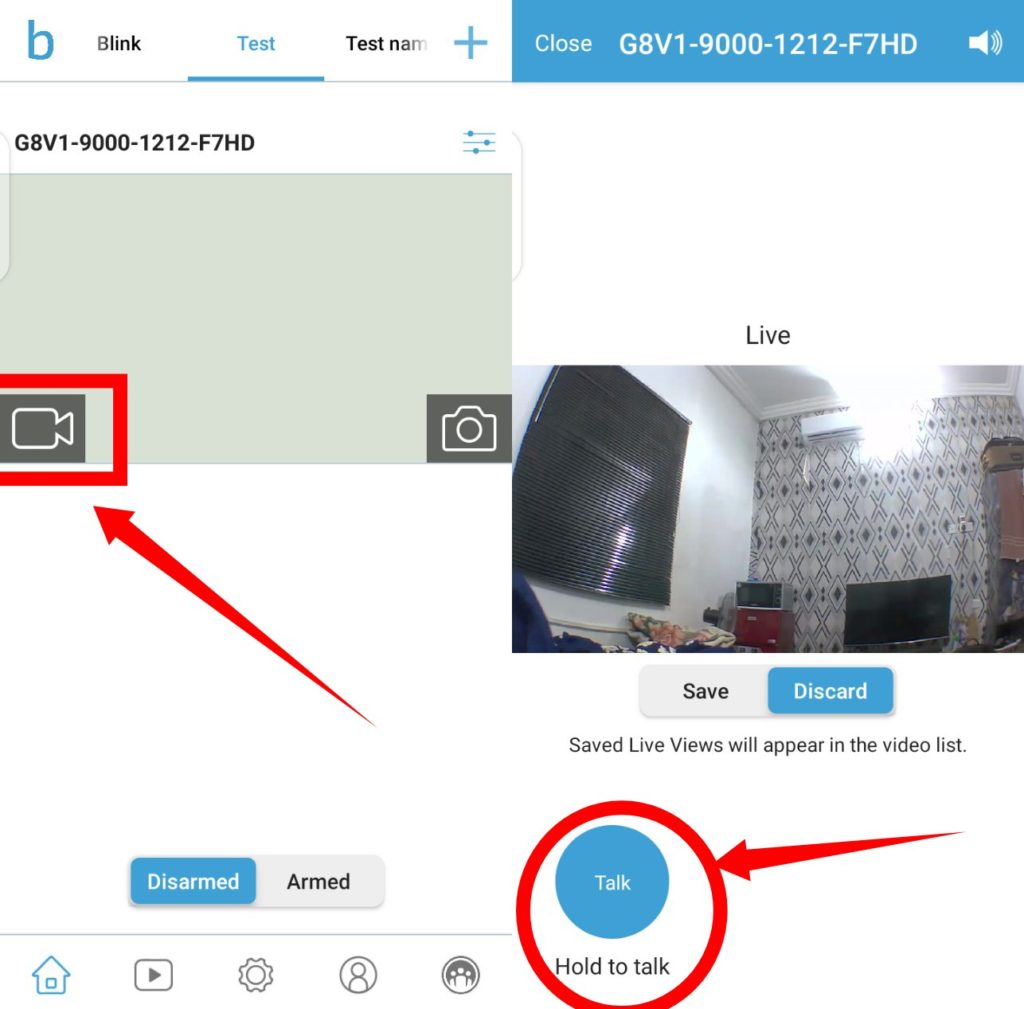
- Finally, tap the live video icon to see live video feed from your camera. Tap and hold the Talk button to speak.
That’s it. That’s how to set up your Blink mini Smart camera. If you are, however, still searching for the right smart camera to buy, we recommend you read How Smart Home Security cameras work and what you should know before buying one
Discover more from Dignited
Subscribe to get the latest posts sent to your email.


