Have you ever wished you could create stunning websites without having to learn how to code? Coding expertise and knowledge vary widely among individuals. If you want a website for your business in such a situation, then what should you do? That’s where Webflow comes in!
What if we told you that you actually don’t need any code to create a professional website with Webflow? That is possible, yes. You are able to make this a reality with the assistance of Webflow! However, before we get you all excited, allow us to assist you in comprehending what we are discussing. Hint: It is something that you can use to quickly and fairly easily build your website without knowing any coding.
Read: Here are the Top 10 No-Code Platforms to Build a Website
What is Webflow?
Webflow is a software-as-a-service tool that makes it possible for web designers to make responsive websites without knowing how to code. Designers can complete most web development and deployment tasks entirely within the application thanks to it.
Webflow makes HTML, CSS, and JavaScript for creators as they utilize the product.
Webflow is an all-in-one online design tool that allows users to “code-first” graphically design, develop, and deploy responsive websites.
Yes, that is what I said! “Webflow empowers designers to build professional, custom websites in a completely visual canvas with no code,” according to their own language.
It is a digital interface builder with a visual component. It lets you position and style any digital interface’s components. Webflow’s significant advantage is that you might have the made point of interaction on any space and immediately change it into an exhaustive website.
Related: What is Zapier: Everything You Should Know
How to create a basic website with webflow
- Create a Webflow Account (you can get started with the free plan).
- You can alternatively sign in with your Google account
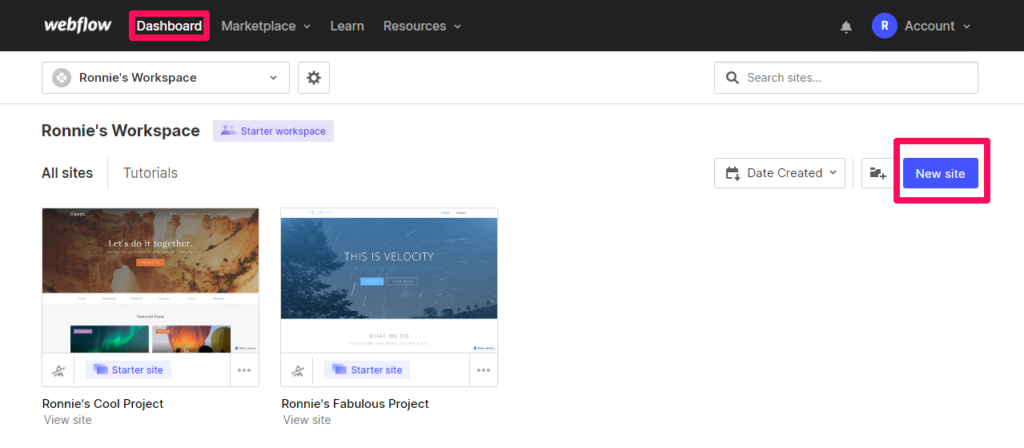
- Open the “Dashboard” & click on “New Site”.
- Scroll down If you want to use a free template or paid one
- Pick a “pre-built template” or go with a blank one.
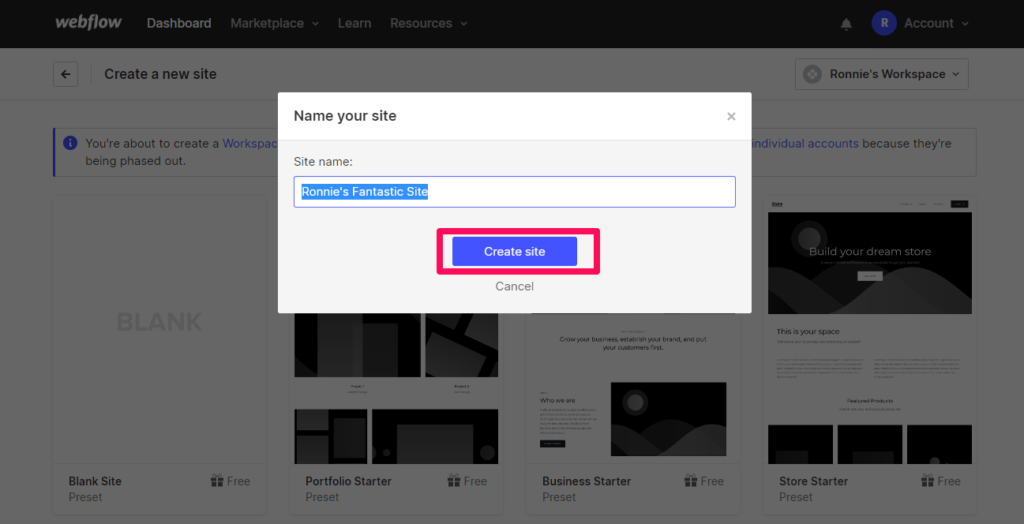
- If you click the “blank” one, give a name to your project and click on the “Create Site” button.
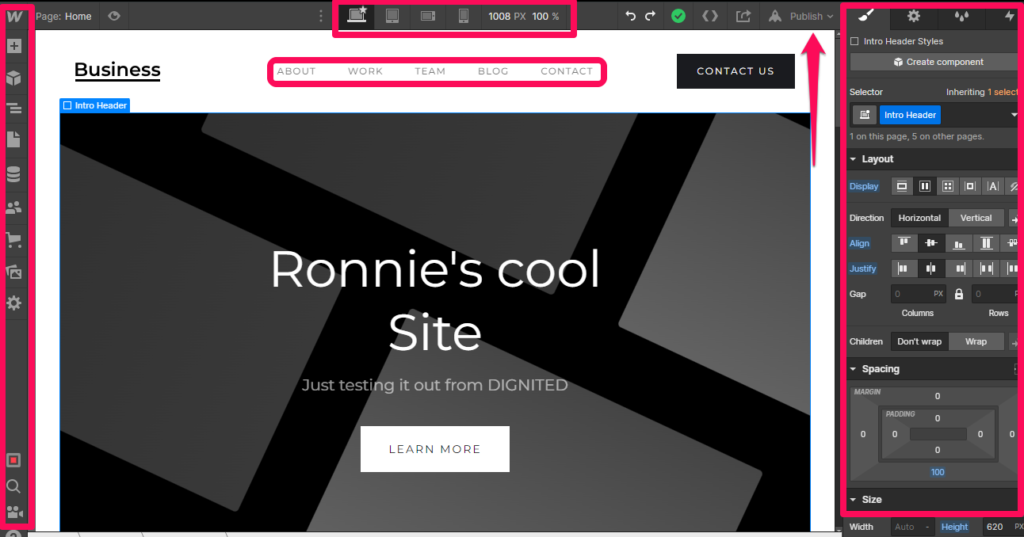
- Now start editing your template by selecting any element; then editing on the right panel
- You can view all screen size versions of your website at the top for responsiveness
- Drag around elements and drop them where you want
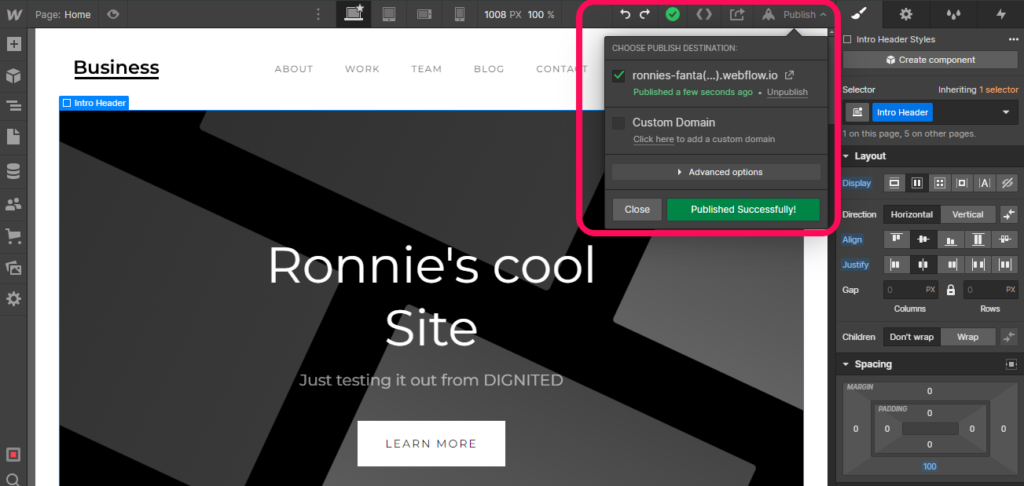
- Once all that is done; You can hit the publish button as shown in the third screenshot
- If you have a domain, upgrade and choose it otherwise let’s try the free version
Here is my version of the website I have just created alongside. I did not change most of the default text. You can go ahead and;
- Creating your own Navbar
- Customize the buttons
- Edit footer
- Edit all placeholder text
- Upload your own images, logos, and designs
- Customize Menu
- Mobile and tabular View
Related: How to Create a Free Business Website With Google
Webflow pricing
The free Starter Site plan is great for trying Webflow. You can still purchase a paid Site plan to publish, host, and unlock additional features. Connect your custom domain to your site. You can also purchase a domain through Webflow.
Currently, Webflow has 12 distinct pricing plans with several unique features.
Conclusion
Webflow was originally designed for digital artists and designers. However, the app has gained popularity among non-technical users interested in creating websites or apps. We hope you have learned something about how you can get started with Webflow. Webflow is ideal for personal websites, blogs & business websites.
Discover more from Dignited
Subscribe to get the latest posts sent to your email.


