Final Cut Pro 10.7 introduced several new features including video role colors, collapse to the connected storyline, accelerated H.264 and HEVC exports, the much-needed enhanced object tracker, and my favorite, automatic timeline scrolling.
With automatic timeline scrolling, You can set the timeline to scroll continuously during playback, so that the timeline always shows the section of the project playing in the viewer. Before this update, you had to do this manually using the horizontal bar or needed some plugin or 3rd party software.
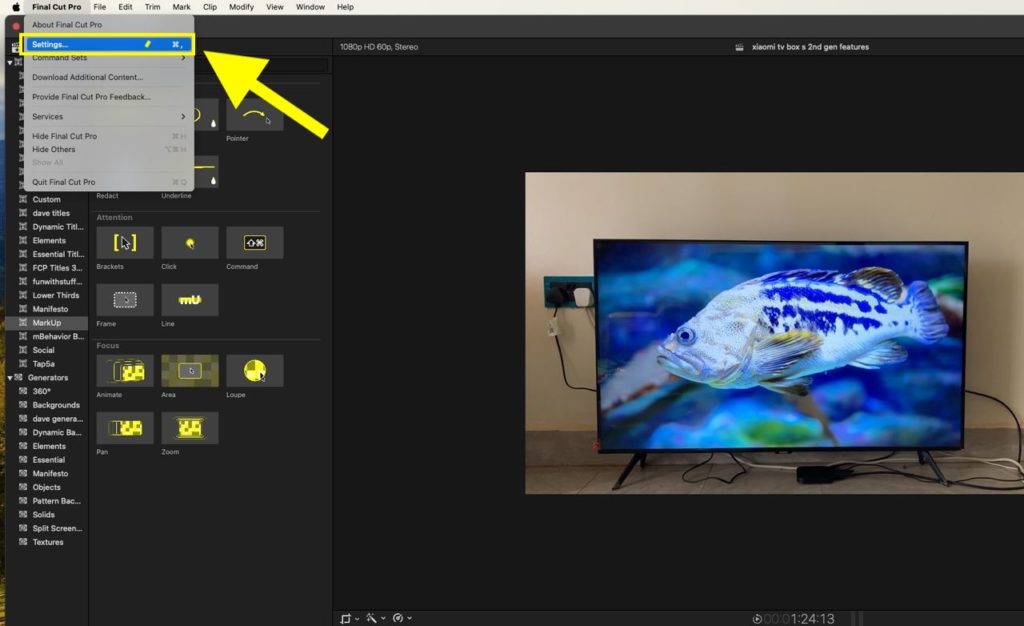
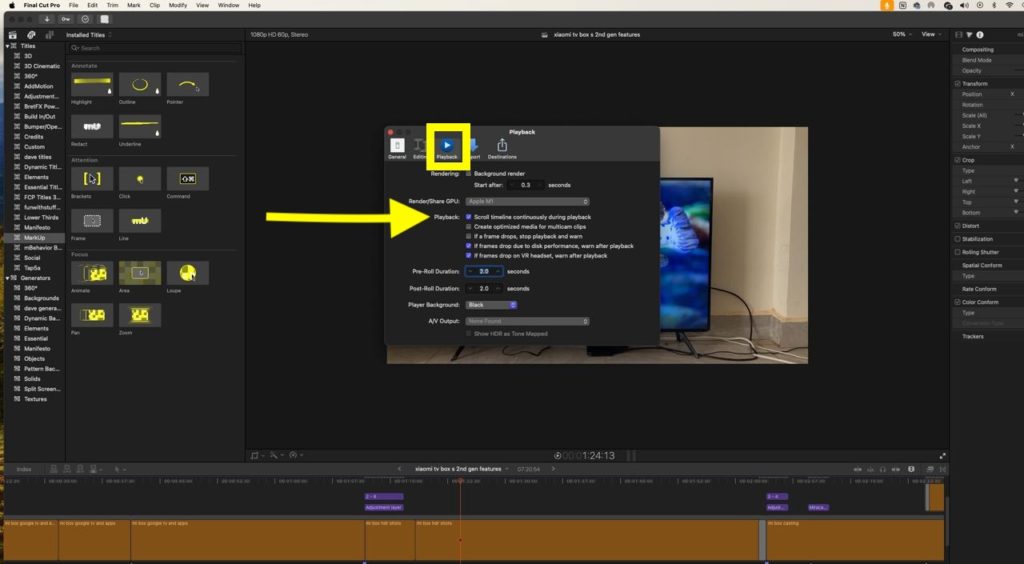
To enable or disable auto-scrolling in FCP, ensure you have the latest update which is 10.7 as of today Dec 21, 2023. This feature is enabled by default, but you can turn it off and on by going to Final Cut Pro > Settings (or press Command-Comma), click Playback, then select “Scroll timeline continuously during playback.”.


Select Scroll timeline continuously during playback
Whenever you play a project that extends beyond the visible timeline, the play head moves to the center of the timeline and then remains there as the clips currently playing in the viewer pass beneath.
That’s it. YOu can also watch our video on the same below.


