Every Android smartphone or tablet has a secret set of options that are hidden by default dubbed “Android Developer Options”. These features are primarily meant for developers as the name would suggest. These options are ideal for people who need additional functions to test software and apps they are writing for Android devices. There are many options that allow you to simulate app stresses or enable debugging options.
Among the options that this secret menu allows you to do include enabling debugging over USB, capture bug reports on to your Android device, and show CPU usage on the screen to measure the impact of your software. There are many more options, most of which we may not get into in this post but first, let’s look at how to access and enable Android Developer Options.
Also Read; 5 features developers will love about Android O, the latest Android version
How to enable Developer Options on your Android Device
Every Android device has this menu hidden somewhere within the default settings menu. However, every OEM makes it a little different to get to them. This menu is hidden for a good reason. The options offer great power – power most people can’t usefully use.
The following process works on most devices.
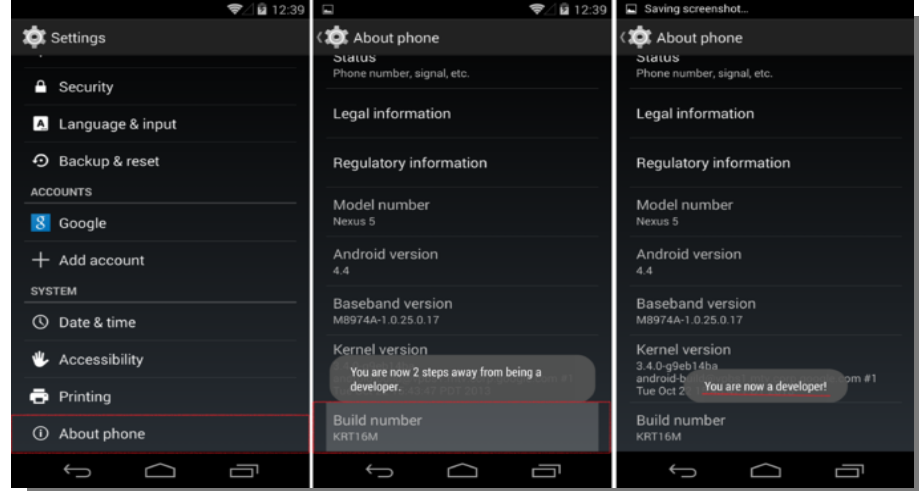
Go to Settings > General > About phone. Then scroll and select Software information > Build number. Now rapidly tap on ‘Build Number‘ five times and you will see the message ‘You are now a developer!’

If your OEM skin makes this a little different, all you have to do is locate Build Number from the About Phone setting of your device. Some OEMs make it seven- rather than five taps so you just tap on it repeatedly until the banner appears.
Discover more from Dignited
Subscribe to get the latest posts sent to your email.


