We’ve watched our lives go completely digital in the last few years. Virtually everything we do today involves making payment for something online; either for subscribing to your favorite music app, paying for that Zoom subscription, or buying stuff from your favorite e-commerce platforms around the world.
Until recent times, doing all of these things online wasn’t always easy. Virtual cards changed the game, however. A virtual card comes with all of the features of a regular credit or debit card. The only difference is that virtual cards are not physical.
While there are many platforms that offer virtual cards, Chipper Cash is one of the very reliable ones. The virtual USD Card allows you to easily subscribe to your favorite platforms like Netflix, Shopify, Apple Music, and Alibaba, and buy items from websites like Amazon.
In this article, I will be showing you how to create a virtual USD card on Chipper Cash.
Related:
- How to Request a Debit, Credit, and Virtual Card on Your Access Bank App
- Grey.co: How to Get a Virtual Foreign Bank Account as a Nigerian
- Differences Between MTN MoMo Card and Airtel Virtual MasterCard
How to Create Your Chipper Virtual USD Card
- Open the Chipper Cash app on your smartphone and tap the “Card” tab.

- Select “Claim Your Card”.

- Tap on USD Card and then tap “Next” once done.
- You should then get a message saying “A brand new card, just for you!” Tap “Continue”. and your Chipper Card is ready to be used.
How to Fund Your Chipper Virtual USD Card

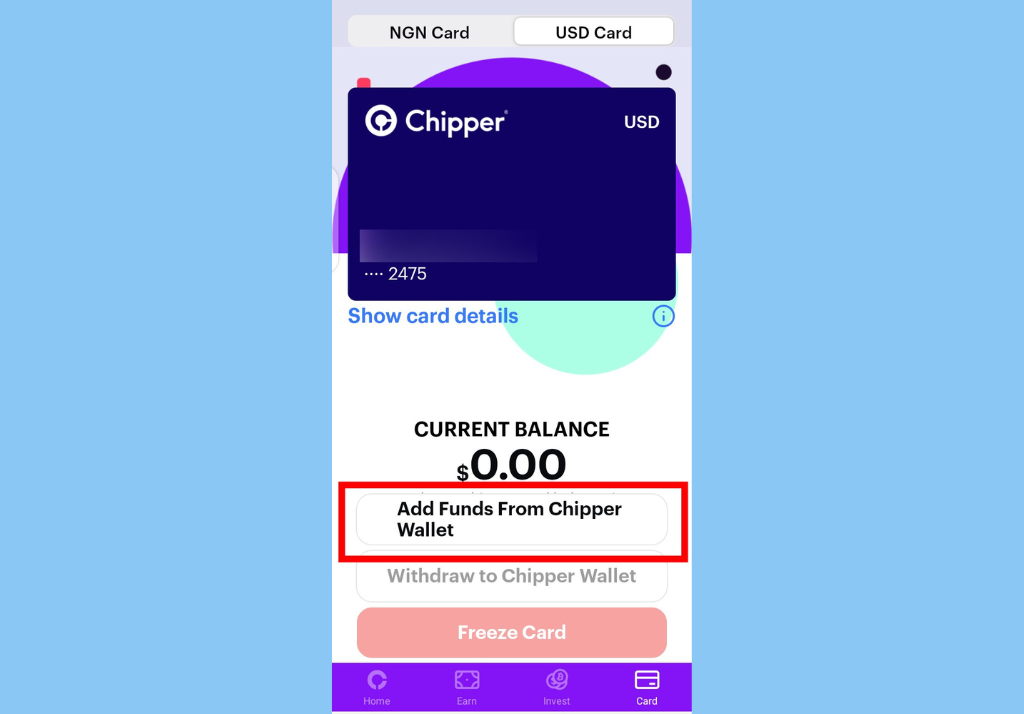
- Tap the “Card” tab and select “Add Funds From Chipper Wallet”.
- Enter the preferred amount you’d like to add.
- Tap on “Add Funds” and your Chipper Card balance will be credited, while your wallet will be debited.
Whenever you need access to your card details (card number, expiration date, and CVV) to make payments online, just open the Chipper app and grab the details. Also, you should know that with a Chipper virtual USD card, you get 5% cash back on every transaction made on the card and the card has a monthly limit of $5000.
Discover more from Dignited
Subscribe to get the latest posts sent to your email.


