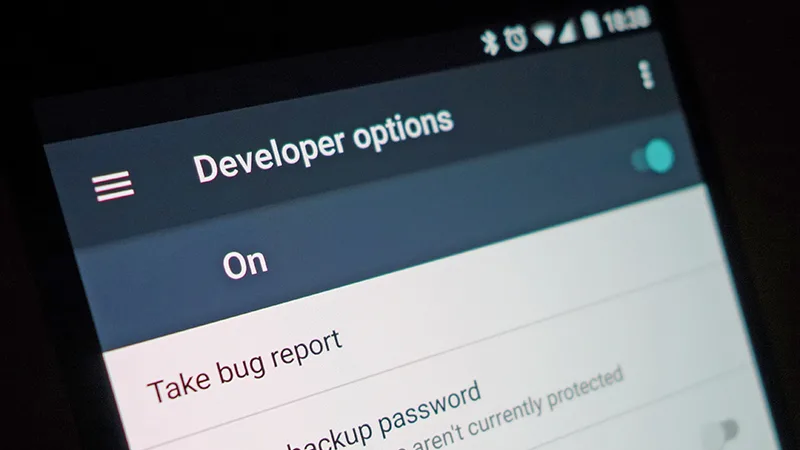
Android devices come with a hidden set of advanced settings called Developer Options. These settings menu contain low-level device tools that are not accessible by default, for obvious reasons of course. We have discussed how to enable Developer Options so if you haven’t enabled these, that might be worth checking out.
Unless you really intend to use these features, we suggest you leave these off. They are meant for higher-level (read: techy) Android users but there is still plenty for the average Joe.
So you have enabled Developer Options. What (magical) things can you do on your Android device using these advanced settings menu?
1. Window & Transition Animation Scale
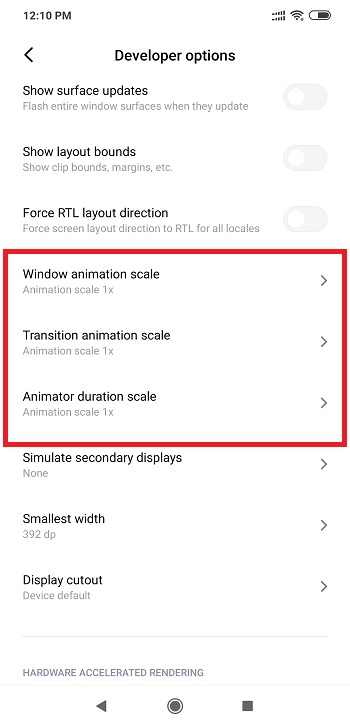
The first entry in our list is actually a set of two options that let you adjust the speed of transition animations. “Window animation scale” affects transitions that occur within apps (such as popups, for example), and the “Transition animation scale” deals with the animations that take place when you’re switching between apps. A third similar option, “Animator duration scale,” only affects certain loading animations, so we’ll skip over that one.
Turning off or reducing these animation settings can help reduce your phone’s battery consumption and also enhances gaming experience on your device. We wrote more about it here; you should check it out.
2. Mock Locations
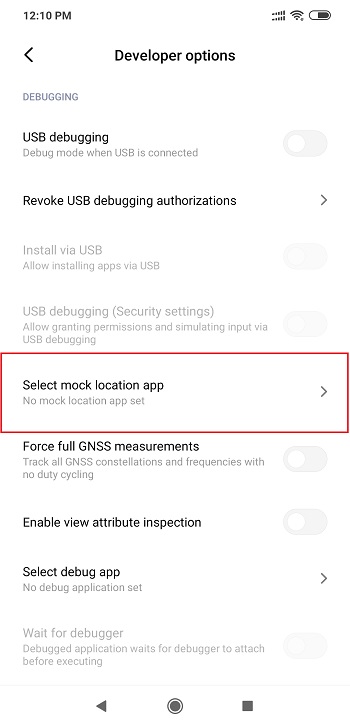
There are some apps in the Play Store which spoof your location and trick other apps into thinking you’re in a different place. However, to enable their functionality, you must first unlock Developer options.
Under the option “Select mock location app,” choose the app that has location spoofing abilities. Once selected, you will now be able to use the app to change location, whether that in the town next door or another country.
If you’d like to speed up the animations, set these options to a value lower than 1x, and almost magically, your phone will instantly feel a lot snappier. On the other hand, if you’d like to see the animations in slow motion, set the values to a higher number.
3. Force GPU Rendering
This next option might help if you’re experiencing graphical sluggishness in some apps. As of version 4.0 (Ice Cream Sandwich), Android uses your device’s dedicated graphics processor to render two-dimensional objects by default. Some apps, however, haven’t been updated to take advantage of this faster method of rendering graphics.
So if you have any apps whose graphics seem to be rendering slower than the rest of your apps, enable the “Force GPU rendering” option. This will make sure that all apps take advantage of Android’s hardware acceleration feature, which should make the user experience a lot smoother in some cases.
4. Show CPU Usage
This next option will come in handy if you’ve ever wondered what was going on behind the scenes on your Android device. Enable the “Show CPU usage” toggle, then you’ll instantly see an overlay on your screen that shows you all of the processes that are currently running. These entries are ordered by their current CPU load, and your overall processor usage is shown as a bar graph at the top of the screen.
5. GPU Rendering Profile
If you’d like to test your device’s graphics performance, select the “GPU rendering profile” option and set it to “Show on screen as bars.” This can be a very useful way of comparing the graphics performance for different apps on your system since the overlay will be shown on top of all screens.
The condensed graph at the top of your screen shows recent graphics performance history, while the bars across the bottom of your screen depict graphics performance on the fly. Higher spikes mean there was a heavy GPU load at that moment, so in general, this is a great way to see if an app is dropping frames or performing poorly from a graphics standpoint.
6. Background Process Limit
If your “Process stats” menu was looking abysmal earlier, or if your phone just doesn’t have much RAM, you might want to look into this last option. Select “Limit background processes,” then you can choose the number of processes that are allowed to run in the background and eat up memory on your device. For instance, you can set this to “2 processes at most,” then only the current app and the two most recent background processes will be allowed to run, which should free up a lot of memory on your device.
7. Force Apps into Split-Screen Mode
Split-screen is a useful feature first introduced in Android 6.0 Marshmallow. This feature allowed users to view two apps simultaneously by dividing the screen into two sections. However, to use a split-screen mode, the app must support the feature, which isn’t always the case. For example, the Netflix app doesn’t support split-screen, which is annoying especially you want to watch a game while also view an article.
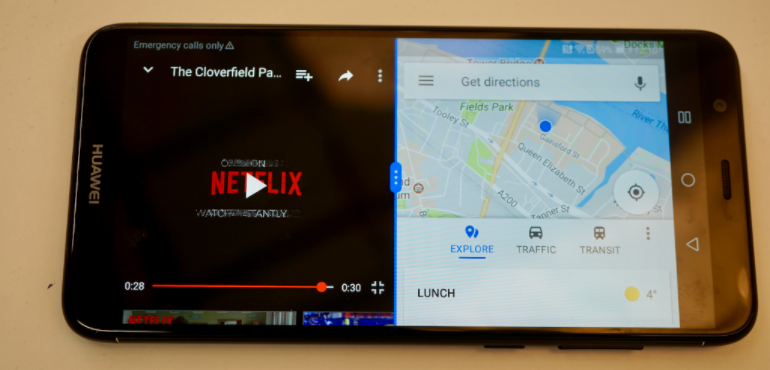
In Developer options, you can change this by enabling “Force activities to be resizable.” Once activated, restart your device. Now all apps will support split-screen mode, even if the developers decided against it. It is worth noting that this isn’t a foolproof method. Since you are using a feature not intended to be used by the app, it may act buggy or crash a few times.
8. Show Touches
This has got to be my most used Developer Option setting. Have you had a device with a faulty touchscreen, one that gets random ghost touches?
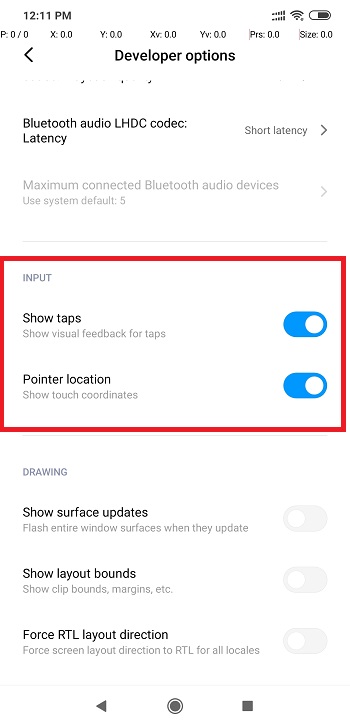
Well, I have. You can enable this feature in Developer Options and whenever you touch your screen, a white dot will show you exactly where the display is registering the touch.
These are just a few of the features and options you can enable and take advantage of. There is a lot more in that hidden menu. You can activate and take a look around, who knows, you just might find something useful.
Discover more from Dignited
Subscribe to get the latest posts sent to your email.


