Syncing your computer or device with Google Drive allows you to access your files anywhere, at any time. Google Drive syncs automatically by default whenever your device is connected to the Internet. However, there are several troubleshooting steps you can take to resolve syncing-related problems.
In this article, I’ll walk you through the steps to create symbolic links so that you can sync any folder on your computer with your cloud service without moving it. Note that Google has a separate program called Backup&Sync that allows you to choose any folder(s) on your computer to backup to Google Drive, which I will explain below.
Before we get into it, let’s first talk a little bit about what Backup and Sync actually is.
Backup & Sync Replaces Google Drive and Google Photos Uploader
Google Drive and Google Photos Uploader have both now been merged into Backup and Sync, so you can control all of your files, videos, images, and more from one app. This is where you’ll control which folders from your Drive are synced to and from your PC or Mac, as well as specifying which image folders should get backed up to your Photos library.
Related post: How to Sync folders between your computer and Microsoft OneDrive
Backup and Sync also adds one more tool to the equation: the option to back up specific folders from your PC or Mac to your Google Drive. With Backup and Sync, you can then access folder on any of my other devices, any time.
It is pretty interesting. Now, let us see how to set it up and get everything synced.
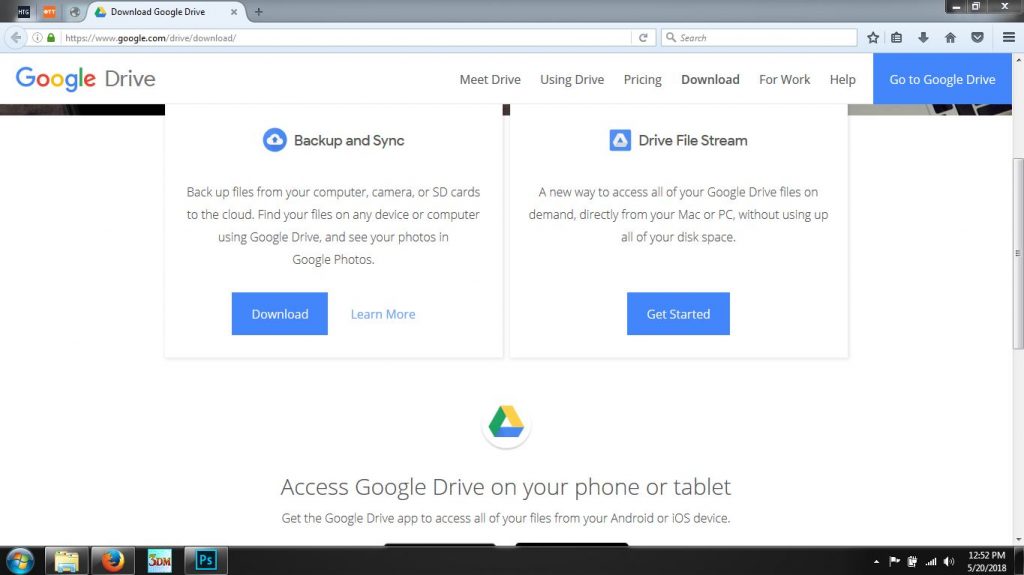
First step: Download and Install Backup and Sync
It is quick and easy to download the Backup and Sync for your computer from the official Google drive download website.
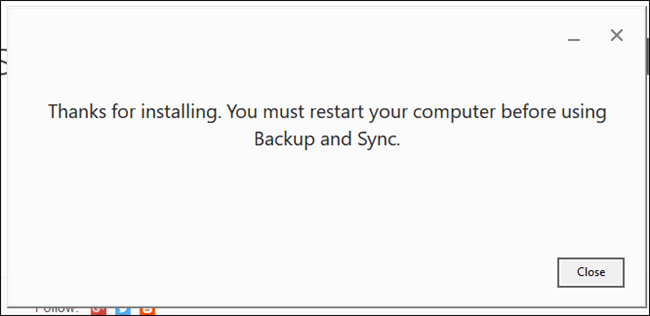
Suppose you already have Google Drive installed, this tool will automatically replace it, no uninstallation necessary. A few seconds later, Backup and Sync will be installed
If you previously had the Google Drive app installed, Backup and Sync should automatically log in to your Google Account. If not, you’ll need to log in. Click “Got it” to move into the app.
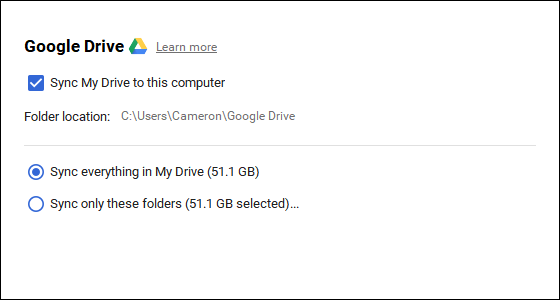
Step Two: Choose Which Folders to Sync from Google Drive
The Backup and Sync tool is split up into two main sections:
- Google Drive: Basically performs the same function as the original Google Drive app. You choose what folders to sync from your Google Drive cloud storage, and they’ll appear in a Google Drive folder on your PC. Anything you put into that folder will also sync to Google
- My Computer: This allows you to sync files between your computer and Drive without putting them in the dedicated Google Drive folder. Pick the folders from your computer you want to sync, and they’ll sync to your cloud storage (though they’ll appear in a separate section of the Google Drive interface, rather than with all your other Drive files.)
The following options in the Google Drive menu. You can Sync:
- My Drive to this Computer: Use this option to enable/disable syncing your Google Drive to your computer.
- Everything in my Drive: Literally syncs the entire contents of your Google Drive to your computer.
- Only These Folders: Allows you to specify which folders to sync from Drive to your computer.
The steps are straight forward and I assure you that it wont get any easier than this.
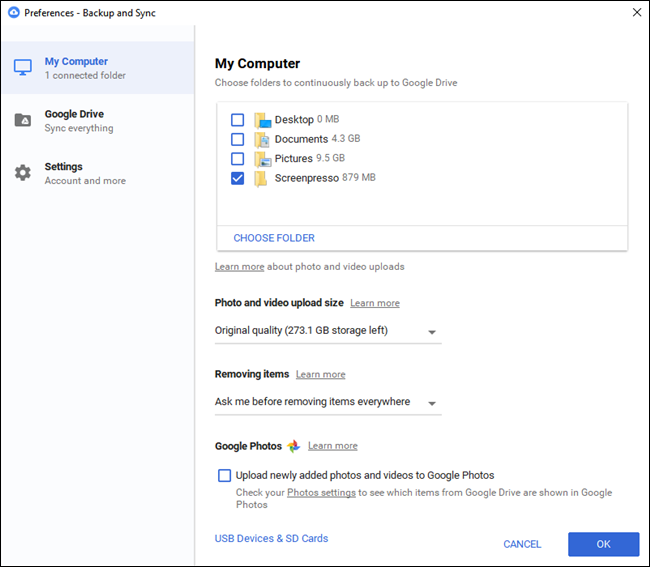
Step Three: Choose Other Folders On You PC to Sync
At the My Computer section, you can select other folders on your PC to sync. There are a few options already available here: Desktop, Documents, and Pictures. You can tick the box next to the option to completely back up everything from that location to your Google Drive.
That’s pretty much it, really. It’s a simple tool.
Much you should know about Backup and Sync
That’s really all there is to Backup and Sync, but there are a couple of other things worth mentioning:
- You can rename your computer by clicking on the “My Computer” (or similar) text at the top of the “My Computer” page and giving it a specific name.
- You can easily upgrade your Drive storage or disconnect your account from the “Settings” tab.
- System startup rules, file sync icon, and right click settings can also be modified on the Settings tab.
- Backup and Sync’s network activity can be restricted in the “Network Settings” section of the Settings tab. Proxies can be specific, and download/upload rates capped if need be.
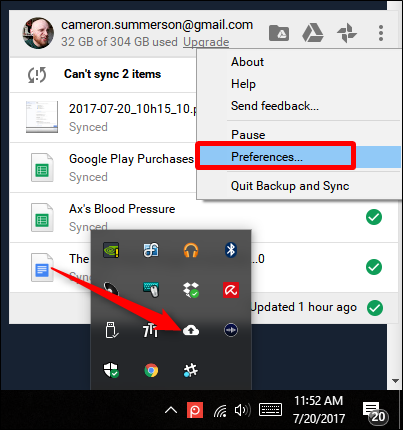
- The Backup and Sync tool will live in your computer’s system tray as long as it’s running. To access its settings, just click its icon in the tray, click the three-dot menu in the upper right corner, and choose “Preferences.”
If you have any questions please let me know in the comments below.