Creating forms is a crucial aspect of many businesses, and Airtable is a powerful tool that can help you do just that. Airtable is a cloud collaboration service that allows you to create databases and share them with your team. One of the features of Airtable is the ability to create forms that can be used to gather information from your team, customers, or other stakeholders. In this blog post, we will explore how to create a form with Airtable, step-by-step.
First, let’s take a look at what kind of forms you can create with Airtable. You can create simple forms that ask for basic information such as name, email address, and phone number. You can also create more complex forms that include drop-down menus, checkboxes, and file attachments. The best part about creating forms with Airtable is that you can customize them to fit your specific needs.
Related: Top Project Management Tools to Try in 2023
Form Creation
Creating a form is very easy with Airtable. Now, let’s dive into these steps:
Section 1: Creating a New Base
The first step in creating a form with Airtable is to create a new base. A base is the foundation of your database and includes all the tables, views, and forms that you create. Here are the steps to create a new base:
- Log in to your Airtable account and click the “All workspaces” button in the top left corner of the screen.
- Give it a name
- Give your base a name and click the “Create a base” button.
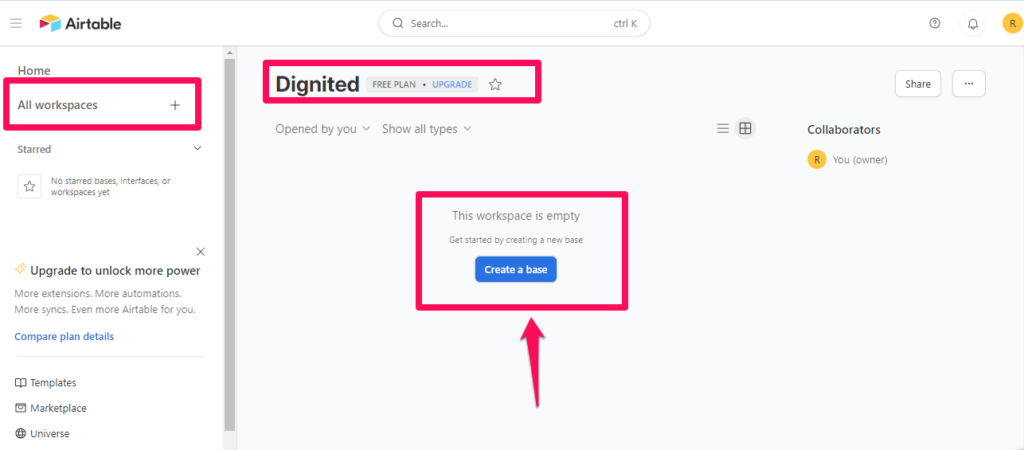
Now that you have created a new base, you can start creating your form.
Section 2: Creating a Form
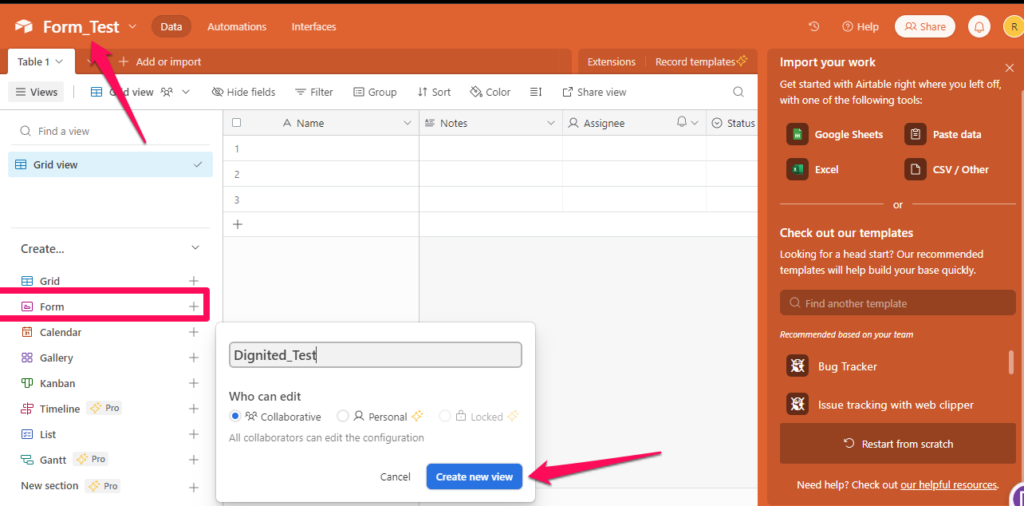
Once you have created a new base, you can create a form. Here are the steps to create a form with Airtable:
- You can name your base: Or leave it untitled
- Click on the “Form” button in the top left bottom corner of the screen.
- Give it a name.
- Click the “Create new view” button.
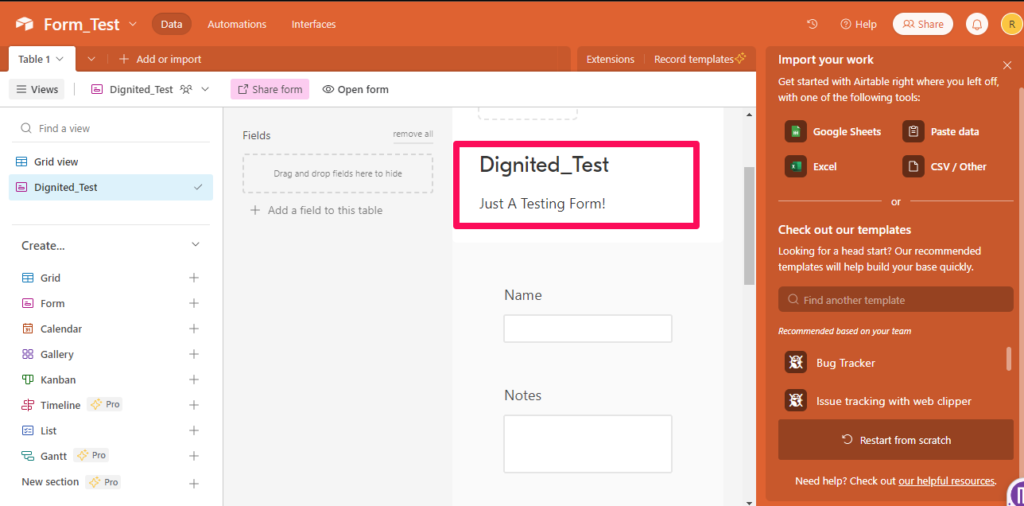
- Customize your form by adding fields and adjusting the settings. You can add fields such as short text, long text, multiple choice, checkboxes, and more.
- Copy the link to your form and share it with your team, customers, or other stakeholders.
- Here is our form: you can test it out by responding.
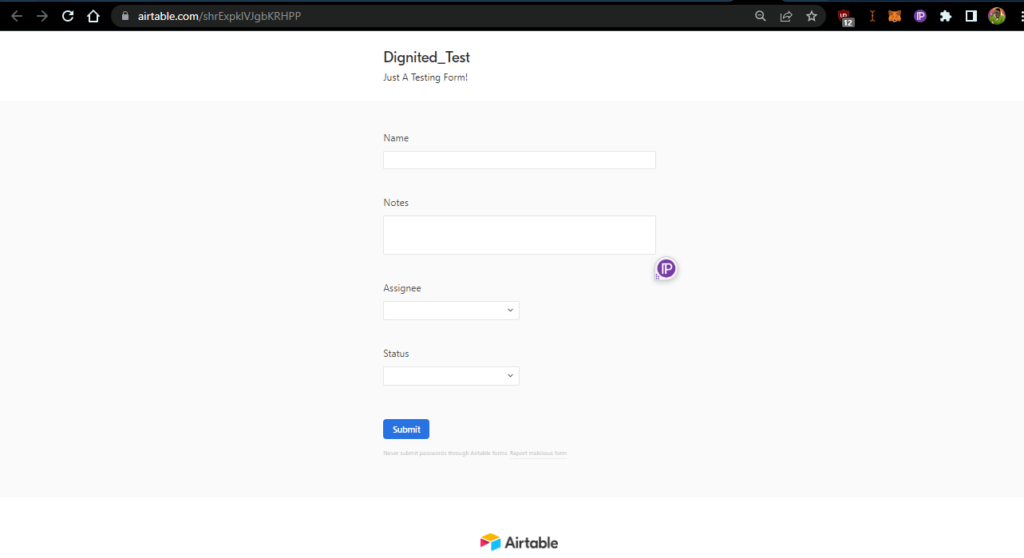
That’s it! You have successfully created a form with Airtable, you will need a premium account to access other features like adding logos, images, etc. The dashboard is also rich for your exploration.
Related: Typeform: Create Your First Online Survey Form
Section 3: Viewing Responses
Once you have shared your form and people start filling it out, you can view their responses in Airtable. Here are the steps to view responses:
- Open your base and click on the table that your form is connected to.
- Click on the “Grid view” button.
- You will see a list of all the responses to your form. You can filter and sort the responses to find the information you need.
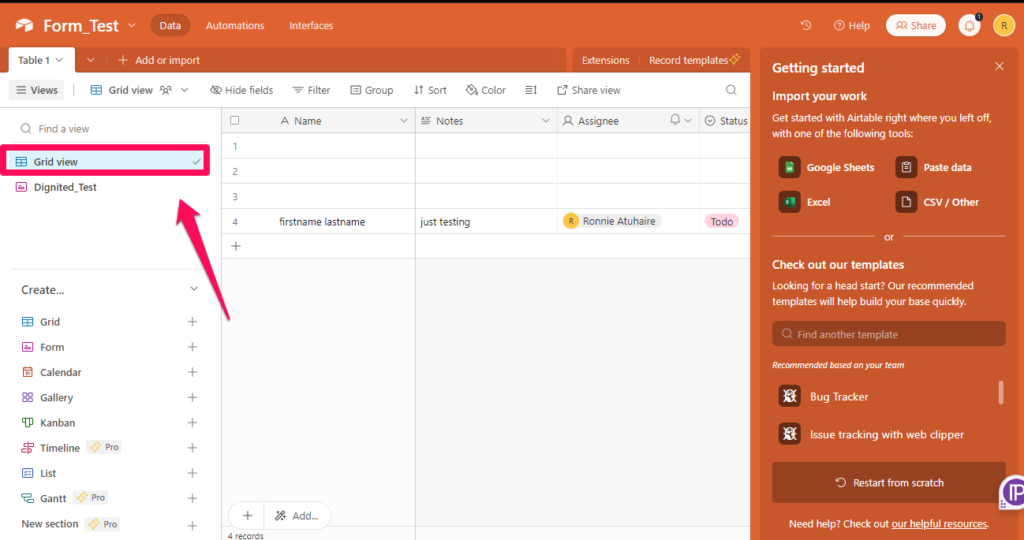
That’s all there is to it! Now you know how to create a form with Airtable and view the responses. Forms are perfect for logging expenses, collecting RSVPs, creating polls and quizzes, collecting customer information, and many other purposes.
Related: Here are the Top 10 No-Code Platforms to Build a Website
Conclusion
Creating forms with Airtable is a simple and effective way to gather information from your team, customers, or other stakeholders. By following the steps outlined in this blog post, you can create a customized form that fits your specific needs. Remember to be creative and think outside the box when creating your form.
Airtable offers many different options for fields and settings, so take advantage of them to create a form that works for you. Now it’s your turn to create a form with Airtable. Good luck!


