Are you looking to get the most out of your Chromebook? Look no further! In this blog post, we will be sharing the top 20 tips and tricks for maximizing productivity on your Chromebook. From keyboard shortcuts to apps, power user features, and extensions, we’ve got you covered. Whether you’re a student, a professional, or simply someone who wants to make the most of your device, these tips will help you work more efficiently and effectively.
So, grab your Chromebook, and let’s get started!
Scan documents using your camera
You already use your iPhone or Android phone to scan documents. But did you know you can also use your Chromebook camera to do the same? Chromebooks have a built-in document scan feature that uses your Chromebook camera to automatically identify, capture, and crop documents. The scans can then be saved as PSD or a picture.
To scan your documents, simply open your Chromebook’s Camera app and press the “Scan” button to get started.
Take screenshots and screen recording
Like your smartphone, Mac, or Windows PC, you can easily take screenshots and capture your Chromebook’s screen. It’s even easier with ChromeOS as this is a built-in feature. Screenshots are saved as PNG or JPEGs to your Chromebook or the cloud on your Google Drive. Screencasts are especially great for those who want to do product demos or tutorials. Further, you can also choose to record your voice and your face using the built-in camera or connected webcam. Perfect for creating presentations or demonstrations. You can watch our step-by-step video tutorial on how to take screenshots on your Chromebook.
To Take a screenshot using the built-in screenshot tool, simply press the “Ctrl + Switch Window” keys to capture the entire screen, or “Ctrl + Shift + Switch Window” to capture a specific area. To take a screen recording, press Ctrl + Alt + Switch Window and then select Screen recording.
Make GIFs with your camera
Every Chromebook ships with a webcam or camera for tablets. You can make great GIFs that you can share with family and friends or on your social media account using your Chromebook camera. In “Video” mode on your Camera app click on the “GIF” button. Then you can record fun five-second videos that will automatically turn into a GIF. Once you’re done, it’s easy to share with a click.
Access Microsoft Office on a Chromebook
I have been using a Chromebook as my daily driver for over a year, but one question has been consistent among friends; can I access Microsoft Office on a Chromebook? This is a perfectly valid question given most people come from a Windows background where Microsoft has dominated the productivity landscape with its wide range of productivity software.
Unfortunately, Google and Microsoft have competing products, so there’s a conflict of interest. Like Microsoft, Google promotes its own suite of productivity tools such as Google Drive, Docs, Sheets, and Slides. So Microsoft Word, Excel, and PowerPoint aren’t natively supported on Chromebooks. Instead, Google fronts its own alternatives. So if you still want to use Microsoft Office products, you will have to use the online version of MS Office now called Microsoft 365.
Read more:
Personalize and customize your desktop
Chromebooks are easily customizable. You can change your wallpaper, screensaver, keyboard shortcuts, position of the shelf, turn on dark mode, change the scrolling behavior, change the default language, and much more. I can’t go through how to do all these customizations because I already did a post on how to do exactly that here.
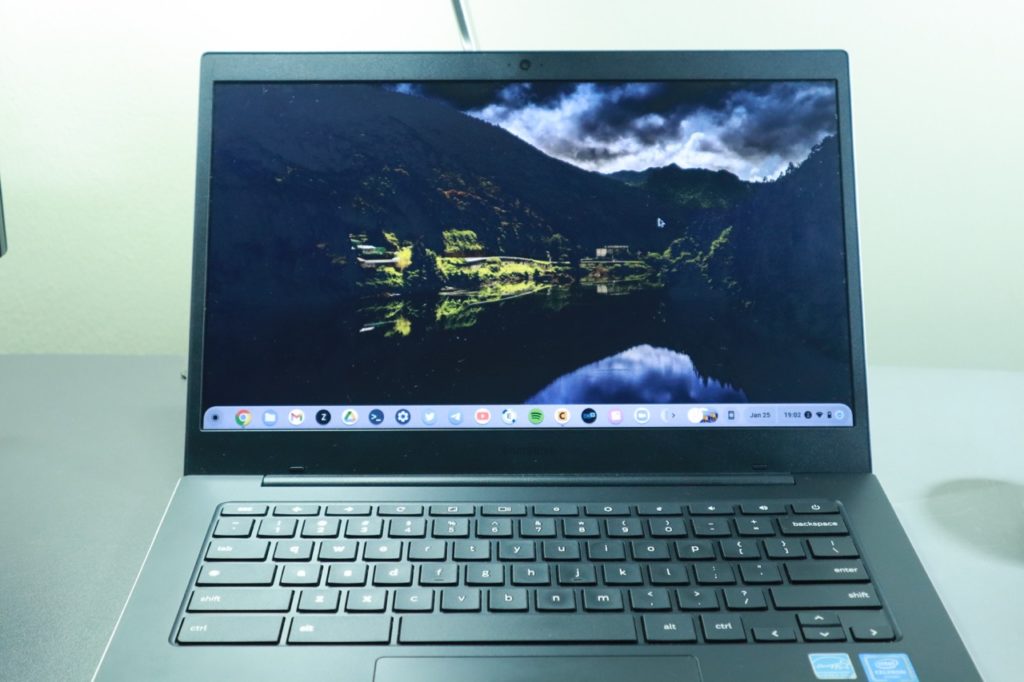
Read more: 10 ways to customize the Look and Feel of your Chromebook
Compared to Macs or iPads, I can say Chromebooks are very customizable, but not quite as flexible as Windows or Linux computers. You might be able to change App icons, accent colors and themes, and default applications as easily as Windows PCs without breaking system internals.
Connect your Android phone to your Chromebook through Phone Hub
Since ChromeOS, the operating system that runs Chromebooks, and Android, the operating system that powers Android phones are made by Google, there’s a tight and smooth integration between Chromebooks and Android phones. Through Phone Hub, you can view your recent photos taken on your Android phone on your Chromebook, the latest Chrome browser tabs.
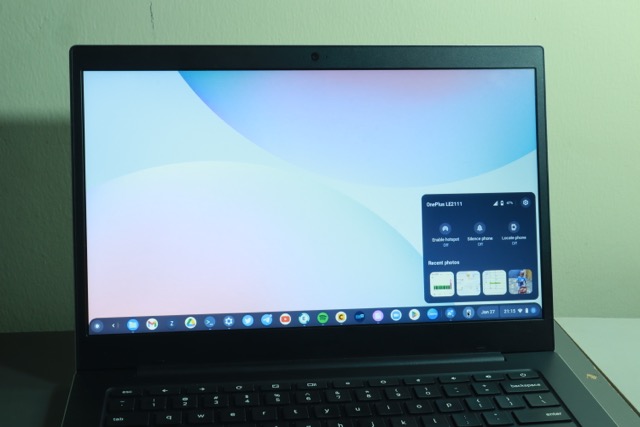
You can also view your smartphone App notifications right on your Chromebook. This saves you from having to keep unlocking your smartphone to check on what’s going on while working on your laptop. Very cool.
Read more:
- How to Connect an Android Phone to a Chromebook Using Phone Hub
- How to view your Android phone’s recent photos and media on Chromebook
Unlock your Chromebook using your Android Phone
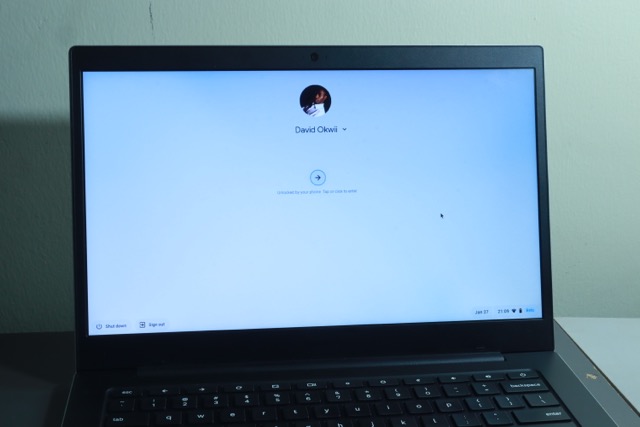
Related to the above, thanks to the tight integration between Chromebooks and Android Phones, you can forget to use passwords to log in to your Chromebook. Through Phone Hub, you can easily unlock your Chromebook using your Android Phone as long as it’s within close proximity and it is unlocked. You can also locate your phone, turn on the mobile hotspot and share your phone’s 4G LTE internet connection with your Chromebook. Chromebooks and Android phones just work well together in the same way that iPhones and Macs do.
Read more: How to Unlock your Chromebook without a password using your Android phone
Use Linux Apps on Chromebook
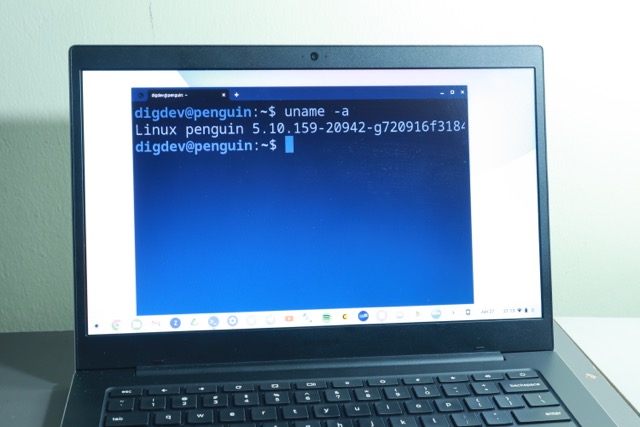
If you want to use desktop apps on your Chromebook, the best route is to install Linux and Linux-based applications. Linux support is not enabled by default, but you can turn it on by going to Settings > Advanced > Developers > Linux development environment and enabling it. This will install Linux as a Terminal application. You can then install and use Linux Apps such as Software development apps such as Visual Studio, VLC, LibreOffice, Audacity, Firefox, and more.
Read more:
Use Android Apps on Chromebook
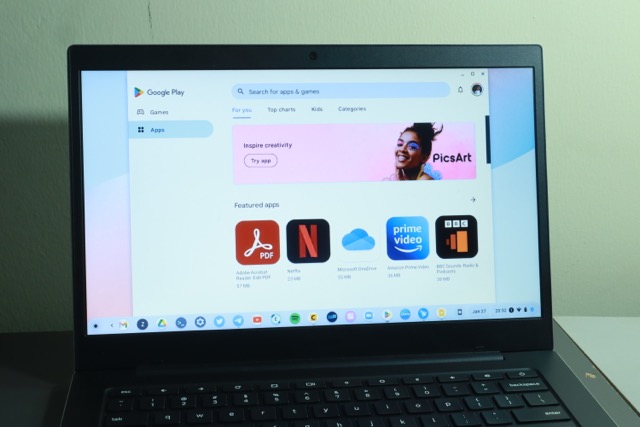
You can take full advantage of millions of Android apps from your Chromebook. Every Chromebook released after 2017 has access to the Google Play Store, which means you can download and use Android apps on your device. While most Android Apps are built for Smartphones that have smaller screens, some scale well with your big-screen Chromebook.
Great examples include Spotify, Canva, Photoshop Express, Google Keep, TikTok, and more. On top of Android Apps, you can use Progressive Web Apps or PWA apps which are web applications that work like native Apps. You can also download Apps from the Google Web store.
Related post:
Use Google Assistant
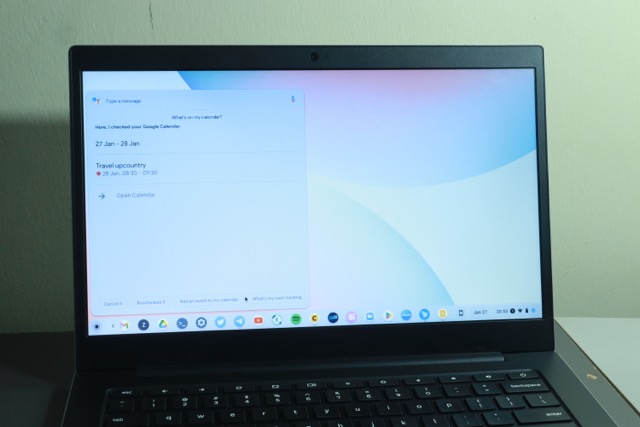
Google Assistant is built into Chrome OS, which means you can use it to set reminders, open Apps, make online searches, and even control smart home devices. Simply press the “Search” key on your keyboard and say “Hey Google” to activate it. I must admit, I don’t use Google Assistant on my Chromebook that much compared to say on my Android smartphone or Google Mini speaker. But if you have set up Assistant routines on your Smartphone, you can activate them right from your Chromebook.
Watch out video on top Chromebook tips and tricks below;
Check your Google calendar with a tap
The Chromebook Calendar found on the system tray is now integrated with your Google Calendar. When you tap on the Calendar by clicking on the date on the system tray, you can quickly glance over the upcoming events you added to your Google calendar. You don’t have to open the Google calendar on your browser.
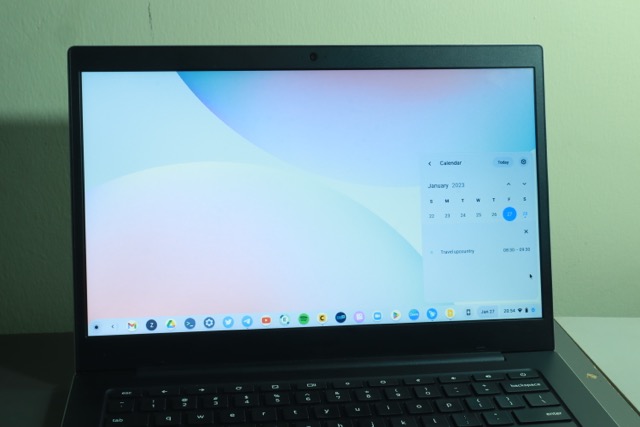
If you want to add a new event, simply click on any date on the calendar and select Open in Google Calendar. This will open the standard Google calendar web app where you can now add your events and invite guests and so forth.
Annotate images, add text, and edit PDFs
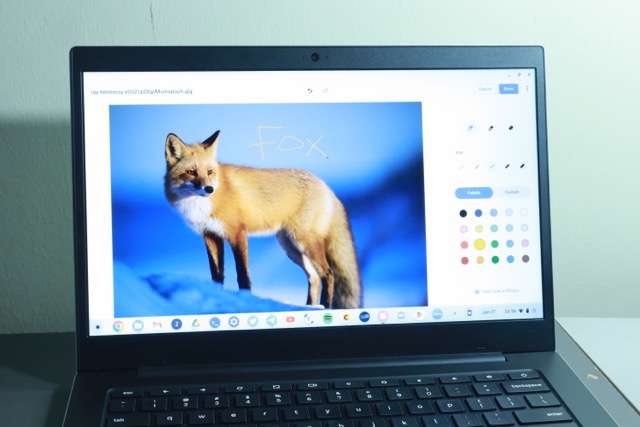
I must say, this is one of my favorite features on Chromebooks. It’s just shocking that most built-in photo viewing apps on other platforms don’t ship with basic image annotating features. Sometimes, you want to perhaps add an arrow or draw a shape, add text annotations around an area in a screenshot for instance to draw attention.
Chrome OS’ built-in image app or Gallery App enables this. Further, you can edit PDF documents, fill out forms, highlight text, and more. Now you can edit PDFs in Chromebook’s built-in Gallery app. Just open your PDF file, and you’ll have the option to fill out forms, highlight text, and add text annotations. And with free hand annotation, you can add your signature to a document, then easily share the PDF through the app.
Read more: How to Open and Edit Photos on a Chromebook
Turn on Dark mode
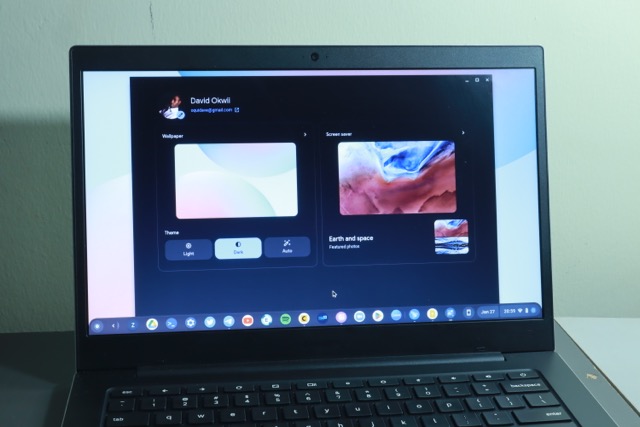
Yes, you can absolutely turn on Dark mode on Chromebooks. These laptops ship with both light and dark themes. You can always use the light theme during the dark and enable the dark theme at night.
But you don’t have to do this manually, you can set this to work automatically in the Chromebook settings so that Dark mode comes on at sunset and turns off at sunrise. Most built-in Apps such as the Files App, Gallery, System Settings, the Shelf, Gmail, Drive, and docs all support Dark mode. Pretty cool.
Delete files to the Trash bin
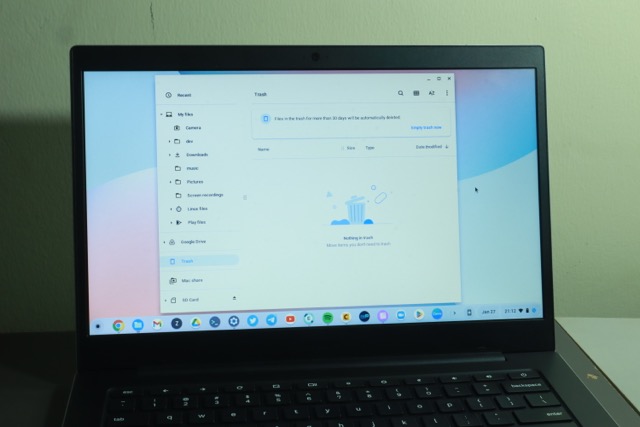
Okay, I have to admit Google was slightly slack at this. Who ships a File manager without a recycle bin? I know Google might use the excuse that your Files are primarily stored on the Cloud, but still, you have a recycle bin just in case you want to roll back when you accidentally delete a file. Until recently, if you deleted a file on Chromebook, it was gone permanently. Not anymore.
With the latest updates, when you delete an item in the “My files” section of the Files app, it will now go to the new Trash section, instead of being permanently removed from your Chromebook. So if you change your mind after deleting something, you have 30 days to recover it. Open the Files app, and find “Trash” on the left-hand side to review and recover items, or to proactively empty the Trash.
Take advantage of the Split screen feature
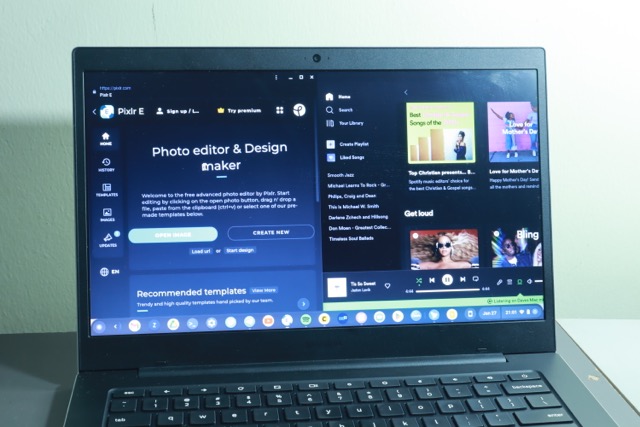
Split-screen mode allows you to view two apps side-by-side, which can be very helpful when you need to reference something while working on another task. To activate the split-screen mode, simply click and hold on the app’s menu bar which is right at the top of the app window, and then drag it to the left or right side of the screen. The app will snap halfway through the screen. That’s just one way to do it, I already wrote about three ways to split screen on Chromebooks here.
Read more: 3 Ways to show two Apps side-by-side a Chromebook
Organize your workspace with virtual desks
If you are a heavy multitasker like myself, you are properly already used to virtual workspaces on Windows or Mac. And sure enough, Chromebooks support this feature. You can organize your windows and apps on different virtual desks. For instance, you can have your serious work with all the docs and Spreadsheets on one virtual desk and then your Instagram, Twitter, YouTube, etc on the other.
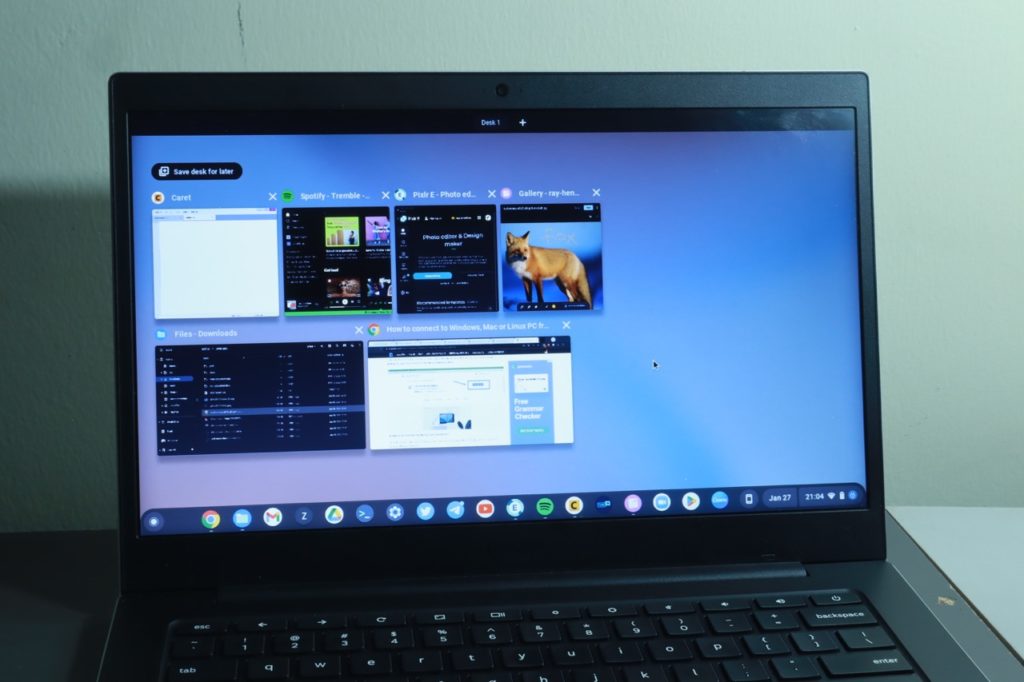
Read more: How to Work With Virtual Desks on Chromebook
Further, you can save or close an entire virtual desk when you are done with it. When you are ready to get back to it, you can open your saved desk with a tap. And when you’re actually done, you can permanently close all the windows in a desk at once. I think this is all cool, but this level of multitasking also calls for serious computing power which most Chromebooks are short of.
With my Samsung Galaxy Go, I can’t even dare use Virtual workspaces, but if your Chromebook has beefy specs such as the Acer Chromebook Spin 514 or Lenovo IdeaPad Flex 5 Chromebook, then you can give this feature a spin.
Use Google Drive and Cloud storage
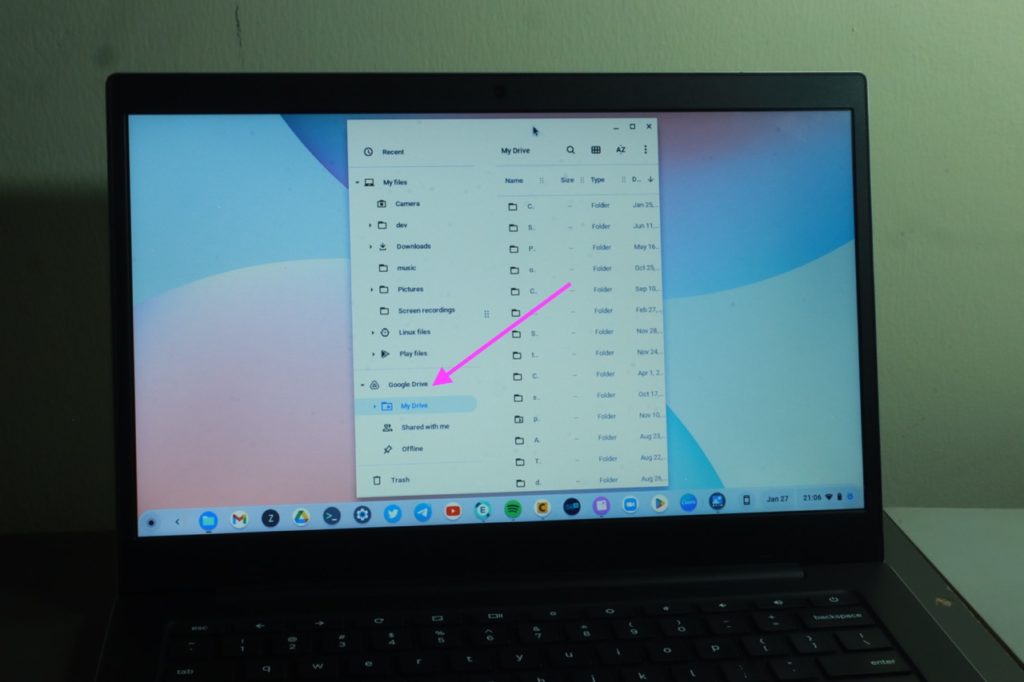
Another Google service built right into Chromebooks is Google Drive. Chromebooks come with built-in support for Google Drive which works like your Chromebook’s hard drive but in the cloud. This service allows you to store and access all of your documents and files in the cloud.
This allows you to easily access your work from any device, and collaborate with others in real time. This also means you can work on documents and projects even when you don’t have your Chromebook with you.
You can access Google Drive from the Files App.
But if you don’t fancy Google Drive, Chromebooks come with onboard local storage — typically 32 or 64 GB for most budget Chromebooks. You also have the option of expanding this storage through a microSD Card supported on almost every Chromebook.
Reset Chromebook using Powerwash
Chromebooks come with a handy way to factory reset them. Use the built-in Chrome OS Powerwash which is a feature that can help you reset your device to its factory settings. To use Powerwash, go to Settings > Advanced > Reset Settings > Powerwash.
Use Chrome Remote Desktop
You won’t tell me that I will replace TeamViewer or AnyDesk with any other remote desktop access software. But why not use the built-in Chrome Remote Desktop to access your Windows or Mac computer from your Chromebook? You can quickly and easily access all of your files and programs from anywhere. I won’t say I use it a lot, but if you are up for it, here’s a detailed article I did on how to use Chrome Remote desktop.
Read more:
- How to Factory reset(Powerwash) your Chromebook
- How to connect to Windows, Mac or Linux PC from Chromebook using Chrome Remote Desktop
Make use of the built-in file manager
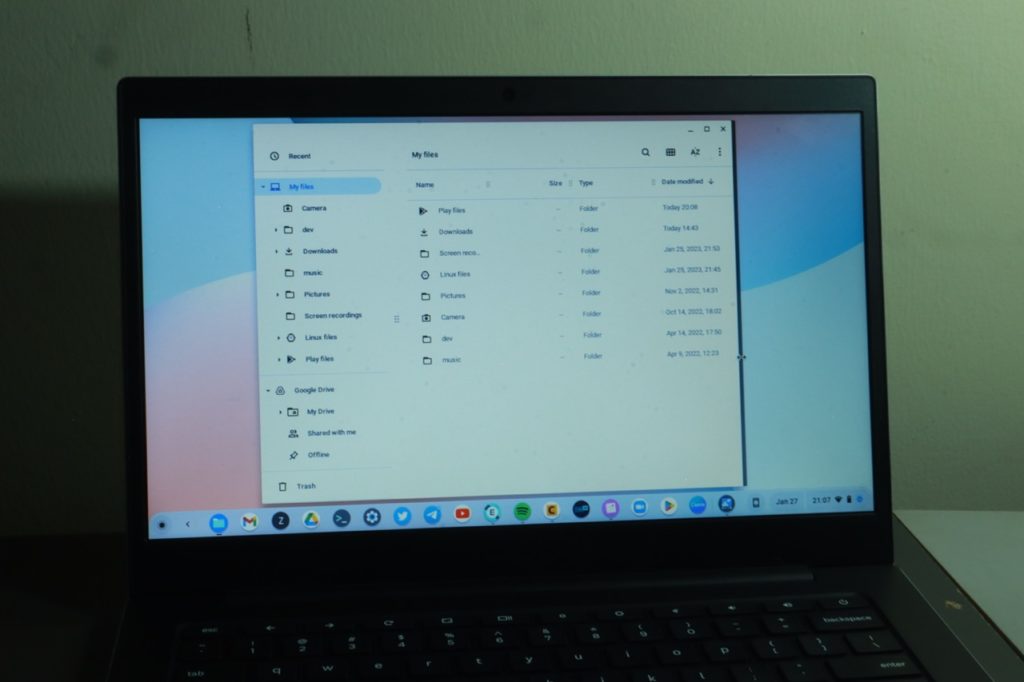
The Chrome OS File explorer or Files App is deceptively simple. It’s extremely minimalist, it’s easy to dismiss it as some underpowered File manager. But you’ll be mistaken. The Files have the most features you would expect your File manager to have. By default, it comes with just one folder; the download folder. But that doesn’t stop you from creating your own folders such as Documents, Pictures, Videos, etc to properly organize your files and folders.
The file manager on a Chromebook allows you to easily navigate and manage your files and folders. You also access Network files from your Network Attached Drive, Windows shared folder or Mac Network file share. You can zip and unzip files.
You can access it by clicking on the “Files” app in the app launcher.
Read more:
- How to Use the Files App on a Chromebook
- How to use Network File Share for Chrome OS to access NAS drive files and Network Shared folders on Chromebooks
Use the Tote to access recent files
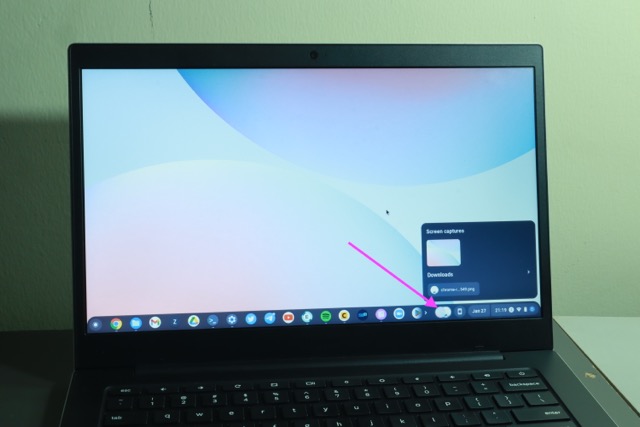
You can access your most recent files such as a screenshot you just took or a file you just downloaded from Tote. It’s found at the bottom-right of your Chromebook’s Shelf.
Use VPN with your Chromebook
Chromebooks have built-in support for VPN. You can connect to various VPN providers that support some of the most popular VPN protocols such as OpenVPN, IKeV2 or Wireguard. But the built-in VPN client is severely limited. I find that I can’t add some parameters required by service providers as the form fields for them are not specified by the client. So connecting to my provider’s VPN this way almost always never works.
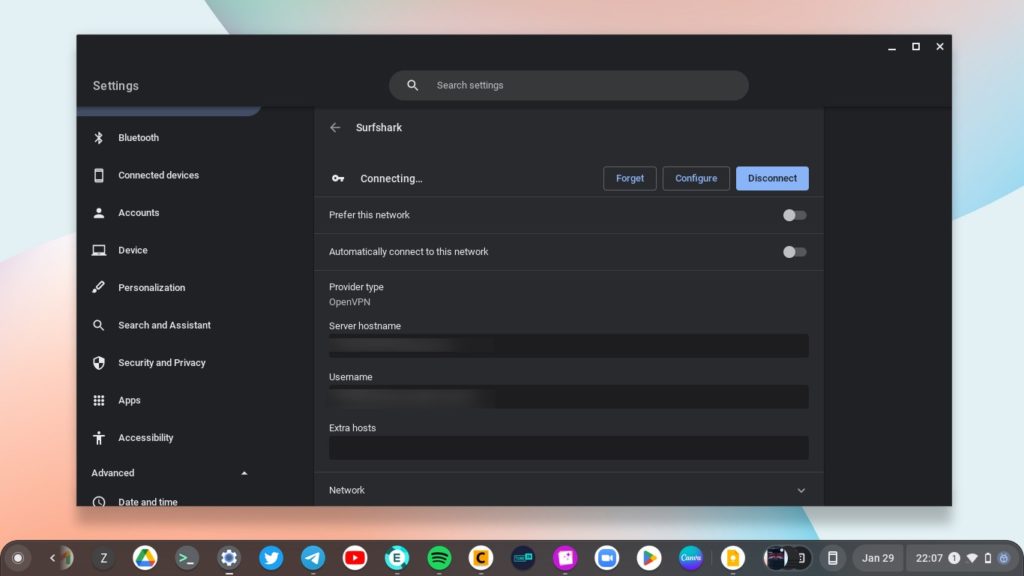
So the easiest way to connect your Chromebook to VPN network is to simply download the Android app of your VPN provider from the Google Play store. Login to your account and then connect. ChromeOS is going to automatically create a VPN connection to your service provider in similar manner to how you connect your smartphone to a VPN.
Restart your Chromebook
Believe it or not, Chromebooks don’t have a restart option anywhere in the user interface. Instead, you’ll see “shutdown” which is the only way to restart your Chromebook. Once your Chromebook shuts down, then you can manually start it by pressing the power button on the keyboard.
The Shutdown option can be found in the quick setting tray accessible at the bottom right corner of the system. Simply click on the time to reveal it and then click on the power icon to shutdown.
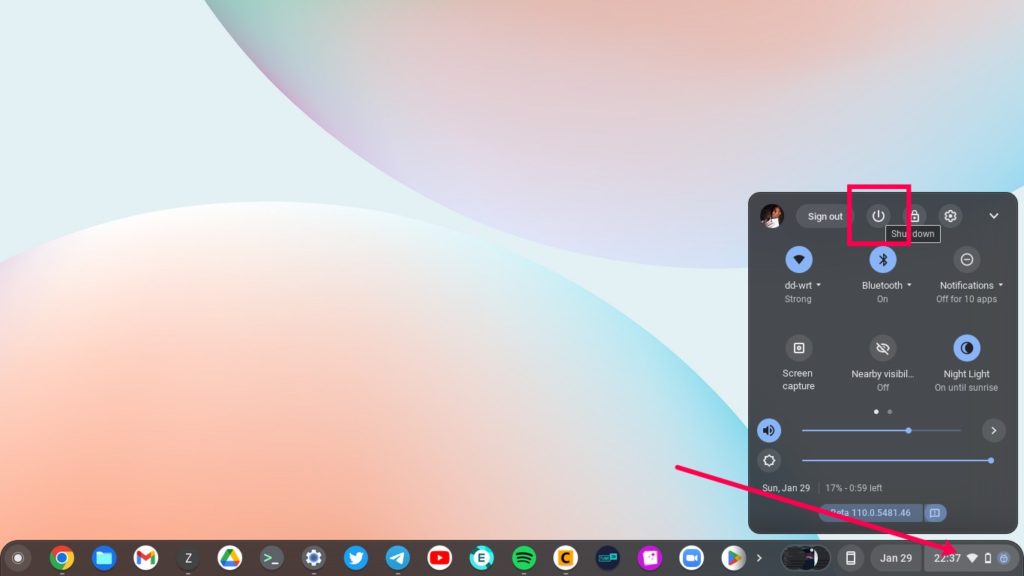
Alternatively, you can shutdown your chromebook by pressing the power button. Pressing it for 2 seconds will reveal a menu bar with other options including shutdown, logout, lock and feedback. You can then select shutdown. But long pressing it for longer, say 3 seconds will immediately shutdown your Chromebook. That works if your Chromebook is operating normally. But if it has hangup or frozen, then you will have to shutdown your Chromebook by performing a hard reset. This is done through the keyboard shortcut combination refresh key + power button. Keep in mind that you’ll lose all unsaved data when performing a hard reset.
Bring up the task manager
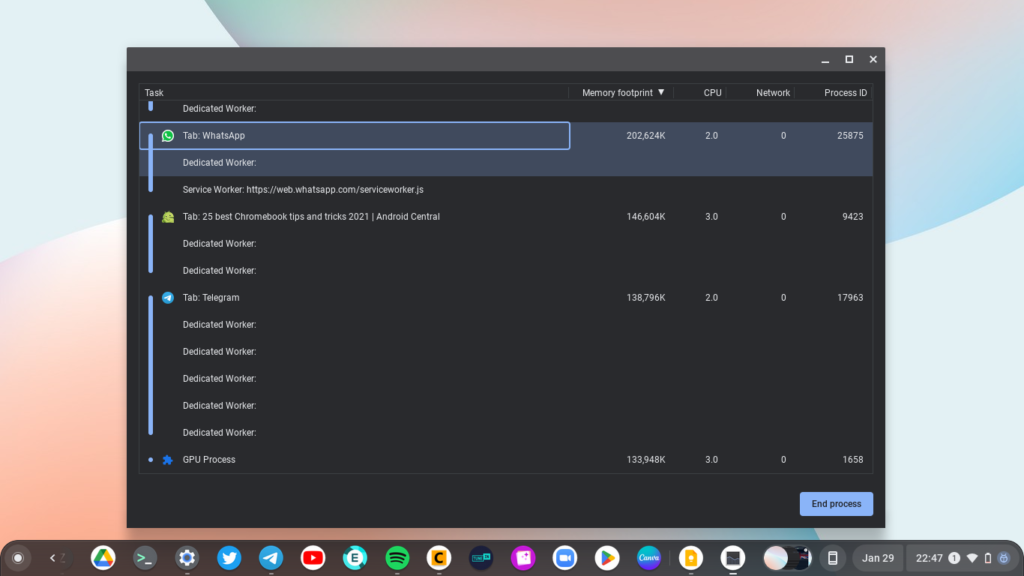
If your Chromebook is running slowly, then you probably want to take a look at all processes running on your laptop through the task manager. You can then close or end a specific Application, or window or tab you suspect is eating up system resources. To bring up the task manager or task bar, use the Shortcut combination Search key + Esc. Select a specific process and then click on End process.
View hardware specs
Want to know how much memory your Chromebook has? Do you know what process is running on your Chromebook? What about storage and network information? Well, if this is something you are interested in, the easiest way to tell is to use the Diagnostics app. It’s built into ChromeOS, and you can start it by simply searching for it from the launcher. This tool also shows you resource utilization of your Chromebook in real time.
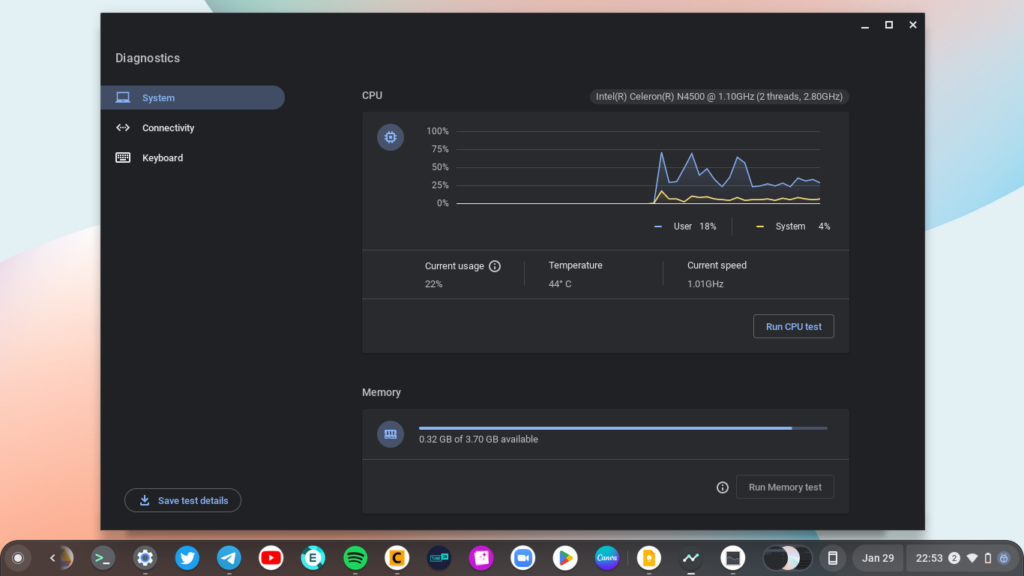
But if you are looking for a more detailed and quite frankly more verbose output of your Chromebook’s hardware specs, then Open Chrome and enter chrome://system in the URL bar to open a page with a full list of system specs.
Cast Chromebook to TV
If you are looking to view your Chromebook’s display on a bigger screen, you can take advantage of the Cast feature. This is built-in to the Chrome browser, which is the default and only browser on ChromeOS. With Cast, you can watch videos and view images from supported applications or websites such as Youtube or Netflix on your TV.
Read more: How to Screen mirror Chromebook to your smart TV
To access Cast, open Chrome browser, click on the Settings icon, then click on Cast. If your Chromebook is on the same WiFi network as your Smart TV, you should see your TV as one of the options to cast to. Then you can click on the cast icon usually displayed as one of the menu items on the media player of a compatible website or Application.
Turn on CAPS LOCK
So Chromebook keyboard doesn’t have a CAPS LOCK unlike what you’re probably used to with Windows and Mac keyboards. To enable CAPS LOCK, simply press ALT + Search key and to disable it, do exactly the same.
But if you are looking for a more detailed and quite frankly more verbose output of your Chromebook’s hardware specs, then Open Chrome and enter chrome://system in the URL bar to open a page with a full list of system specs.
Cast Chromebook to TV
If you are looking to view your Chromebook’s display on a bigger screen, you can take advantage of the Cast feature. This is built-in to the Chrome browser, which is the default and only browser on ChromeOS. With Cast, you can watch videos and view images from supported applications or websites such as Youtube or Netflix on your TV.
Read more: How to Screen mirror Chromebook to your smart TV
To access Cast, open Chrome browser, click on the Settings icon, then click on Cast. If your Chromebook is on the same WiFi network as your Smart TV, you should see your TV as one of the options to cast to. Then you can click on the cast icon usually displayed as one of the menu items on the media player of a compatible website or Application.
Turn on CAPS LOCK
So Chromebook keyboard doesn’t have a CAPS LOCK unlike what you’re probably used to with Windows and Mac keyboards. To enable CAPS LOCK, simply press ALT + Search key, and to disable it, do exactly the same.
Use Chromebook offline
Chromebooks are primarily cloud machines. They need constant internet to work just like your smartphone. However, like windows PC, you can also work offline, especially with Google’s productivity tools such as Docs, Slides, and sheets. To Work offline with Docs for instance, make sure you are online first, then go to Menu > Settings and toggle Offline. Now you can create, open and edit your recent Google Docs files on your device while you’re offline.


